Chicken Enchilada Green Sauce Recipe

This post contains affiliate links. As an Amazon Associate I earn from qualifying purchases.
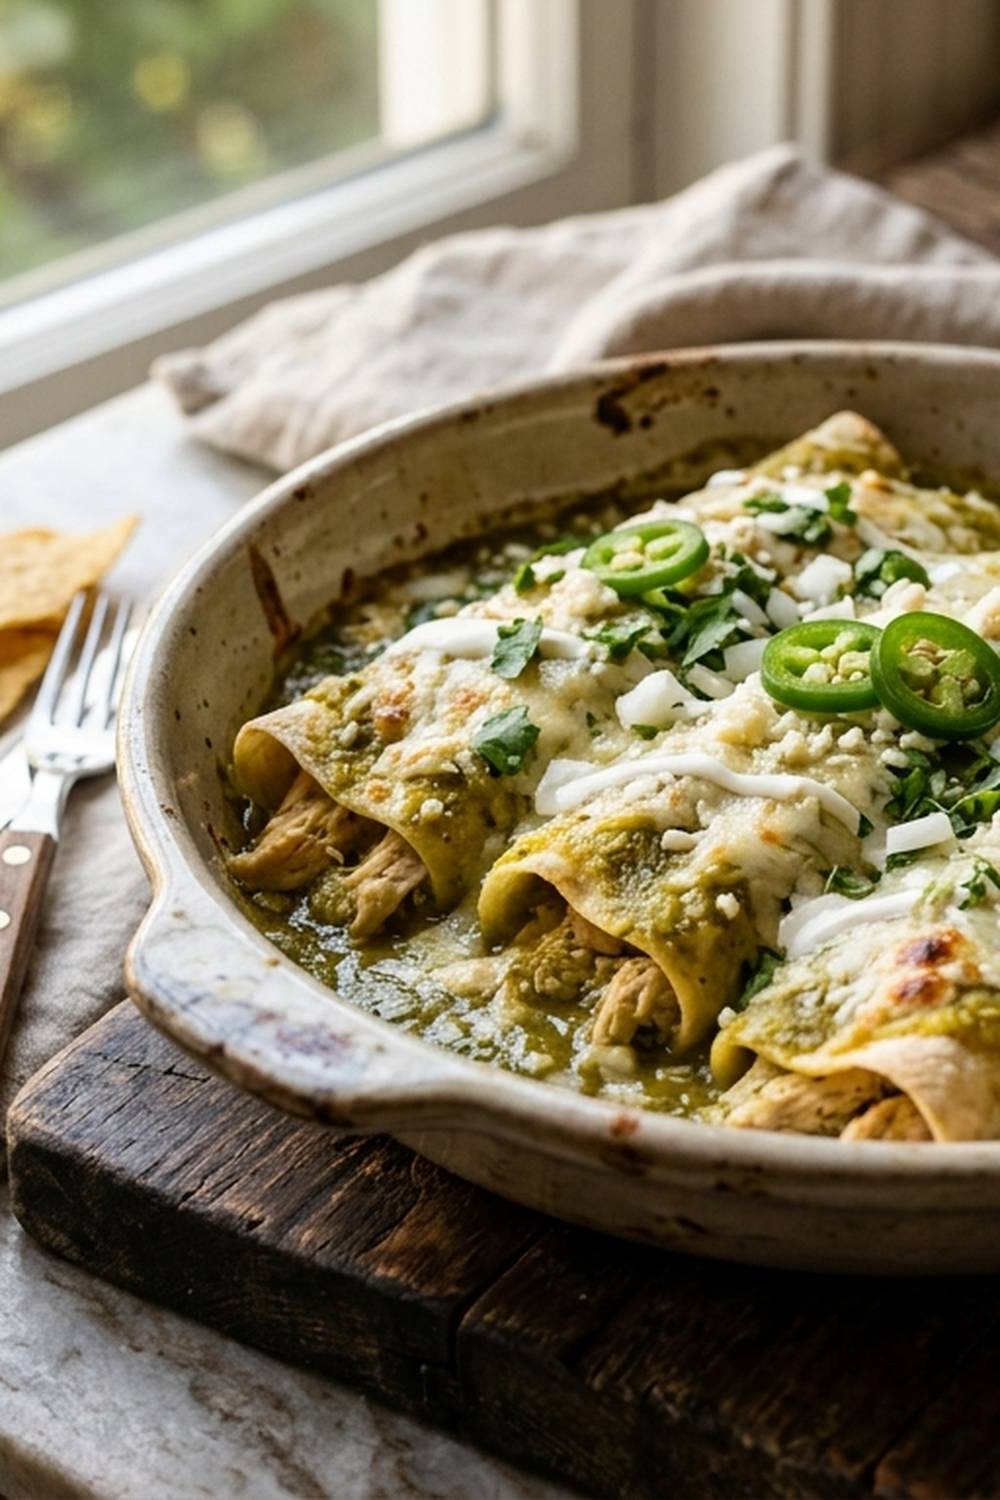
Five ingredients. That’s all it takes to create an unforgettable chicken enchilada verde that will have your guests asking for the recipe. No complicated preparations, no exotic pantry items, no stress—just pure, delicious comfort in every bite. I’ve spent the last decade simplifying holiday gatherings for busy home cooks, and this recipe represents everything I believe about festive entertaining: accessibility, flavor, and the kind of food that brings people together without keeping you trapped in the kitchen.
Chicken Enchilada Verde That Proves Simple Is Best
I discovered the power of constraint cooking about eight years ago, right here in Colorado, while hosting a last-minute gathering for my neighborhood community group. My original plan? An elaborate three-course meal. My reality? A kitchen fire in my neighbor’s condo forced us to relocate to my place with exactly four hours notice.
Standing in my kitchen, I realized I had everything I needed for something beautiful: shredded chicken, tortillas, green enchilada sauce, cheese, and sour cream. Nothing fancy. Nothing complicated. What emerged was this verde masterpiece—a dish so stunning and satisfying that my guests still talk about that “accidental” dinner party. That night, I learned that the most memorable meals aren’t measured by ingredient count. They’re measured by the joy they create.
Since then, this recipe has become my go-to for potlucks, family dinners, and those moments when entertaining feels overwhelming. It’s the dish I recommend to everyone from busy professionals to new parents discovering how to feed their growing families with intention and ease.
Why 5 Ingredients Is Actually an Advantage
- Mastery happens faster – with fewer variables, you can truly understand how heat, timing, and technique work together. By your third time making this, you’ll know exactly how to adjust it for your oven, your preferences, your family’s tastes.
- Shopping and prep time collapse dramatically – you’ll spend fifteen minutes gathering ingredients instead of an hour hunting through specialty sections. Less waste means money stays in your budget where it belongs, especially important during the holiday season when every dollar counts.
- Each ingredient becomes the star – without a crowded cast of characters, every component shines. Your green sauce isn’t competing with seven other flavors. The chicken stays tender and prominent. The cheese melts into every crevice.
Choosing Your 5 Ingredients Wisely
I didn’t arbitrarily pick five ingredients and call it a day. As a registered dietitian, I approached this with intention: maximum nutrition, maximum flavor, maximum accessibility.
Green enchilada sauce forms the backbone—it’s concentrated flavor without effort. Your shredded chicken (I recommend rotisserie for time-saving) provides lean protein and substance. Monterey Jack cheese creates that essential creamy richness while melting beautifully. Sour cream adds tang and helps bind everything into a cohesive filling. Finally, fresh green chiles bring authentic southwestern heat and brightness that bottled salsa simply cannot replicate.
Could I add cumin? Absolutely. Cilantro? Definitely. But these five create a complete, balanced dish that tastes far more sophisticated than its simplicity suggests. That’s the real magic—knowing what’s truly essential and having the confidence to stop there.
The 5 Ingredients
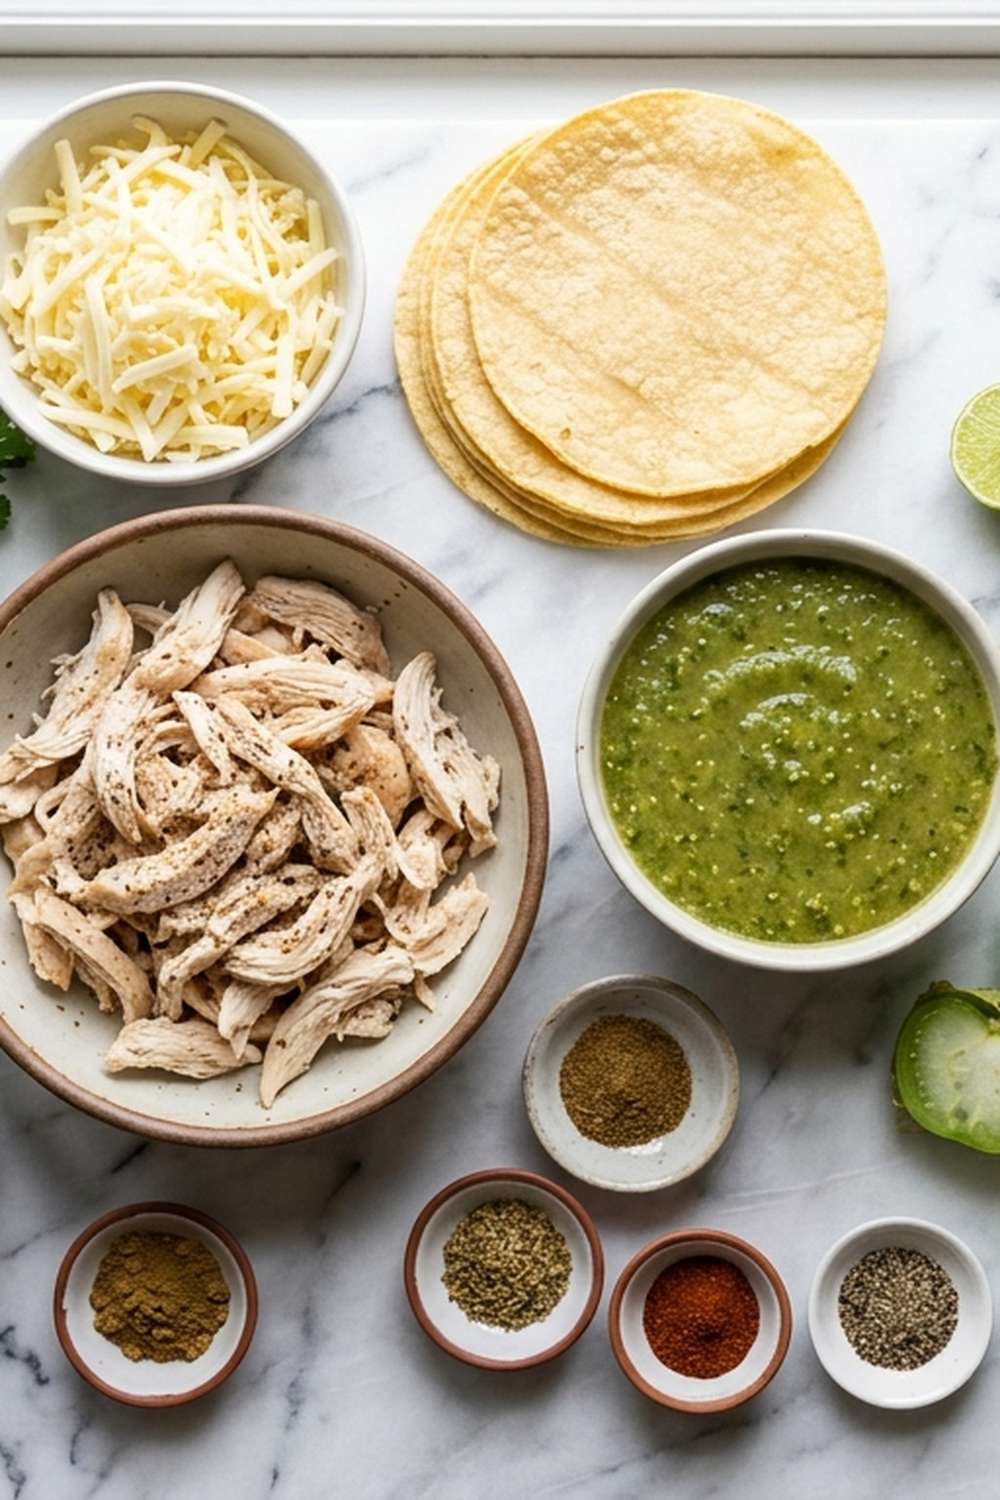
These five ingredients work together like a well-orchestrated ensemble, each playing a crucial role in creating something greater than the sum of its parts. There’s no filler here—everything earns its place on your grocery list and in your dish.
- 1 can (15 ounces) green enchilada sauce (concentrated, ready to use, and the flavor foundation of this entire dish—don’t skip quality here, as this isn’t a place for budget cuts)
- 3 cups shredded cooked chicken (rotisserie chicken saves tremendous time and keeps moisture intact—one whole bird costs about $8-10 and eliminates 45 minutes of cooking and shredding)
- ¾ cup sour cream (full-fat creates better texture and richness than light versions—this ingredient makes the filling creamy and helps bind everything together)
- 1 can (4 ounces) diced roasted green chiles (fresh or canned both work; these provide authentic southwestern flavor that makes people ask “what is that amazing taste?”)
- 1½ cups shredded Monterey Jack cheese (divided between filling and topping for even flavor distribution—sharp aged varieties add complexity but mild works beautifully too)
How to Make Chicken Enchilada Verde With Just 5 Ingredients
The elegance of simplicity becomes obvious once you start cooking. Without a dozen ingredients demanding attention, you can focus on technique, timing, and the little moments that transform a good dish into one people remember. This isn’t a race—it’s about understanding how heat and time work with your five components to create something special.
Step 1: Create Your Flavor Base
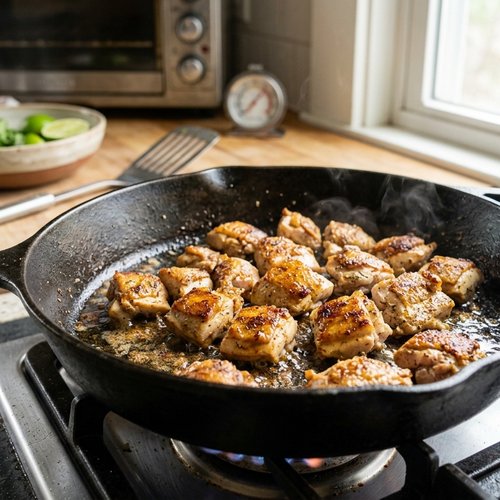
Begin by preheating your oven to 375°F. While it warms, you’re going to build the foundation of your filling. Grab a large skillet and place it over medium heat with just a touch of olive oil—about one tablespoon. Don’t skip this step, as it prevents sticking and helps everything brown slightly, adding depth.
Dice one medium onion and add it to your warm skillet. Let it sit for about three to four minutes, stirring occasionally. You’re looking for that moment when the onion becomes translucent and slightly caramelized at the edges—this is when the natural sugars unlock and flavor deepens. This small step completely transforms the final dish.
Step 2: Introduce the Aromatic Magic
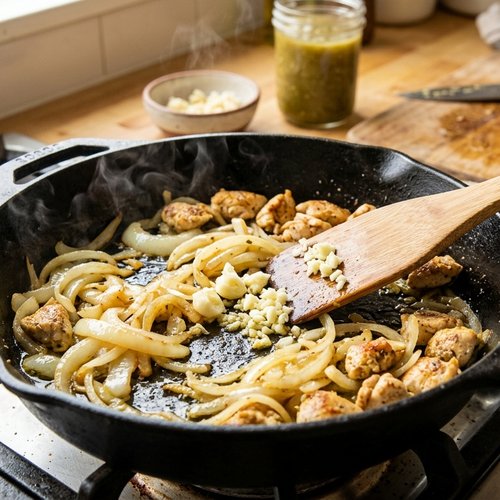
Once your onion reaches that beautiful translucent stage, add two minced garlic cloves. Here’s where timing matters: cook the garlic for exactly 30 to 45 seconds. Any longer and you risk bitterness. Any shorter and it remains raw. You’ll know it’s perfect when the aroma fills your kitchen—that’s your signal to turn off the heat immediately.
This brief moment of garlic-cooking is essential in professional cooking. It mellows the harsh raw garlic flavor while infusing the oil with aromatic compounds that will permeate your entire dish. It’s a small technique that yields outsized results.
Step 3: Build Your Filling Foundation
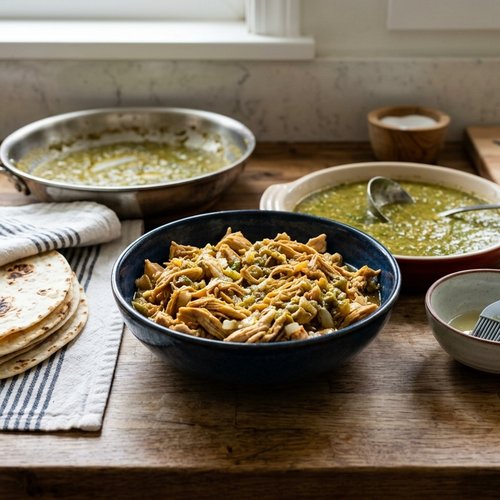
Now comes the beautiful part—assembly. With the heat off, pour one-quarter cup of your green enchilada sauce directly into the warm skillet. Add the entire can of diced roasted green chiles, the three cups of shredded chicken, and one-half cup of your Monterey Jack cheese.
Finally, add the three-quarter cup of sour cream. Stir everything together gently but thoroughly, making sure every bit of chicken gets coated in the creamy sauce. You’re creating a filling that’s cohesive, moist, and flavorful. Don’t overmix—you want pieces of chile visible and distinct, not pulverized.
Step 4: Set Up Your Assembly Line
Here’s a professional tip from years of holiday hosting: organization prevents stress. Gather your prepared filling, your tortillas (flour or corn, whatever your family prefers), your baking dish, and the remaining enchilada sauce. Having everything within arm’s reach means you’ll work quickly and confidently, without that frantic searching for supplies mid-assembly.
Spread a thin layer of green enchilada sauce across the bottom of your baking dish—just enough to coat it lightly. This prevents sticking and creates a flavorful base layer that will bubble up around your enchiladas during baking.
Step 5: Fill and Roll With Confidence
Take one tortilla and fill it with approximately one-third cup of your chicken mixture—that’s roughly a rounded ice cream scoop. Don’t overfill; a common mistake is packing too much filling into each tortilla, which causes them to burst during baking and creates a messy presentation.
Roll each tortilla gently but firmly, then place it seam-side down in your prepared baking dish. The seam-side down positioning helps everything stay together as it bakes. Continue with remaining tortillas until your filling is gone and your baking dish is filled with a neat row of enchiladas.
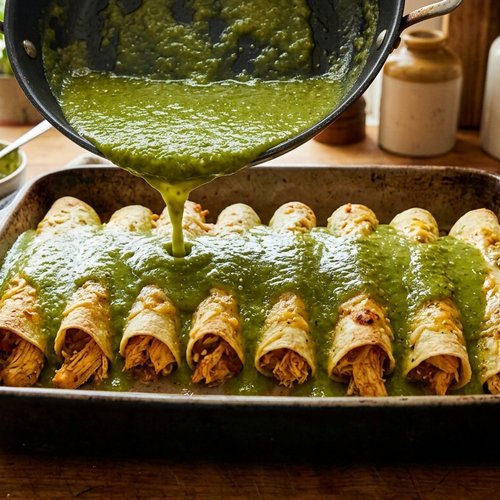
Step 6: Sauce and Top
Pour the remaining enchilada sauce evenly over the top of your enchiladas, making sure every roll gets coverage. This is what creates that gorgeous, saucy presentation when you serve. Top everything with your remaining one cup of Monterey Jack cheese, distributing it evenly so every enchilada gets melty, bubbly goodness.
Step 7: Bake to Perfection
Place your assembled baking dish in your preheated 375°F oven for approximately 20 minutes. You’ll know it’s done when the cheese is completely melted and the sauce is bubbling around the edges—you might see small bubbles breaking through the cheese surface, which is exactly what you want. This bubbling indicates the filling has heated through and the cheese has reached optimal meltiness.
If your cheese still looks pale or flat after 20 minutes, give it another 5 minutes. Oven temperatures vary significantly, especially at higher Colorado elevations where I test my recipes. Don’t go longer than 25-27 minutes total, as you want the filling hot but the tortillas still tender.
Step 8: Rest and Garnish
Remove from the oven and let your enchiladas rest for five minutes before serving. This resting period allows the cheese to set slightly, making serving cleaner and more elegant. If you want to add a fresh flourish, sprinkle with chopped cilantro just before serving—it adds color and a bright herbal note that feels restaurant-quality.
The Optional 6th Ingredient (If You Want to Elevate)
If you want to take this from wonderful to extraordinary without compromising the simplicity philosophy, add fresh cilantro. A quarter cup of chopped fresh cilantro stirred into your filling (save a tablespoon for garnish) adds brightness, herbal complexity, and an authentic southwestern essence that feels like a restaurant secret but takes zero additional effort.
Cilantro is optional because not everyone loves it—some people have a genetic variation that makes it taste soapy to them. But for those who adore it, this addition transforms the dish into something that tastes like it came from a professional kitchen. The cost? Less than a dollar. The flavor impact? Tremendous.
5-Ingredient Variations
- Red Enchilada Verde – swap the green enchilada sauce for red enchilada sauce and use a can of diced red bell peppers instead of green chiles. This creates a completely different flavor profile that feels fresh and new while using the exact same technique. My family requests this version during winter holidays because the deep red color feels more festive.
- Cheesy Verde With White Sauce Base – replace the sour cream and green enchilada sauce with cream of chicken soup mixed with one cup of chicken broth, keeping the green chiles and doubling the cheese. This creates a creamier, richer dish that appeals to cheese lovers and people who prefer milder flavors. It’s also what I recommend for guests unfamiliar with green chile.
- Lighter Lime Cilantro Version – swap sour cream for plain Greek yogurt (same amount) and add the zest and juice of one lime. This creates a brighter, slightly lighter version that still feels indulgent but contains more protein and less saturated fat—perfect for people watching their nutrition without sacrificing flavor.
Expert’s Nutritional Insight
As a registered dietitian, I want you to understand why this dish works nutritionally. The chicken provides lean protein—approximately 28 grams per serving—while the sour cream and cheese provide satisfying fat that helps your body absorb the fat-soluble vitamins in those green chiles. The green chiles bring capsaicin, a compound with anti-inflammatory properties, plus vitamin C and antioxidants.
According to USDA nutrition databases, one enchilada from this recipe provides approximately 320 calories, 24 grams protein, 18 grams fat, and 14 grams carbohydrates. The protein-to-calorie ratio makes this satisfying without being heavy—people feel full and nourished, not uncomfortably stuffed. This is the kind of comfort food that actually supports your body instead of fighting against it.
Make-Ahead Guide: Simplifying Your Hosting
This is where my decade of helping people host stress-free gatherings becomes invaluable. You have multiple options depending on when you want to prepare.
Two Days Ahead: Prepare your filling completely and store it in an airtight container in the refrigerator. Assemble your baking dish (fill and roll the enchiladas, add sauce and cheese), cover tightly with plastic wrap, and refrigerate. When you’re ready to bake, simply remove from the refrigerator 15 minutes before oven time and bake as directed—you might add 5-7 extra minutes since it’s starting cold.
The Morning Of: Shred your chicken and prep your onion and garlic. Store each in separate containers. Complete the filling about 4 hours before baking. Assemble your baking dish 2 hours before oven time. This gives you flexibility while keeping evening stress minimal.
Day-Of, One Hour Before: Complete the entire recipe through assembly. Bake when guests arrive. The smell that fills your home is incredible marketing—everyone knows something delicious is happening.
Pro tip from my holiday entertaining experience: assemble everything in a disposable aluminum baking dish if you’re bringing this to a potluck or gathering. People love the convenience of taking it straight from oven to table without dirtying permanent dishes, and you’ll get your dish back clean instead of scraped and caked.
Common Mistakes to Avoid
Overfilling Tortillas: The most common error I see is cramming too much filling into each tortilla. Stick to one-third cup—about a rounded ice cream scoop. Overstuffed enchiladas split during baking, creating a messy presentation and uneven cooking.
Using Cold Filling: If you made your filling ahead and it’s cold from the refrigerator, it takes longer to heat through properly. Bring it to room temperature for 20 minutes before assembling, or add 5-7 minutes to your baking time to ensure the center reaches safe temperature.
Skipping the Bottom Sauce Layer: This seems like a small thing, but that thin layer of sauce on the bottom of your baking dish prevents sticking and adds flavor to the underside of each enchilada. Don’t skip this step—it transforms the final dish.
Not Letting It Rest: I know you’re eager to serve when enchiladas come out bubbling from the oven, but five minutes of resting allows the cheese to set slightly. This prevents everything from sliding around on the plate and creates a more elegant presentation—which matters when you’re entertaining.
Seasonal Variations Throughout the Year
Spring and Summer: Use fresh corn tortillas and add fresh cilantro to your filling. The fresh corn flavor pairs beautifully with green chiles, and cilantro brings brightness that feels seasonal. Serve alongside a simple avocado tomatillo salsa recipe for color and freshness.
Fall: Add one teaspoon of smoked paprika to your filling for warmth and smokiness that feels seasonally appropriate. Use flour tortillas for a heartier feel. Serve alongside asparagus corn recipes for a complete harvest-inspired meal.
Winter and Holiday Season: This is when I make this dish most often. Stick with the classic green chile version and add one quarter teaspoon of cumin to your filling for warmth. Serve family-style for a communal, festive feel. Consider making two baking dishes—one for your family table and one to deliver to a neighbor or someone who might need a home-cooked meal during the busy season.
Can I Store Chicken Enchilada Verde?
Refrigerator Storage: Keep leftovers in an airtight container for up to four days. The tortillas soften slightly as they sit, which some people prefer and others find less appealing—personal preference dictates whether you love day-two leftovers or prefer eating these fresh.
Freezer Storage: You can freeze baked enchiladas in a freezer-safe container for up to three months. To reheat, thaw in the refrigerator overnight, then warm in a 350°F oven covered with foil for 20-25 minutes until heated through. Don’t microwave if you can help it—oven reheating keeps the tortillas from becoming rubbery.
Uncooked, Assembled Enchiladas: The unbaked dish can be frozen for two months. Thaw overnight in the refrigerator before baking, and bake as directed, adding 5-10 minutes to cooking time. This is incredibly helpful if you want to prepare ahead for a gathering.
I’ve found that freezing baked enchiladas works better than freezing uncooked ones, as the cheese and tortillas maintain better texture after being baked first.
Nutrition Information
Based on USDA nutrition data, one enchilada from this recipe (serving 8 total) contains approximately 320 calories, 24 grams of protein, 18 grams of fat (including 8 grams saturated), 14 grams of carbohydrates, 2 grams of dietary fiber, and 680 mg of sodium. The protein-to-carb ratio makes this satisfying, and the fat content helps your body absorb fat-soluble vitamins like A and K from the green chiles.
The sodium comes primarily from the canned enchilada sauce and cheese—if you’re watching sodium intake, you can reduce salt without significantly impacting flavor. The dietary fiber from the green chiles and tortillas supports digestive health, even though the amount is modest.
One serving provides approximately 28% of your daily protein needs, making this an excellent choice for anyone building muscle or recovering from exercise. The complete amino acid profile from the chicken means your body can utilize this protein efficiently.
What to Serve With Chicken Enchilada Verde?
Remember my philosophy: simplicity is strength. You don’t need six side dishes to create a complete, memorable meal. One or two complementary components are plenty.
- Simple Mexican Rice – a basic pilaf-style rice cooked in chicken broth with a bit of tomato keeps the meal grounded without competing for attention. This feels complete without overdoing it.
- Fresh Green Salad with Lime Dressing – crisp greens with a simple lime vinaigrette balance the richness of cheese and sour cream. The acidity cleanses your palate between bites.
- Warm Flour Tortillas – sometimes people want an extra tortilla for soaking up sauce or creating simple bites. Warm them wrapped in a kitchen towel for comfort and ease.
- Refried Beans or Black Beans – one simple bean dish adds protein and fiber while reinforcing the southwestern theme without requiring much effort.
When you’re hosting, arroz con pollo best recipe makes a fantastic complementary main if you’re feeding a larger group and want variety, though these verde enchiladas truly stand alone beautifully.
Chicken Enchilada Green Sauce Recipe
Ingredients
Method
- Begin by preheating your oven to 375°F. While it warms, you're going to build the foundation of your filling. Grab a large skillet and place it over medium heat with just a touch of olive oil—about one tablespoon. Don't skip this step, as it prevents sticking and helps everything brown slightly, adding depth. Dice one medium onion and add it to your warm skillet. Let it sit for about three to four minutes, stirring occasionally. You're looking for that moment when the onion becomes translucent and slightly caramelized at the edges—this is when the natural sugars unlock and flavor deepens. This small step completely transforms the final dish.
- Once your onion reaches that beautiful translucent stage, add two minced garlic cloves. Here's where timing matters: cook the garlic for exactly 30 to 45 seconds. Any longer and you risk bitterness. Any shorter and it remains raw. You'll know it's perfect when the aroma fills your kitchen—that's your signal to turn off the heat immediately. This brief moment of garlic-cooking is essential in professional cooking. It mellows the harsh raw garlic flavor while infusing the oil with aromatic compounds that will permeate your entire dish. It's a small technique that yields outsized results.
- Now comes the beautiful part—assembly. With the heat off, pour one-quarter cup of your green enchilada sauce directly into the warm skillet. Add the entire can of diced roasted green chiles, the three cups of shredded chicken, and one-half cup of your Monterey Jack cheese. Finally, add the three-quarter cup of sour cream. Stir everything together gently but thoroughly, making sure every bit of chicken gets coated in the creamy sauce. You're creating a filling that's cohesive, moist, and flavorful. Don't overmix—you want pieces of chile visible and distinct, not pulverized.

- Here's a professional tip from years of holiday hosting: organization prevents stress. Gather your prepared filling, your tortillas (flour or corn, whatever your family prefers), your baking dish, and the remaining enchilada sauce. Having everything within arm's reach means you'll work quickly and confidently, without that frantic searching for supplies mid-assembly. Spread a thin layer of green enchilada sauce across the bottom of your baking dish—just enough to coat it lightly. This prevents sticking and creates a flavorful base layer that will bubble up around your enchiladas during baking.
- Take one tortilla and fill it with approximately one-third cup of your chicken mixture—that's roughly a rounded ice cream scoop. Don't overfill; a common mistake is packing too much filling into each tortilla, which causes them to burst during baking and creates a messy presentation. Roll each tortilla gently but firmly, then place it seam-side down in your prepared baking dish. The seam-side down positioning helps everything stay together as it bakes. Continue with remaining tortillas until your filling is gone and your baking dish is filled with a neat row of enchiladas.

- Pour the remaining enchilada sauce evenly over the top of your enchiladas, making sure every roll gets coverage. This is what creates that gorgeous, saucy presentation when you serve. Top everything with your remaining one cup of Monterey Jack cheese, distributing it evenly so every enchilada gets melty, bubbly goodness.
- Place your assembled baking dish in your preheated 375°F oven for approximately 20 minutes. You'll know it's done when the cheese is completely melted and the sauce is bubbling around the edges—you might see small bubbles breaking through the cheese surface, which is exactly what you want. This bubbling indicates the filling has heated through and the cheese has reached optimal meltiness. If your cheese still looks pale or flat after 20 minutes, give it another 5 minutes. Oven temperatures vary significantly, especially at higher Colorado elevations where I test my recipes. Don't go longer than 25-27 minutes total, as you want the filling hot but the tortillas still tender.

- Remove from the oven and let your enchiladas rest for five minutes before serving. This resting period allows the cheese to set slightly, making serving cleaner and more elegant. If you want to add a fresh flourish, sprinkle with chopped cilantro just before serving—it adds color and a bright herbal note that feels restaurant-quality.
FAQs
Can I Make This Dairy-Free?
Yes, and it will still be delicious. Replace the sour cream with dairy-free sour cream (Kite Hill makes an excellent version), use a dairy-free cheese blend like Violife, and you’re set. The green enchilada sauce is typically already dairy-free—just check your brand. The filling won’t be quite as creamy, but the flavor remains wonderful.
What if I Don’t Have Monterey Jack Cheese?
Monterey Jack melts beautifully and has a mild flavor that won’t compete with green chiles, but honestly, sharp cheddar, Oaxaca, or even mozzarella works. Avoid very hard cheeses like Parmesan as your primary cheese, as they don’t melt smoothly. Use what you have—the technique matters more than the specific cheese.
How Many People Does This Feed?
This recipe makes eight enchiladas, so it feeds four to six people as a main course depending on appetite and accompanying sides. For larger gatherings, I recommend making two baking dishes simultaneously—it requires minimal additional effort and ensures everyone gets warm, fresh enchiladas.
Can I Use Shredded Turkey Instead of Chicken?
Absolutely. Turkey provides similar nutrition and texture. Because turkey can sometimes be slightly drier, I recommend mixing your turkey shreds with an additional one-quarter cup of sour cream to maintain moistness. Everything else stays exactly the same.
What If I Want These Spicier?
Use hot green enchilada sauce instead of mild, and add fresh jalapeño slices to your filling. You can also sprinkle red pepper flakes over the top before baking. Green chiles themselves vary in heat level depending on the variety and brand—jalapeño-based sauces will be spicier than Anaheim chile-based ones.
More 5-Ingredient Recipes You’ll Love
- Arroz Con Pollo Best Recipe – another one-dish wonder that feeds families beautifully with minimal ingredients
- Bacon And Brie Recipe – an elegant appetizer that proves simplicity creates sophistication
- this simple cake – a dessert that brings seasonal warmth without unnecessary complexity
I can’t wait to share many more delicious and festive recipes with you! This chicken enchilada verde represents everything I believe about home cooking: that constraints create creativity, that simple can be extraordinary, and that the best meals are the ones made with intention and served with joy. Whether you’re hosting a neighborhood gathering like I did eight years ago, feeding your family on a busy Tuesday night, or bringing comfort food to someone who needs it, this dish delivers on all fronts. Make it tonight, make it next month, make it for every gathering where you want to feed people without feeding yourself stress. You’ve absolutely got this.