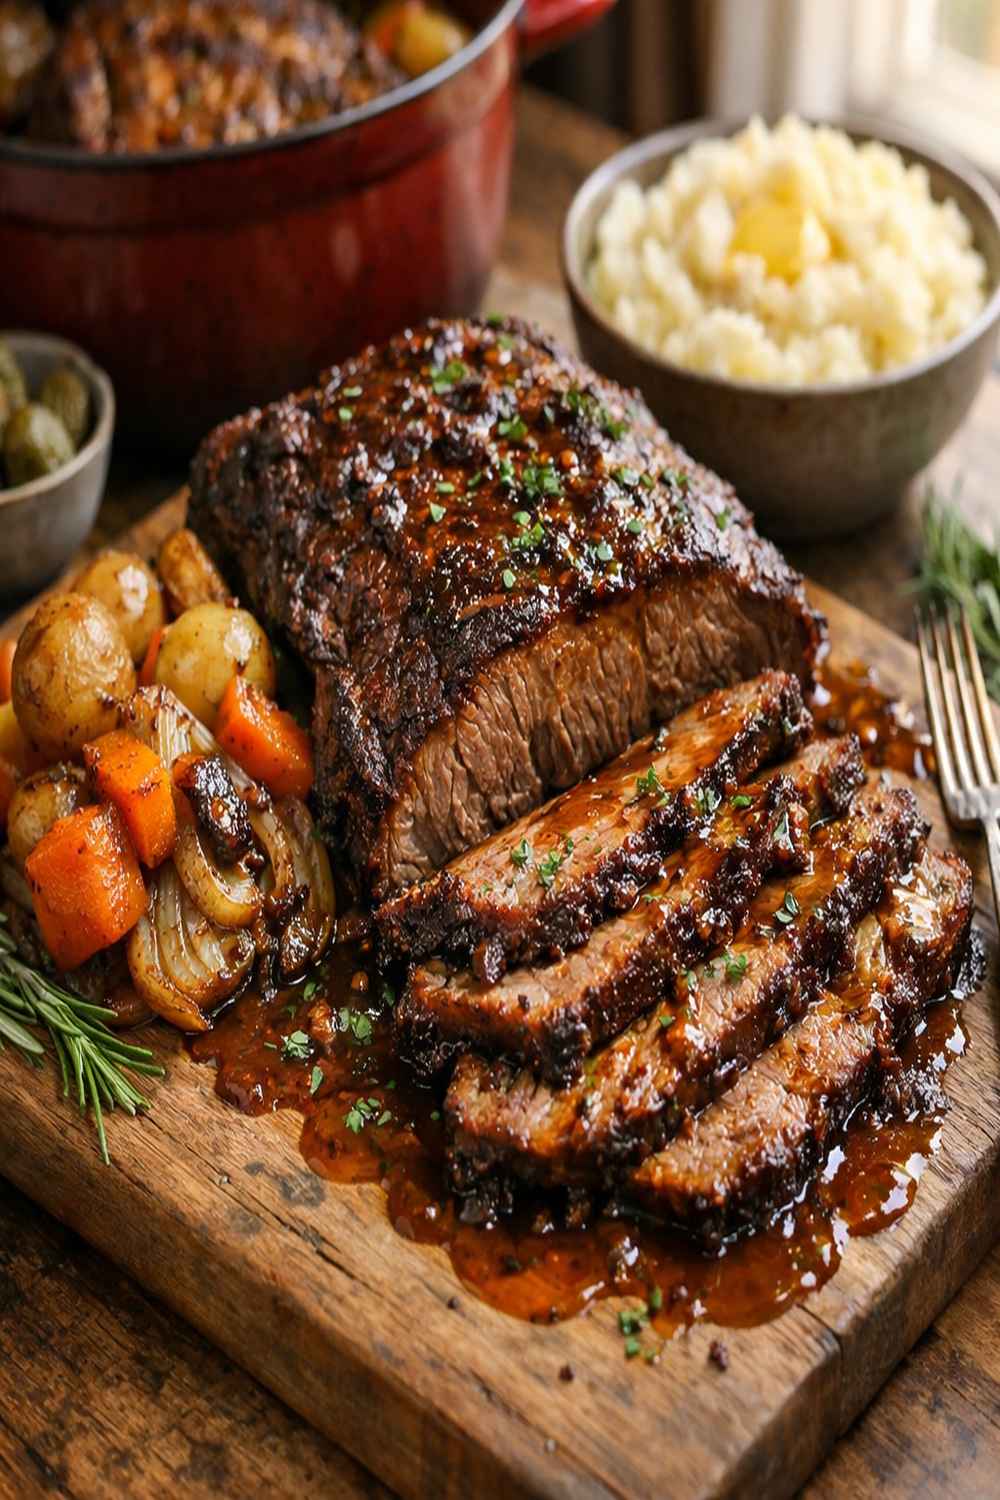
Beef Brisket Dutch Oven Recipe

This post contains affiliate links. As an Amazon Associate I earn from qualifying purchases.
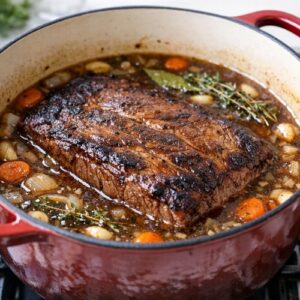
I’ll never forget the first time my grandmother pulled a mahogany-dark brisket from her old cast-iron Dutch oven during our Colorado mountain cabin gathering. The aroma had been building for hours—a intoxicating blend of caramelized meat, sweet spices, and savory depth that drew everyone to the kitchen before dinner was even announced. That moment taught me something profound about festive gatherings: the most meaningful celebrations aren’t about complicated techniques or fancy presentations. They’re about the patience, love, and tradition simmered into every bite. Today, I’m sharing that exact recipe with you, adapted through my decade of nutrition expertise to make it accessible, budget-friendly, and perfect for bringing your own loved ones around the table.
Authentic Beef Brisket Dutch Oven Recipe: The Story Behind the Slow Simmer
This recipe represents something deeply personal to me. Growing up in Colorado, I watched my family honor our cattle-ranching heritage through slow-cooked beef traditions that stretched back generations. The Dutch oven method isn’t just a cooking technique—it’s a philosophy about respecting the ingredient, trusting the process, and creating space for conversation while dinner develops.
When I became a registered dietitian, I realized that the traditional slow-cooking method my family used actually preserves nutrients better than high-heat cooking, breaks down connective tissue for easier digestion, and creates naturally rich flavors without relying on excessive salt or processed ingredients. This recipe bridges my heritage with my professional passion for nourishing, inclusive gatherings.
The History and Cultural Significance of Beef Brisket Dutch Oven Cooking
Brisket holds a special place in American barbecue and home cooking traditions, particularly in Texas, Colorado, and the Great Plains regions where cattle ranching shaped regional identity. The cut comes from the breast of the cow—a heavily-exercised muscle that requires low-and-slow cooking to transform tough connective tissue (collagen) into tender, gelatin-rich meat.
The Dutch oven method specifically emerged from European cooking traditions, brought to America by Dutch and German immigrants who valued the vessel’s ability to maintain consistent, moist heat. In Colorado’s mountain communities, where harsh winters made long, slow meals practical and necessary, the Dutch oven became indispensable for festive gatherings. Unlike outdoor barbecue (which requires warm weather and specialized equipment), a Dutch oven works year-round, making it perfect for indoor holiday celebrations.
This cooking method also carries economic and cultural significance. Brisket was historically an affordable cut—the “poor person’s meat”—that demonstrated resourcefulness and skill. Transforming an inexpensive ingredient into something extraordinary became a point of pride in working-class and ranch communities. Today, it remains accessible and budget-friendly, making it ideal for inclusive gatherings where budget matters.
What Makes an Authentic Beef Brisket Dutch Oven Recipe
Authentic brisket cooking is defined by specific techniques that honor the meat’s structure and create properly developed flavors. Unlike quick-cooking methods, authentic Dutch oven brisket respects time as an ingredient—typically requiring four to five hours of gentle, moist heat.
- The sear-first method – Browning the meat before braising creates a flavorful crust through the Maillard reaction (the chemical process that develops color and complex tastes). This step can’t be skipped or rushed; proper searing takes 5 minutes per side and requires medium-high heat.
- Low-temperature braising – Cooking at 300°F (rather than 350°F or higher) ensures the meat becomes tender without drying out. High heat speeds evaporation, which toughens meat. Low heat allows collagen to convert to gelatin slowly and evenly.
- Whole muscle cooking – Traditional preparation keeps the brisket intact throughout cooking, allowing fat layers to baste the meat naturally. Cutting before cooking releases juices and prevents proper caramelization.
- Proper resting – At least 15 minutes of rest after cooking allows muscle fibers to relax and reabsorb juices. Cutting into a still-hot brisket causes moisture loss, resulting in dry meat.
The Ingredients – Sourcing Quality Components for Your Gathering
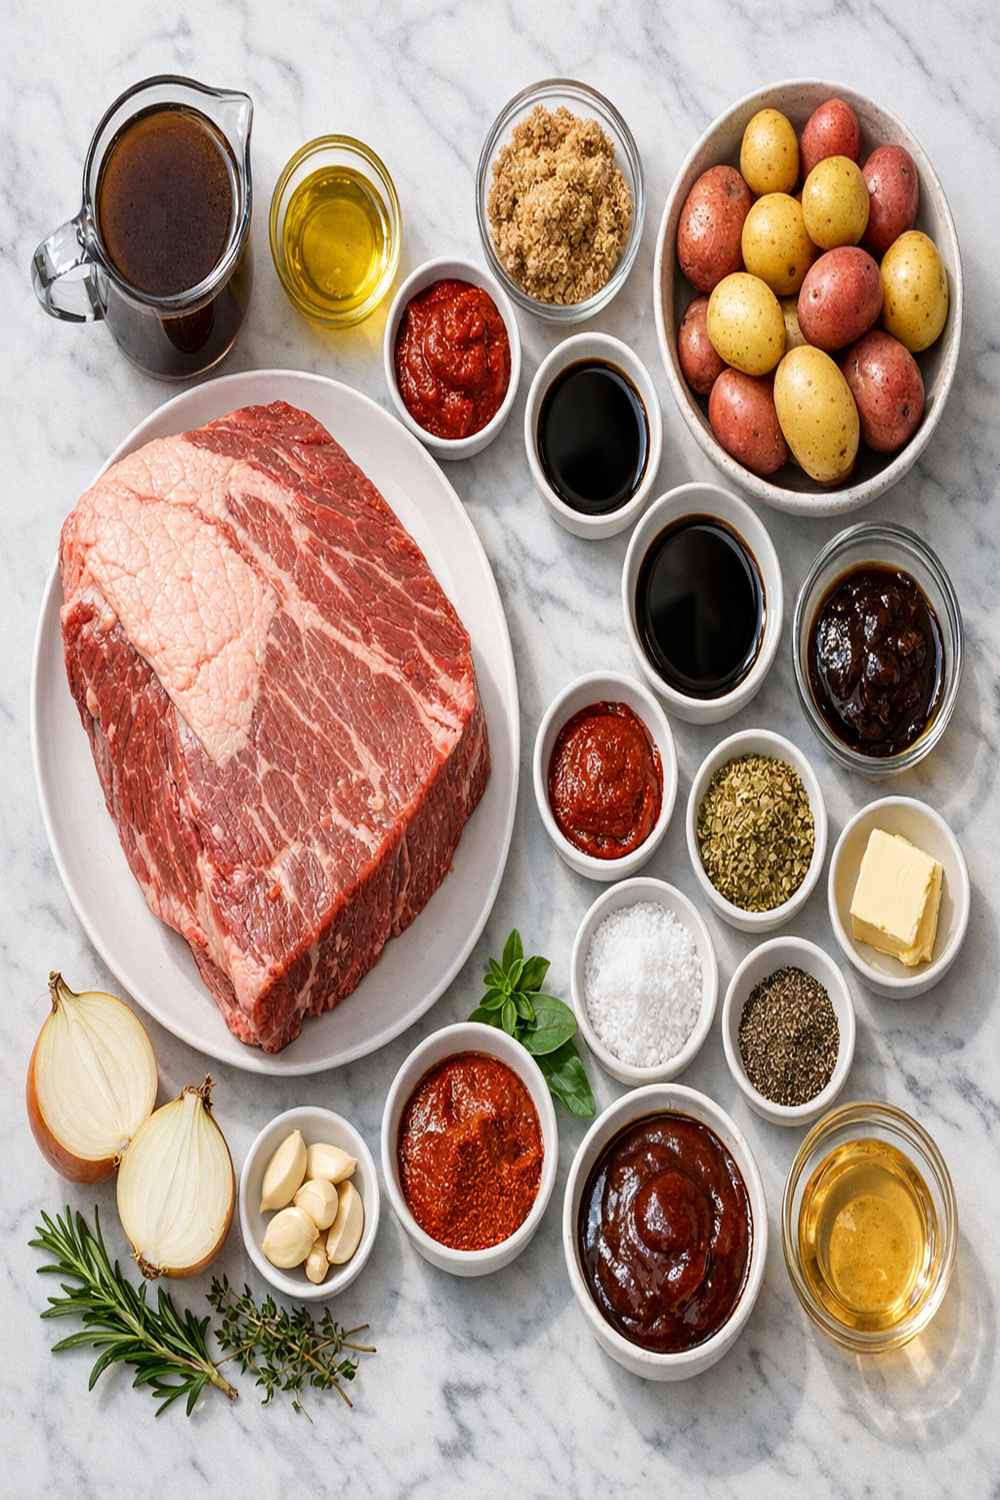
Creating an authentic beef brisket Dutch oven dish starts with understanding each ingredient’s role and where to source quality versions. I’ve learned through years of hosting Colorado gatherings that ingredient quality directly impacts flavor, and many specialty items are more accessible than people realize.
- 1 tablespoon Worcestershire sauce (adds umami depth and slight tang)
- 2 tablespoons fresh herbs like thyme or rosemary (optional but recommended for finishing flavor)
- ¾ cup beef broth, low-sodium (gives you control over salt content; homemade is best, but quality store-bought works)
- 1 tablespoon light brown sugar (adds subtle sweetness that complements savory elements without overpowering)
- 2 medium onions, sliced (yellow or sweet onions caramelize beautifully and add natural sweetness)
- ¾ cup barbecue sauce (choose a version with recognizable ingredients; or make your own for best results)
- 1 tablespoon soy sauce (contributes savory notes and salt; use low-sodium if concerned about sodium intake)
- 1 tablespoon sea salt (higher quality than table salt; helps distribute seasoning evenly)
- 2 tablespoons BBQ seasoning blend (use a balanced mix with paprika, garlic powder, onion powder, and black pepper; avoid blends with excessive salt)
- 2 tablespoons avocado oil (high smoke point makes it ideal for searing; coconut or refined olive oil work if budget is tight)
- 3 cloves garlic, minced (fresh garlic provides depth that jarred versions cannot match)
- 1 beef brisket, 3 to 5 pounds, untrimmed (ask your butcher for the flat-cut or point-cut; I prefer point-cut for more marbling and fat content that keeps meat moist)
- 1 tablespoon cornstarch (optional, for thickening the final sauce)
Make-Ahead Guide: Preparation Tips from a Festive Gathering Expert
As someone who’s hosted dozens of holiday gatherings, I’ve learned that proper prep transforms cooking day from stressful to joyful. This recipe is exceptionally make-ahead friendly, which is exactly why I love it for entertaining.
The day before: Combine the BBQ seasoning blend, brown sugar, and sea salt in a small bowl. Rub this mixture generously over the entire brisket surface, paying special attention to edges and any exposed grain. The dry rub begins breaking down meat proteins immediately through enzymatic action. Wrap the seasoned meat tightly in plastic wrap and refrigerate overnight. This resting period allows flavors to penetrate the meat and intensifies the final taste.
Morning of the gathering: Remove the brisket from the refrigerator about one hour before cooking. Bringing meat to room temperature ensures even cooking throughout (cold meat in a hot pan creates an uneven crust). While the meat reaches room temperature, prep your aromatics: slice onions and mince garlic, storing them separately in containers. Combine your braising liquid (broth, BBQ sauce, Worcestershire, and soy sauce) in a measuring cup and set aside.
The cooking timeline: Start your Dutch oven at least five hours before serving (4-4.5 hours cooking + 15 minutes rest + buffer time = about 5 hours needed). If serving dinner at 6 PM, begin cooking by 1 PM. The beauty of this recipe is that once it enters the oven, it requires zero attention, allowing you to set the table, prepare sides, and welcome guests without kitchen stress.
The Traditional Method: How to Make Authentic Beef Brisket Dutch Oven Recipe
This method honors the slow-cooking tradition that transforms a tough, economical cut into something remarkable. Each step builds on the previous one, creating layers of flavor that quick-cooking methods cannot achieve. I’m walking you through this exactly as my grandmother taught me, with professional insights about why each step matters.
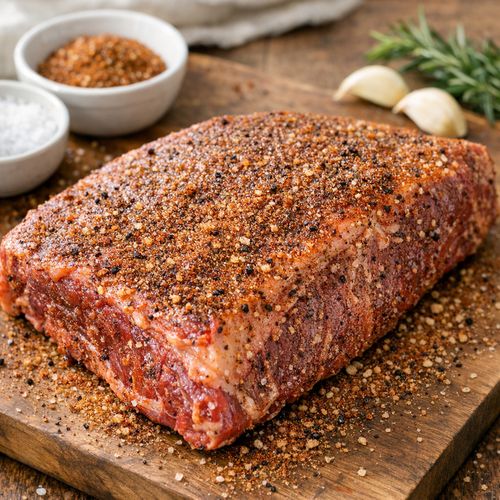
Step 1: Season and Rest Your Brisket
If you’ve prepared your brisket the night before, you’re already ahead. If doing this same day, combine 2 tablespoons of BBQ seasoning blend, 1 tablespoon of light brown sugar, and 1 tablespoon of sea salt in a small dish. Mix thoroughly so the sugar distributes evenly. Rub this mixture generously over all surfaces of your brisket, using enough pressure that the rub adheres to the meat’s surface. The seasoning should coat the entire exterior, creating a flavorful crust during searing. Let the seasoned meat stand at room temperature for at least one hour (or refrigerate overnight). This resting period is non-negotiable—it allows seasonings to penetrate and helps the meat cook evenly.
Step 2: Preheat Your Oven and Heat Your Dutch Oven
Adjust your oven rack to the lower-middle position (this ensures even heat circulation around your Dutch oven). Preheat your oven to 300°F. This temperature is essential—it’s low enough to prevent moisture loss but high enough to properly braise the meat. Allow at least 15 minutes for your oven to reach this temperature. While the oven preheats, place your Dutch oven (cast iron or enameled ceramic) on your stovetop over medium-high heat. Let it warm for 2-3 minutes. This preheating step ensures your sear will be effective.
Step 3: Sear the Brisket for Color and Flavor
Add 2 tablespoons of avocado oil to your heated Dutch oven. The oil should shimmer and move freely across the bottom—this indicates proper heat. Carefully place your seasoned brisket fat-side down into the hot oil. You should hear an immediate sizzle. Do not move the meat for 5 minutes. This uninterrupted contact creates a golden-brown crust through the Maillard reaction. After 5 minutes, carefully flip and sear the other side for another 5 minutes. The brisket should develop a rich mahogany crust on both sides. Remove the seared meat and set it aside on a clean plate.

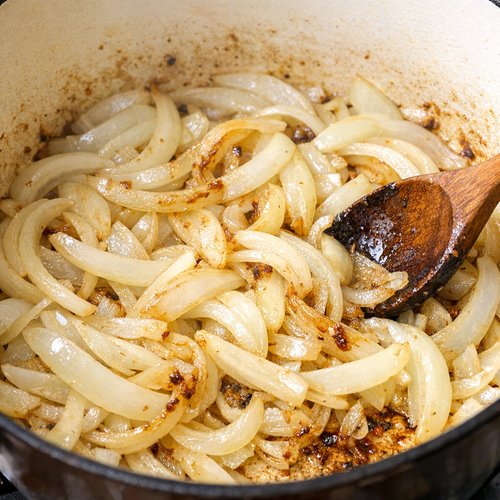
Step 4: Build Your Flavor Base with Aromatics
Without draining the oil, reduce heat to medium and add your 2 sliced medium onions to the same Dutch oven. The onions will stick initially—this is good. They’re absorbing the flavorful browned bits left from searing. Cook for 6 minutes, stirring occasionally, until onions soften and begin to turn golden. Add your 3 cloves of minced garlic and cook for exactly 1 more minute. Garlic burns quickly, so watch carefully. You want fragrant garlic, not bitter burnt garlic.
Step 5: Deglaze and Build Your Braising Liquid
Pour ¾ cup of beef broth into the Dutch oven. Use a wooden spoon to scrape the bottom, lifting up all the browned bits (called the fond) that contain concentrated flavor. These caramelized particles will dissolve into your braising liquid, enriching the entire dish. Continue scraping and stirring for 1-2 minutes until the bottom is clean.
Remove from heat. In a separate bowl or measuring cup, whisk together ¾ cup of BBQ sauce, 1 tablespoon of Worcestershire sauce, and 1 tablespoon of soy sauce. Pour this mixture into your Dutch oven and stir gently to combine.
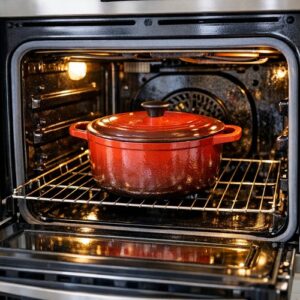
Step 6: Return the Brisket and Begin Braising
Place your seared brisket back into the Dutch oven, positioning it so it’s mostly submerged in the braising liquid (the top may show slightly, and that’s fine). Cover your Dutch oven with its lid and transfer to your preheated 300°F oven. This is the magic moment where time and moisture work together to transform tough meat into something tender.
Step 7: The Patient Wait—4 to 4.5 Hours of Braising
Set a timer for 4 hours. During this time, check the brisket once at the 2-hour mark to ensure it’s braising properly (the liquid should bubble gently around the edges when you peek). You shouldn’t need to flip or move the meat—the liquid surrounding it does the work. After 4 hours, the meat should be fork-tender. To test doneness, pierce the thickest part with a fork; the meat should offer almost no resistance and should yield easily to gentle pressure.

Step 8: Rest Your Brisket for Maximum Juiciness
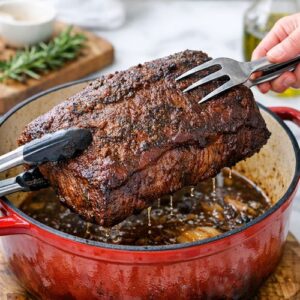
Carefully remove your Dutch oven from the oven (use oven mitts—the handles are extremely hot). Using tongs or two large forks, transfer the brisket to a cutting board or serving platter. Let the meat rest uncovered for at least 15 minutes. During this rest, muscle fibers relax and reabsorb juices that mobilized during cooking. This step makes the difference between tender-and-juicy meat and meat that’s tender but slightly dry.
Step 9: Create Your Finished Sauce (Optional Thickening)
While the brisket rests, you can leave your braising liquid as-is (it’s already delicious) or thicken it into a proper sauce. If thickening, whisk 1 tablespoon of cornstarch with 1 tablespoon of cold water until smooth, creating a slurry. Place your Dutch oven on the stovetop over medium heat. Once the liquid begins to simmer, slowly pour in your cornstarch mixture while whisking constantly. Continue stirring for about 5 minutes until the sauce thickens to your desired consistency. The sauce should coat the back of a spoon lightly.
Step 10: Slice and Serve with Respect for the Grain
This is the final, crucial step. Look at your rested brisket and identify the direction of the meat’s grain (you’ll see lines running through it). Always slice against the grain—perpendicular to these lines. Slicing against the grain shortens muscle fibers, making each bite more tender. Use a sharp carving knife and cut slices about ¼-inch thick. Arrange on a serving platter and pour your prepared sauce over the top, or serve sauce on the side so guests can control the amount.

Common Mistakes to Avoid: Lessons from Years of Entertaining
After hosting countless holiday gatherings and teaching nutrition clients how to prepare this dish, I’ve identified mistakes that trip up even careful cooks. Learning from others’ experiences saves your gathering.
- Skipping the sear – Some people try to skip searing to save time, placing the raw brisket directly into the braising liquid. This creates gray, bland meat without the mahogany crust that develops deep flavor. The sear takes just 10 minutes and is absolutely essential.
- Using oven temperatures that are too high – Cooking at 325°F or 350°F instead of 300°F speeds evaporation, drying out the meat before connective tissue fully breaks down. The lower temperature seems slow but delivers superior results.
- Cutting before resting – Impatience is the enemy here. Slicing into a still-hot brisket releases juices that haven’t been reabsorbed, making the final dish dry. Those 15 minutes of rest are as important as the 4.5 hours of cooking.
- Using a brisket that’s trimmed too much – Ask your butcher for brisket with fat cap intact. This fat layer basts the meat as it cooks and keeps it moist. Over-trimmed brisket often turns out tough.
Expert’s Nutritional Tip: Why This Slow-Cooked Method Matters
As a registered dietitian, I appreciate that this cooking method does something scientifically valuable. The low-temperature, long-duration braising breaks down collagen (a connective tissue protein) into gelatin without using excessive salt or processed ingredients. This gelatin improves bone health and joint function—our bodies can actually use this nutrient from the meat.
Additionally, the moist cooking environment preserves B vitamins (especially B12 and niacin, critical for energy) better than dry-heat cooking methods. The searing step develops antioxidants through the Maillard reaction, creating compounds with anti-inflammatory potential. Unlike quick recipes relying on added sugars, this approach builds complexity through patient technique. One 3-ounce serving of properly cooked brisket (about the size of a deck of cards) delivers approximately 25 grams of protein with only 5-7 grams of fat, making it a nutrient-dense protein choice that supports muscle maintenance.
Seasonal Variations: Adapting Your Brisket Through the Year
One of my favorite aspects of this recipe is its flexibility for seasonal entertaining. The core technique remains constant, but ingredients can shift with what’s fresh and abundant.
Spring gatherings: Add 1 tablespoon of fresh lemon zest to your seasoning rub for brightness. Include fresh thyme or tarragon in your braising liquid. Spring onions can replace standard yellow onions for lighter flavor.
Summer celebrations: Use lighter BBQ sauces with fruit elements (peach, cherry, or blueberry-based). Add 1 tablespoon of apple cider vinegar to your braising liquid for tanginess that cuts richness. This is still delicious served at room temperature for outdoor gatherings.
Fall festivals: Incorporate 1 tablespoon of balsamic vinegar and fresh rosemary into your braising liquid. Add ½ teaspoon of smoked paprika to your seasoning rub. Serve with autumn vegetables like roasted root vegetables and caramelized Brussels sprouts.
Winter holidays: This is the classic season for this recipe. Stick with traditional preparations, but consider adding 1 tablespoon of Dijon mustard to your braising liquid and fresh thyme sprigs. The rich, warming nature of this dish is perfect for cold-weather entertaining when guests appreciate slow-cooked comfort.
Regional Variations Around the World
- Texas barbecue tradition – Texas cooks typically use only salt and pepper on their brisket, sometimes called “naked brisket.” They focus on smoke and time rather than sauce, often cooking with oak or hickory smoke. The braising liquid might be just beef broth with no BBQ sauce.
- Jewish Ashkenazi preparation – Ashkenazi Jewish communities developed a tradition of braised brisket with gravy, using onions, carrots, and root vegetables as the braising base. Often seasoned with paprika, this method predates BBQ-sauce versions and remains popular for Passover and holiday meals.
- Central European style – German and Czech traditions feature brisket braised with root vegetables, sour cream, and sometimes beer or red wine. These preparations lean into the hearty, rustic tradition that influenced American Dutch oven cooking.
Traditional Serving Customs
In Colorado cattle country, where this recipe has deep roots, brisket is traditionally served at important family gatherings—holiday celebrations, birthdays, and reunion meals. The presentation matters. Sliced brisket is typically arranged on a platter with sauce poured over (or on the side), surrounded by family-style side dishes that guests share.
Etiquette in traditional settings emphasizes serving the eldest guests first, and brisket is carved and plated in the kitchen before service rather than carved tableside (this prevents the meat from cooling). The meal typically includes comfort-food sides and moves at a leisurely pace—brisket is meant to be savored and discussed, not rushed.
In my Colorado mountain-cabin tradition, we serve this with crusty bread for sauce-soaking, roasted root vegetables, and a simple green salad for balance. The meal often becomes a conversation anchor—people linger, share stories, and reconnect over this shared dish.
Can I Store Beef Brisket Dutch Oven Recipe?
One of the best aspects of this recipe is that it stores beautifully and actually improves over time as flavors meld. After your gathering, let any leftovers cool to room temperature before storing.
Refrigerator storage: Transfer the brisket and sauce together to an airtight container. The meat and sauce keep for 3-4 days refrigerated, making it perfect for next-day entertaining or family meals.
Freezer storage: Slice the cooled brisket and layer it with sauce in a freezer-safe container or resealable bag, removing as much air as possible. Properly stored, it keeps for 2-3 months frozen. Thaw overnight in the refrigerator before reheating.
Reheating: Warm refrigerated or thawed brisket gently in a 325°F oven, covered with foil, for 15-20 minutes until warmed through. Alternatively, reheat on the stovetop over low heat with a splash of broth to restore moisture. Never microwave, as this can make meat tough.
Nutrition Information
One 3-ounce serving of beef brisket with sauce contains approximately 240 calories, 25 grams of protein, 14 grams of fat, and 2 grams of carbohydrates (values vary slightly depending on sauce thickness and meat trim). According to USDA data, brisket is an excellent source of B vitamins, particularly niacin and B12, which support energy metabolism and nervous system function.
The slow-cooking process contributes nutritional value beyond macronutrients. The collagen breakdown creates gelatin, which supports joint and gut health—a benefit exclusive to low-and-slow cooking methods. The variety of antioxidants created during searing (through the Maillard reaction) provides anti-inflammatory compounds that support overall wellness.
For those watching sodium intake, control the sauce quantity and use low-sodium broth and soy sauce. One serving with moderate sauce contains approximately 800 milligrams of sodium—reasonable for most diets but something to monitor if sodium restriction is medically necessary.
What Can I Serve With Beef Brisket Dutch Oven Recipe?
Brisket’s rich depth pairs beautifully with bright, acidic, and vegetable-forward sides that balance the meal. Drawing from my experience hosting festive gatherings, these pairings celebrate both tradition and nutrition.
- Roasted root vegetables – Carrots, parsnips, and potatoes roasted with olive oil and herbs complement brisket’s earthiness and add fiber and vitamin C. Roast them on a separate pan while the brisket cooks, finishing them at the same time.
- Creamed horseradish – The sharp bite of horseradish cuts through brisket’s richness, traditionally served alongside slow-cooked beef in European preparations.
- Bright green salad – A simple arugula or mixed greens salad with lemon vinaigrette provides acid, antioxidants, and textural contrast. This is especially important for balancing the richness of braised meat.
- Crusty bread – A traditional accompaniment for sauce-soaking and balancing the meal with carbohydrates and texture.
- Roasted Brussels sprouts or broccoli – These cruciferous vegetables add nutritional density and bitter notes that pair thoughtfully with savory meat. Toss with olive oil and serve alongside.
If planning a complete festive meal, consider serving brisket alongside lighter proteins like Lemon Baked Cod Recipe for guests who prefer seafood, or include vegetarian options like Arroz Con Pollo Best Recipe as an alternative main dish for inclusive gatherings.
Beef Brisket Dutch Oven Recipe
Ingredients
Method
- If you've prepared your brisket the night before, you're already ahead. If doing this same day, combine 2 tablespoons of BBQ seasoning blend, 1 tablespoon of light brown sugar, and 1 tablespoon of sea salt in a small dish. Mix thoroughly so the sugar distributes evenly. Rub this mixture generously over all surfaces of your brisket, using enough pressure that the rub adheres to the meat's surface. The seasoning should coat the entire exterior, creating a flavorful crust during searing. Let the seasoned meat stand at room temperature for at least one hour (or refrigerate overnight). This resting period is non-negotiable—it allows seasonings to penetrate and helps the meat cook evenly.

- Adjust your oven rack to the lower-middle position (this ensures even heat circulation around your Dutch oven). Preheat your oven to 300°F. This temperature is essential—it's low enough to prevent moisture loss but high enough to properly braise the meat. Allow at least 15 minutes for your oven to reach this temperature. While the oven preheats, place your Dutch oven (cast iron or enameled ceramic) on your stovetop over medium-high heat. Let it warm for 2-3 minutes. This preheating step ensures your sear will be effective.
- Add 2 tablespoons of avocado oil to your heated Dutch oven. The oil should shimmer and move freely across the bottom—this indicates proper heat. Carefully place your seasoned brisket fat-side down into the hot oil. You should hear an immediate sizzle. Do not move the meat for 5 minutes. This uninterrupted contact creates a golden-brown crust through the Maillard reaction. After 5 minutes, carefully flip and sear the other side for another 5 minutes. The brisket should develop a rich mahogany crust on both sides. Remove the seared meat and set it aside on a clean plate.
- Without draining the oil, reduce heat to medium and add your 2 sliced medium onions to the same Dutch oven. The onions will stick initially—this is good. They're absorbing the flavorful browned bits left from searing. Cook for 6 minutes, stirring occasionally, until onions soften and begin to turn golden. Add your 3 cloves of minced garlic and cook for exactly 1 more minute. Garlic burns quickly, so watch carefully. You want fragrant garlic, not bitter burnt garlic.
- Pour ¾ cup of beef broth into the Dutch oven. Use a wooden spoon to scrape the bottom, lifting up all the browned bits (called the fond) that contain concentrated flavor. These caramelized particles will dissolve into your braising liquid, enriching the entire dish. Continue scraping and stirring for 1-2 minutes until the bottom is clean. Remove from heat. In a separate bowl or measuring cup, whisk together ¾ cup of BBQ sauce, 1 tablespoon of Worcestershire sauce, and 1 tablespoon of soy sauce. Pour this mixture into your Dutch oven and stir gently to combine.

- Place your seared brisket back into the Dutch oven, positioning it so it's mostly submerged in the braising liquid (the top may show slightly, and that's fine). Cover your Dutch oven with its lid and transfer to your preheated 300°F oven. This is the magic moment where time and moisture work together to transform tough meat into something tender.
- Set a timer for 4 hours. During this time, check the brisket once at the 2-hour mark to ensure it's braising properly (the liquid should bubble gently around the edges when you peek). You shouldn't need to flip or move the meat—the liquid surrounding it does the work. After 4 hours, the meat should be fork-tender. To test doneness, pierce the thickest part with a fork; the meat should offer almost no resistance and should yield easily to gentle pressure.
- Carefully remove your Dutch oven from the oven (use oven mitts—the handles are extremely hot). Using tongs or two large forks, transfer the brisket to a cutting board or serving platter. Let the meat rest uncovered for at least 15 minutes. During this rest, muscle fibers relax and reabsorb juices that mobilized during cooking. This step makes the difference between tender-and-juicy meat and meat that's tender but slightly dry.
- While the brisket rests, you can leave your braising liquid as-is (it's already delicious) or thicken it into a proper sauce. If thickening, whisk 1 tablespoon of cornstarch with 1 tablespoon of cold water until smooth, creating a slurry. Place your Dutch oven on the stovetop over medium heat. Once the liquid begins to simmer, slowly pour in your cornstarch mixture while whisking constantly. Continue stirring for about 5 minutes until the sauce thickens to your desired consistency. The sauce should coat the back of a spoon lightly.
- This is the final, crucial step. Look at your rested brisket and identify the direction of the meat's grain (you'll see lines running through it). Always slice against the grain—perpendicular to these lines. Slicing against the grain shortens muscle fibers, making each bite more tender. Use a sharp carving knife and cut slices about ¼-inch thick. Arrange on a serving platter and pour your prepared sauce over the top, or serve sauce on the side so guests can control the amount.
FAQs
Can I make this recipe with a smaller brisket, like 2 pounds?
Yes, but adjust your cooking time. A 2-pound brisket will finish in approximately 3-3.5 hours rather than 4-4.5 hours. Use the fork-tender test to determine doneness rather than relying solely on time—different ovens and brisket thicknesses vary. Start checking at the 2.5-hour mark for smaller cuts.
What if my brisket isn’t fork-tender after 4 hours?
This occasionally happens with particularly thick briskets or variations in meat structure. Simply return it to the oven, cover it, and continue cooking. Check every 30 minutes. Some briskets need 5 hours. It’s better to cook longer than to rush and end up with tough meat. The worst that happens with extra time is meat that’s almost creamy-tender rather than just tender.
Can I make this on the stovetop instead of in the oven?
You can, but results won’t be identical. After searing and building your braising liquid, reduce heat to low, cover your Dutch oven, and simmer on the stovetop for 4-5 hours. Check periodically to ensure the liquid maintains a gentle simmer (not a rolling boil, which toughens meat). Oven cooking distributes heat more evenly, but stovetop works in a pinch.
Is it okay to use different cuts of beef, like chuck roast?
Absolutely. Chuck roast works beautifully with this method—actually, it’s often preferred for stews and braises because it’s more affordable than brisket. Use the same cooking time and method. Short ribs are another excellent option, though they’ll cook faster (3-3.5 hours). The technique adapts to various cuts; the key is choosing fattier, more marbled cuts that benefit from braising.
How do I know which type of brisket to buy—flat or point?
The point cut (also called deckle) has more intramuscular fat and is more forgiving—harder to overcook because the fat keeps meat moist. The flat cut is leaner, more uniform in shape, and better if you want slices of uniform thickness. For beginners, point cut is more forgiving. For presentation, flat is easier to slice neatly. Both work beautifully with this recipe.
More Recipes From This Tradition
- Sizzling Pork Belly Plate 20 Minute Dinner – A faster alternative for when you need festive proteins on a tighter timeline
- this cozy soup – Another celebration of beef braising traditions from a different cultural perspective
I’ve spent the last decade translating my family’s festive traditions and my nutrition expertise into recipes that bring people together without stress or complication. This beef brisket Dutch oven recipe represents everything I believe about gathering: that the most meaningful celebrations honor tradition, respect ingredients, and create space for connection. Whether you’re hosting a winter holiday meal, a summer reunion, or a simple family gathering, this recipe delivers reliable, nourishing results that let you be present with your loved ones rather than stressed in the kitchen.
The magic isn’t in complexity—it’s in patience, quality ingredients, and the willingness to slow down and savor the process. I can’t wait to share many more delicious and festive recipes with you. Happy Cooking!