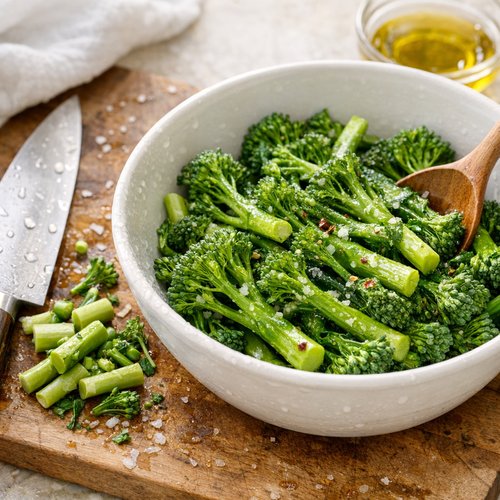
Broccolini Roasted Recipe

This post contains affiliate links. As an Amazon Associate I earn from qualifying purchases.
I still remember the first holiday gathering I hosted in my tiny Denver apartment back in 2012. I was nervous about impressing my boyfriend’s family, so I overcompliciated everything—until my grandmother pulled me aside and whispered, “The best meals are the simplest ones.” That year, I made a simple roasted vegetable medley, and it became the star of the table. These days, I make roasted broccolini at nearly every festive gathering I host, and it’s become my secret weapon for stress-free entertaining. Much like my asparagus corn recipe, this dish proves that minimal ingredients and honest cooking create maximum flavor. Ready in just 15 minutes with virtually zero cleanup? This is the only side you’ll ever need.
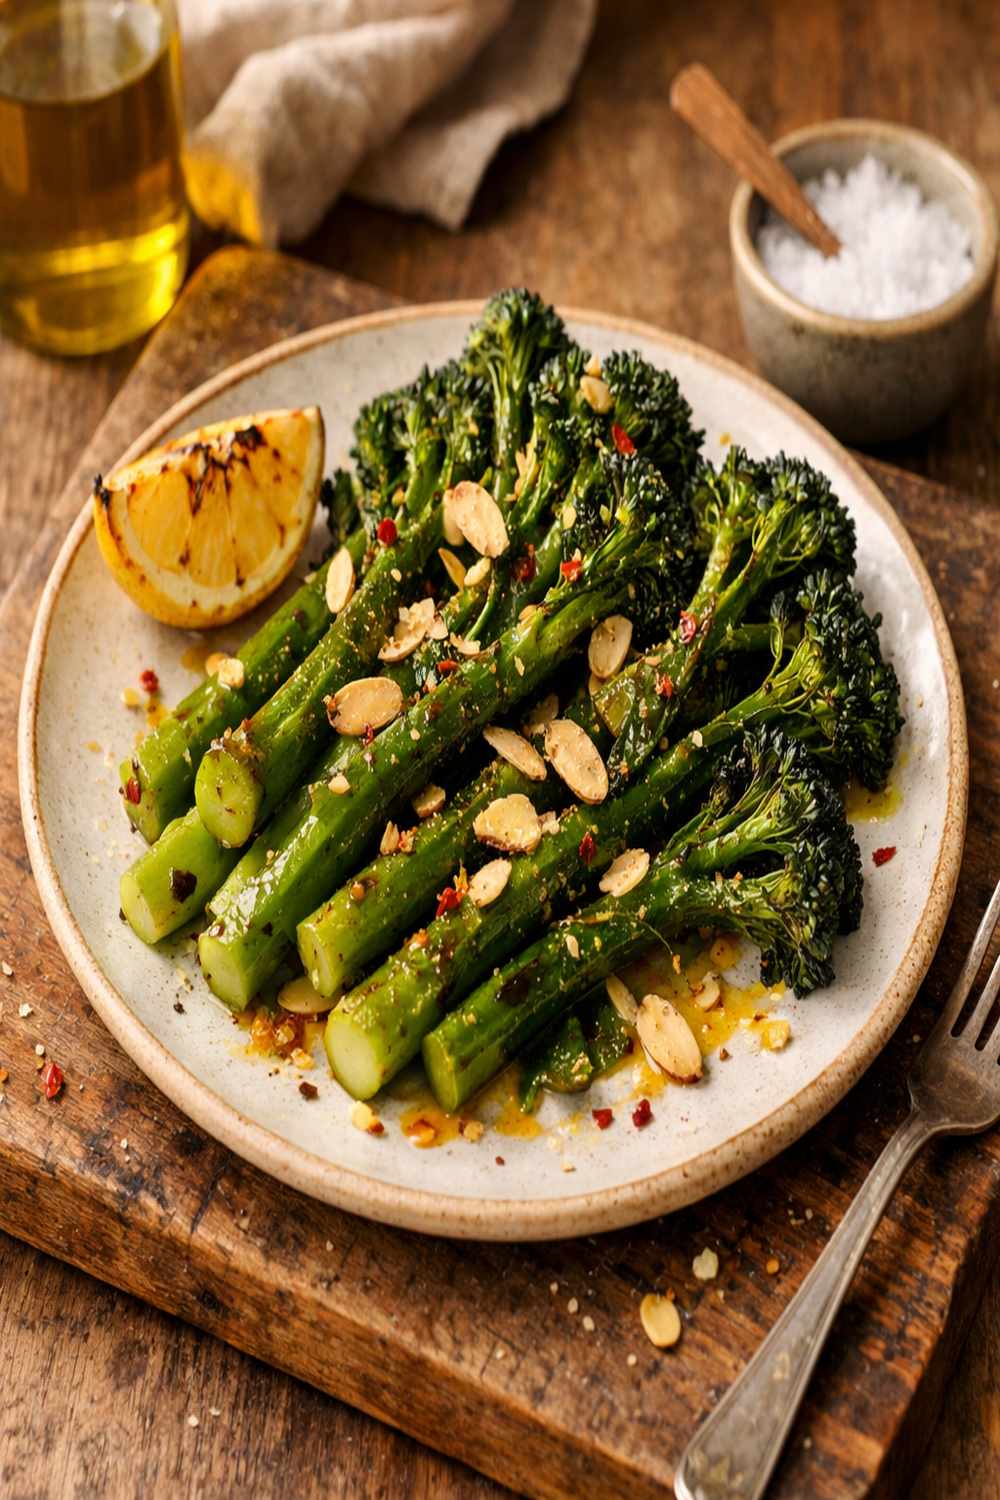
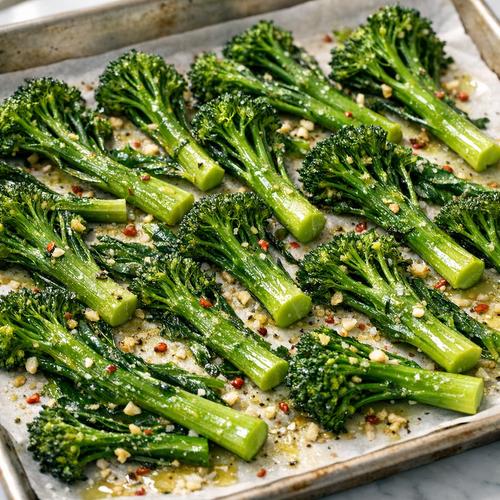
Easy Crispy Brockolini Roasted Recipe (Ready in 15 Minutes, 4 Ingredients, One Pan!)
After a decade of working with families across Colorado, I’ve learned that the best holiday recipes are those that don’t demand hours in the kitchen or a shopping list that requires a second mortgage. This roasted broccolini recipe is exactly that—it’s my go-to when I’m hosting a crowd and need something that looks restaurant-quality while I’m simultaneously managing three other dishes. The magic happens when high heat transforms tender broccolini into crispy, caramelized perfection with just a brush of olive oil and a splash of soy sauce.
Why You’ll Love This Recipe
- Ready in exactly 15 minutes – preheat your oven while you’re gathering ingredients, and dinner’s on the table before the appetizer conversation ends
- Works for any occasion – serve it alongside your 3 meat lasagna at casual dinners, or as an elegant side at your most formal holiday table
- Only four ingredients – no special pantry items needed, just things you likely have right now in your kitchen
- Zero judgment on portions – people always want seconds, which tells you everything you need to know
- Crispy exterior, tender interior – the high-heat roasting method creates those addictive golden, caramelized tips while keeping the stems perfectly tender
- Budget-friendly and inclusive – naturally vegan, gluten-free, and costs just pennies per serving
What You Need
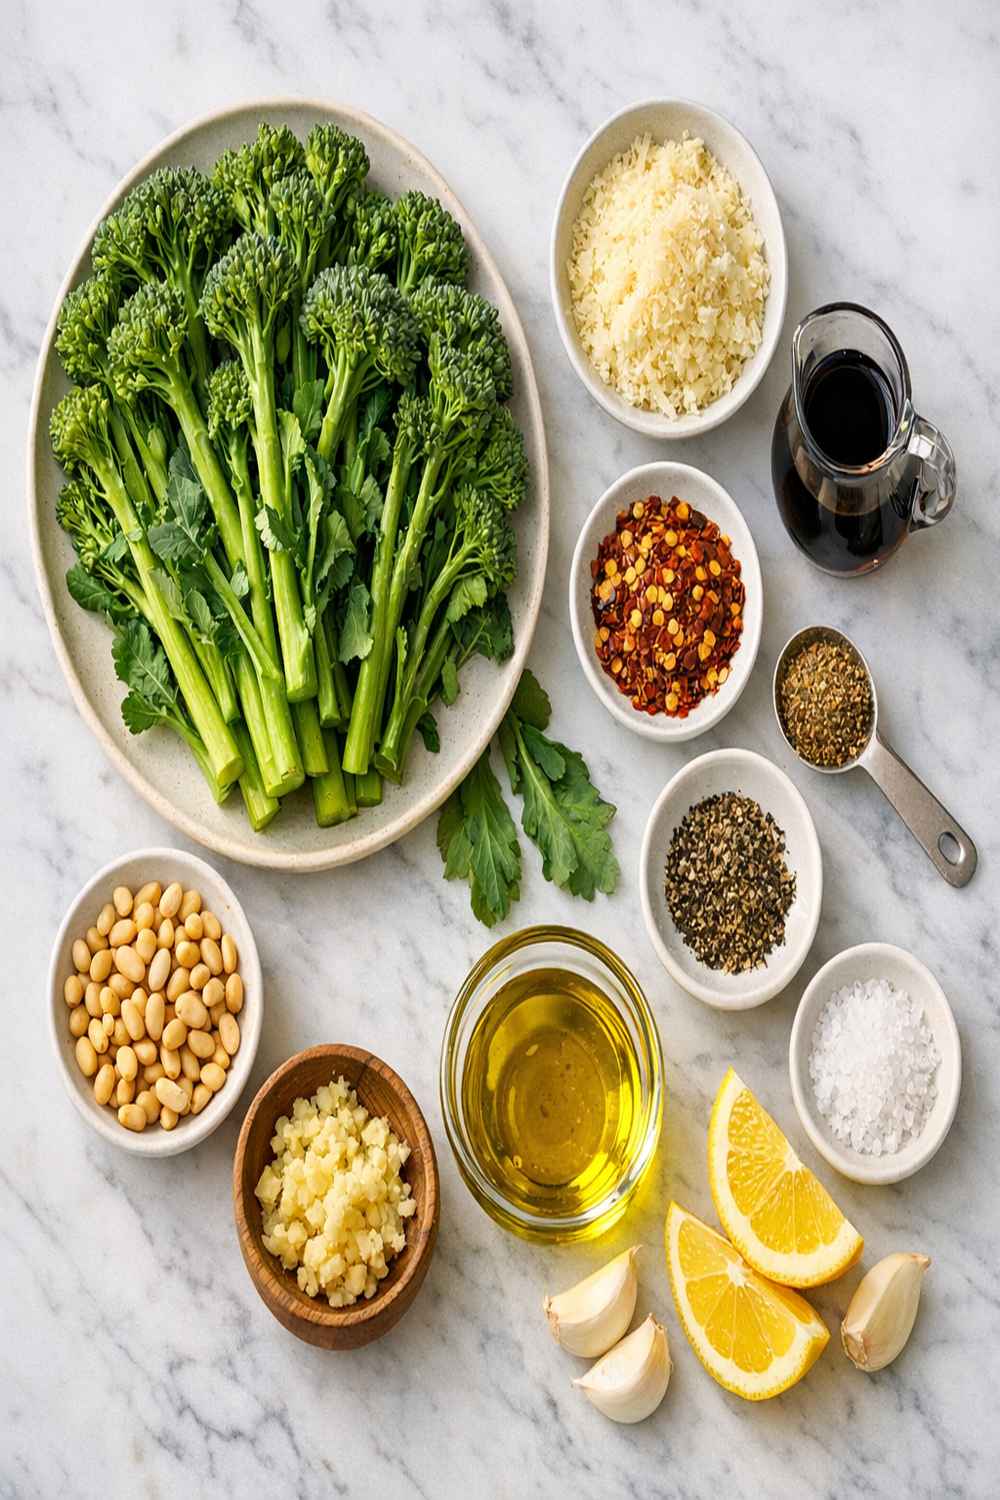
Just four simple ingredients—here’s everything:
- ¼ teaspoon freshly cracked black pepper (optional but recommended for subtle heat)
- ½ teaspoon coarse sea salt or fleur de sel (for finishing, adds a satisfying mineral crunch)
- 2 tablespoons extra-virgin olive oil (use your best quality for maximum flavor)
- 1 tablespoon low-sodium soy sauce (adds umami depth without overwhelming salt)
- 1 bunch fresh broccolini (about 12 ounces, with rough stem ends trimmed away but tender leaves left intact)
How to Make Roasted Broccolini in 3 Simple Steps
Here’s exactly how to transform these humble ingredients into a side dish that steals the show:
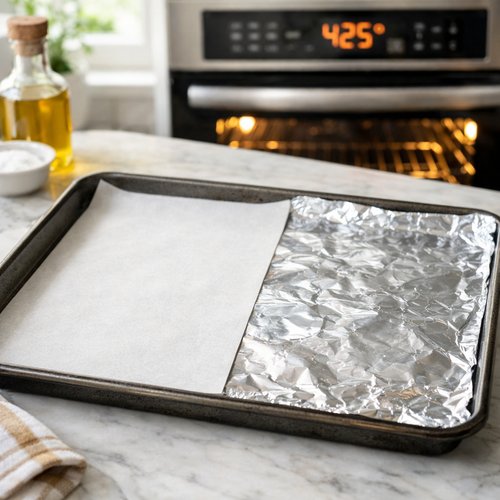
Step 1: Prep Your Pan and Preheat
Heat your oven to 425 degrees Fahrenheit and line a large sheet pan with parchment paper or aluminum foil for easy cleanup. This high heat is what creates those gorgeous caramelized edges. I prefer parchment paper because it’s easier on the environment and works beautifully at this temperature. If using foil, there’s no need to oil it beforehand.
Step 2: Trim and Toss
Rinse your broccolini under cool water and pat completely dry—this step is non-negotiable for crispiness. Moisture is the enemy of that beautiful caramelization. Trim away the thick, woody bottom inch or so of each stem, but leave all the tender leaves attached; those leaves become crispy and delicious when roasted. Toss your prepared broccolini in a large bowl with the olive oil and soy sauce, making sure every piece gets lightly coated. The soy sauce adds wonderful umami flavor without requiring extra salt.
Step 3: Roast and Finish
Spread the broccolini in a single layer across your prepared pan, making sure pieces aren’t overlapping or crowding each other. This is the most important step for achieving that crispy exterior. Roast for 12-15 minutes, checking around the 12-minute mark. You’re looking for the florets and leaf tips to turn deep golden brown and the stems to be fork-tender. Remove from the oven and immediately sprinkle with coarse sea salt and freshly cracked pepper. The salt should go on while everything is still hot so it adheres properly and adds that final touch of finishing elegance.
Common Mistakes to Avoid
- Overcrowding the pan – I cannot stress this enough. Broccolini needs air circulation to crisp properly. If you have a large crowd, use two sheet pans instead of stacking vegetables on one. This is where my registered dietitian background pays off; I’ve watched countless home cooks fail at this step.
- Skipping the dry-patting step – I know it seems fussy, but water is steam, and steam creates softer edges rather than crispy ones. Pat your broccolini dry before roasting, every single time.
- Adding salt too early – salt draws out moisture, which compromises crispiness. Always add your finishing salt after roasting, never before.
- Using low heat – I see this all the time. People think they’ll roast at 375 degrees “to be safe,” but you’ll end up with limp broccolini instead of crispy broccolini. Trust the 425 degrees; your oven is built for this.
Expert’s Nutritional Tip
Here’s something I always share with my clients: broccolini contains sulforaphane, a powerful compound with anti-inflammatory properties that becomes more bioavailable when the vegetable is lightly charred through high-heat cooking. That means the crispy, caramelized edges aren’t just delicious—they’re actually more nutritious than gently steamed broccolini. According to USDA nutritional data, one serving of roasted broccolini provides approximately 35 calories, 3 grams of protein, and over 40% of your daily vitamin C requirement. That’s why I always encourage people to embrace the char.
5 Ways to Customize This Recipe
- Garlic Lover’s Version – mince 2-3 fresh garlic cloves and toss them in with the oil and soy sauce before roasting for an aromatic, savory depth
- Spicy Kick – add ¼ teaspoon red pepper flakes or a drizzle of sriracha with the oil for heat that builds as you eat
- Sesame Everything – finish with a sprinkle of toasted sesame seeds and a few drops of dark sesame oil instead of the sea salt for an Asian-inspired twist
- Citrus Brightness – finish with fresh lemon zest and a squeeze of juice instead of (or in addition to) the sea salt for a Mediterranean angle that pairs beautifully with fish
- Parmesan Crust – toss with grated Parmigiano-Reggiano cheese in the last minute of roasting for a decadent, umami-rich version that works alongside lighter proteins
Make-Ahead and Meal Prep Tips
- Prep the night before – wash, dry, and trim your broccolini up to 24 hours ahead, storing it in a paper towel-lined container in your refrigerator. This saves you 5 minutes on the day of your gathering and eliminates last-minute stress. When you’re ready to cook, simply toss with oil and soy sauce and roast as directed.
- Make it part of a sheet pan dinner – arrange your broccolini on one side of the sheet pan and add sliced chicken thighs, salmon fillets, or shrimp on the other side. Everything roasts together in 15 minutes, creating a complete meal with minimal cleanup. This is my favorite weeknight dinner strategy because one pan means one thing to wash.
- Double batch for leftovers – roasted broccolini keeps beautifully for 3-4 days in the refrigerator and makes an excellent cold salad addition or lunchbox vegetable. I often make twice what I need so I have portions ready for the following day.
- Room temperature service – unlike many vegetables, roasted broccolini actually tastes wonderful at room temperature, which means you can roast it 2-3 hours ahead of your gathering and simply bring it to the table without reheating.
Seasonal Variations
- Spring version – pair with fresh asparagus spears, treating them exactly the same way. The two vegetables roast beautifully together and create a gorgeous spring garden aesthetic on the plate.
- Summer version – add halved cherry tomatoes and fresh basil after roasting for brightness that complements grilled proteins and pairs beautifully with your summer entertaining aesthetic.
- Fall version – toss with a drizzle of balsamic vinegar and crispy sage leaves after roasting for an earthy, sophisticated side that works with harvest-themed gatherings.
- Winter version – add a pinch of nutmeg and a squeeze of lemon juice to emphasize the warming spices that feel appropriate for holiday tables and comfort food gatherings.
Quick Substitutions
- Broccolini unavailable – use regular broccoli crowns cut into florets, asparagus spears, or even Brussels sprouts halved lengthwise. All roast beautifully at the same temperature and timing.
- Soy sauce swap – coconut aminos provide a similar umami depth if you need to avoid soy, or simply use ½ teaspoon of liquid smoke and a pinch of sea salt for a different flavor profile
- Olive oil alternatives – avocado oil works beautifully for high-heat roasting and has a neutral flavor, or use toasted walnut oil if you want a more distinctive nuttiness
- Sea salt shortage – kosher salt or even regular table salt works, though coarse sea salt’s mineral quality and satisfying texture is genuinely worth seeking out
How to Store and Reheat
Refrigerator: Roasted broccolini keeps beautifully for 3-4 days when stored in an airtight container. Freezer: I don’t recommend freezing roasted broccolini as the texture becomes soft upon thawing. Reheating: Simply place on a sheet pan and warm in a 375-degree oven for 5-7 minutes until heated through and the edges re-crisp slightly. You can also enjoy it cold directly from the refrigerator as a salad component or snack—honestly, it’s delicious either way.
Nutrition at a Glance
Per serving (approximately ½ bunch): 85 calories, 3g protein, 4g carbohydrates, 7g fat, 2g fiber. Rich in vitamins C and K, plus minerals like potassium and iron. According to USDA nutritional database, broccolini provides antioxidants and anti-inflammatory compounds that make this dish as nourishing as it is delicious. This is a naturally vegan, gluten-free, and keto-friendly option that works for virtually any dietary preference.
Serve It With
This roasted broccolini shines alongside nearly any protein and pairs beautifully with creamy, cheesy, or rich dishes. I often serve it with my baked Camembert cheese recipe for an elegant appetizer spread, or alongside the 9×13 chicken pot pie for a complete, satisfying meal. Here are my favorite combinations:
- With roasted chicken thighs – the umami from soy sauce complements poultry beautifully, creating a cohesive plate
- Alongside grilled salmon – the slight bitterness of broccolini balances rich fish perfectly
- With creamy pasta dishes – the crispy edges cut through richness and add textural interest
- Beside grain bowls – add roasted broccolini to farro, quinoa, or rice bowls with your favorite proteins and sauces
- As part of a vegetable medley – combine with roasted carrots, Brussels sprouts, or potatoes for a composed side dish
Broccolini Roasted Recipe
Method
- Heat your oven to 425 degrees Fahrenheit and line a large sheet pan with parchment paper or aluminum foil for easy cleanup. This high heat is what creates those gorgeous caramelized edges. I prefer parchment paper because it's easier on the environment and works beautifully at this temperature. If using foil, there's no need to oil it beforehand.

- Rinse your broccolini under cool water and pat completely dry—this step is non-negotiable for crispiness. Moisture is the enemy of that beautiful caramelization. Trim away the thick, woody bottom inch or so of each stem, but leave all the tender leaves attached; those leaves become crispy and delicious when roasted. Toss your prepared broccolini in a large bowl with the olive oil and soy sauce, making sure every piece gets lightly coated. The soy sauce adds wonderful umami flavor without requiring extra salt.

- Spread the broccolini in a single layer across your prepared pan, making sure pieces aren't overlapping or crowding each other. This is the most important step for achieving that crispy exterior. Roast for 12-15 minutes, checking around the 12-minute mark. You're looking for the florets and leaf tips to turn deep golden brown and the stems to be fork-tender. Remove from the oven and immediately sprinkle with coarse sea salt and freshly cracked pepper. The salt should go on while everything is still hot so it adheres properly and adds that final touch of finishing elegance.

Notes
FAQs
Why are my broccolini stems tough instead of tender?
You likely didn’t trim enough of the woody bottom. Broccolini stems get increasingly fibrous toward the base. Trim away at least one full inch from the bottom, and if the remaining stem is thicker than a pencil, consider slicing thick stems lengthwise so they cook at the same rate as thinner pieces.
Can I make this ahead for a party?
Absolutely! Roast your broccolini up to 3 hours before serving and leave it at room temperature on the serving platter. It tastes wonderful warm or at room temperature. If you prefer it warm, simply reheat in a 375-degree oven for 5 minutes while guests arrive.
My broccolini came out soft instead of crispy. What went wrong?
Most likely culprits: overcrowded pan, broccolini wasn’t completely dry before roasting, or your oven temperature was too low. Make sure pieces aren’t touching, pat them thoroughly dry, and verify your oven runs at 425 degrees (use an oven thermometer if you suspect temperature issues).
Is this recipe actually vegan and gluten-free?
Yes! All four ingredients are naturally vegan and gluten-free. Just verify your soy sauce is gluten-free if that’s a dietary concern—many brands are, but tamari is a safer alternative for celiac households.
Can I prepare the broccolini and oil mixture the morning of my gathering?
I recommend against mixing more than 30 minutes ahead, as the soy sauce will begin drawing moisture from the broccolini. Instead, trim and wash everything the night before, then toss with oil and soy sauce just 15 minutes before roasting. This preserves maximum crispiness potential.
More Quick Recipes You’ll Love
- Avocado Tomatillo Salsa Recipe – bright, fresh, and pairs beautifully with any gathering where broccolini is served
- Barbecue Potatoes Recipe – another sheet pan side that works alongside your roasted broccolini for a vegetable-forward meal
- this no-bake Italian dessert – the perfect elegant dessert to follow a simple vegetable-focused dinner
There you have it—proof that the best holiday recipes are the simplest ones, just like my grandmother knew all those years ago. This roasted broccolini recipe has saved me countless hours of kitchen stress while impressing everyone at my table. Make it tonight, make it again next week, and then tell me how many people asked for the recipe. I can’t wait to share many more delicious and festive recipes with you! Happy cooking!