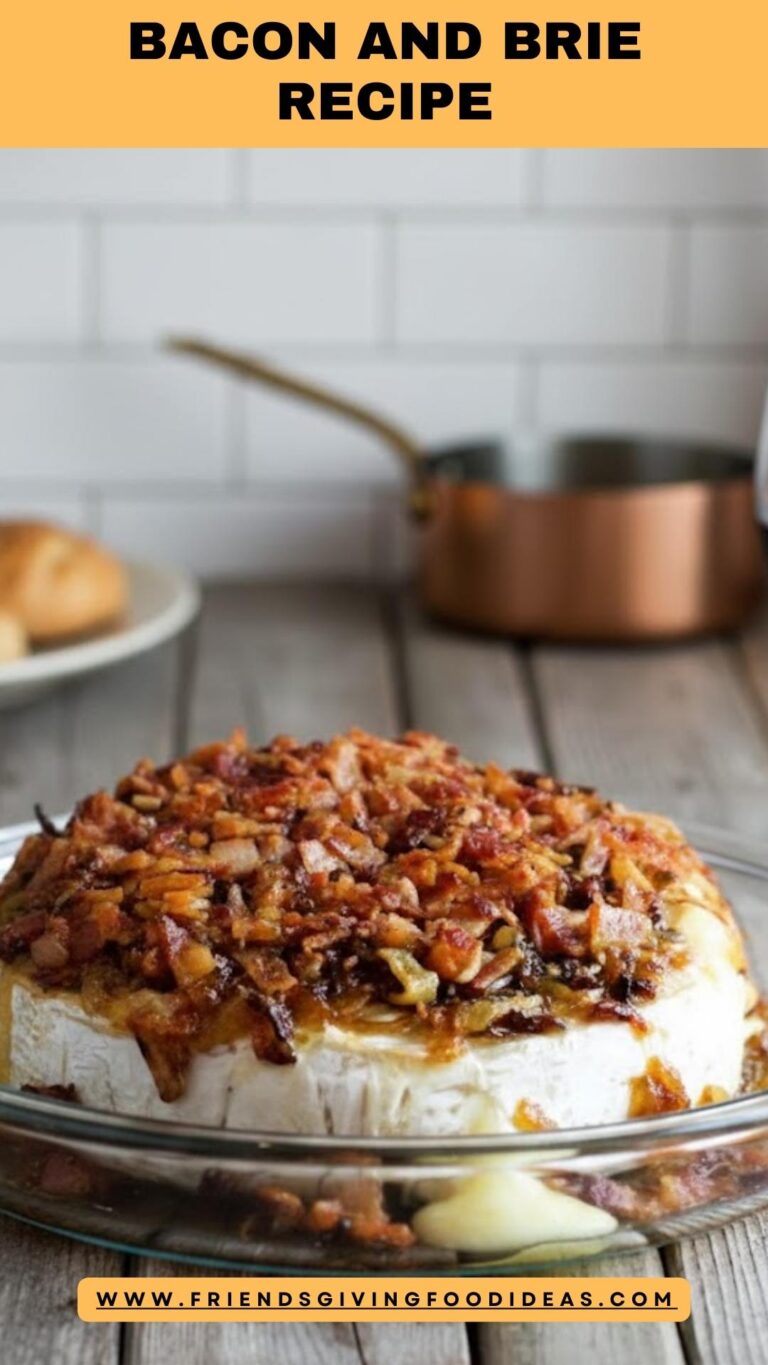
Brie And Bacon Recipe
This post contains affiliate links. As an Amazon Associate I earn from qualifying purchases.
When you’re hosting a festive gathering in Colorado, you need appetizers that feel both elegant and approachable—dishes that don’t demand hours in the kitchen yet leave your guests genuinely impressed. This warm brie with crispy bacon and caramelized onions does exactly that. The creamy, melting cheese paired with sweet-savory onions and smoky bacon creates a flavor combination that keeps people coming back for more. It’s the kind of recipe I’ve served at countless holiday parties, friendsgivings, and casual winter gatherings, and it never fails to spark conversation. If you love this style of indulgent-yet-accessible appetizer, you might also enjoy exploring our Baked Camembert Cheese Recipe, which offers a similar showstopper appeal with European charm.
A Family Tradition Born from Holiday Chaos
I’ll never forget the year I was hosting my first major holiday dinner in my Denver home. My extended family was arriving in three hours, and I’d overcommitted on the menu—roasted turkey, three sides, and three desserts. I was stressed, overwhelmed, and honestly, panicking.
My grandmother called to check in, and when I told her my situation, she laughed knowingly. “Iris, people don’t remember every side dish. They remember how you made them feel,” she said. “Make something warm, something they can gather around, something that says ‘I’m glad you’re here.'”
That’s when she shared her secret: a round of warm brie, topped with caramelized onions and crispy bacon, served with crusty bread. It was simple, it could be assembled ahead, and it created an instant gathering point in her kitchen. I made it that day, and within minutes, my family was standing around it, laughing, sharing stories, completely forgetting about the chaos I’d felt just moments before.
Now, more than a decade into my career as a registered dietitian and festive gathering specialist, I still come back to this recipe. It’s taught me that the best appetizers aren’t about complexity—they’re about creating moments of connection. And they’re definitely not about stressing yourself out.

What is Warm Brie with Crispy Bacon and Caramelized Onions?
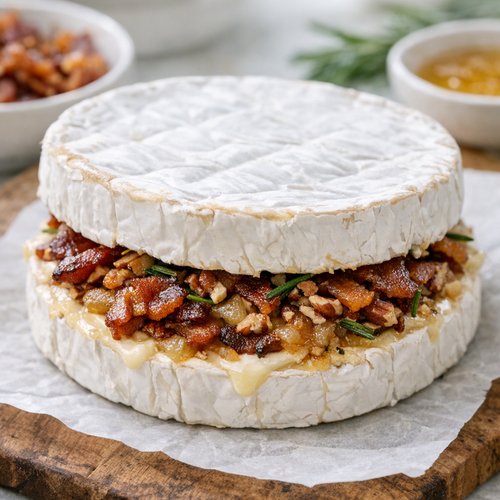
This is a classic French-inspired appetizer that’s become a beloved staple at Colorado gatherings. A whole wheel of creamy brie cheese is topped with bacon that’s been cooked until just crispy and then finely chopped, plus a generous mound of golden caramelized onions that have been slowly coaxed to sweetness over medium-low heat.
The magic happens when the brie melts in the oven just until it begins to ooze, transforming into a warm, spreadable dip that begs to be enjoyed with bread, crackers, or vegetables. The caramelized onions add sophisticated sweetness and depth, while the bacon provides smoky, salty contrast that balances the richness of the cheese.
The origins of this dish trace back to French cheese courses and wine pairings, but it’s evolved into an accessible, stress-free appetizer that works perfectly for any gathering—from intimate dinner parties to large holiday celebrations. What makes it special is how it bridges elegant and comfortable, making everyone at your table feel cared for.
Why You’ll Love This Warm Brie Recipe
- Minimal hands-on time. The longest step is the caramelized onions, which cook mostly unattended while you prep other dishes or welcome arriving guests. Once assembled, the brie bakes for just 10 minutes.
- Make-ahead friendly. You can prepare the bacon, caramelize the onions, and even assemble the entire dish hours before baking. It reheats beautifully, making it perfect for holiday hosting when your oven is already occupied.
- Naturally inclusive. Unlike many appetizers that require sophisticated palates or adventurous ingredients, this recipe uses flavors everyone loves. The combination of cheese, bacon, and caramelized onions is universally appealing—from young kids to experienced food lovers.
- Budget-friendly and scalable. A single wheel of brie serves 8-12 people as an appetizer, making the per-person cost remarkably low. You can also easily double or triple the recipe by preparing multiple wheels.
- Nutritionally balanced. Unlike many festive appetizers that are purely indulgent, this recipe includes protein from the bacon and cheese, plus the caramelized onions provide natural sweetness without added sugars (my preferred approach), and valuable micronutrients.
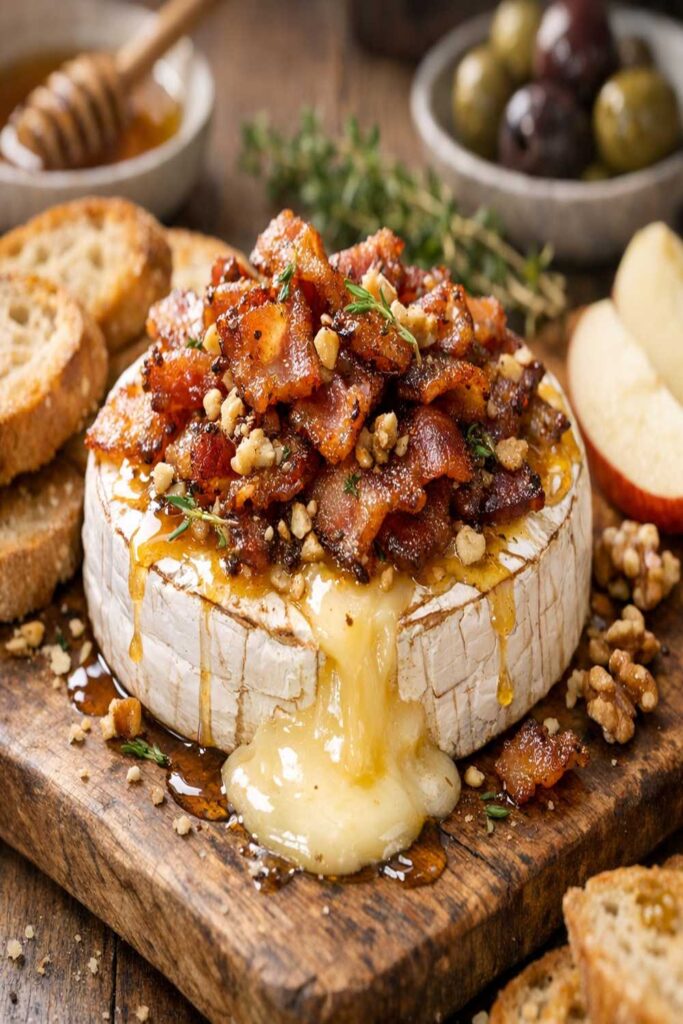
- Naturally elegant. The whole wheel of brie, golden and oozing, is visually stunning. It’s the kind of dish that photographs beautifully and makes your gathering feel special without requiring a culinary degree to execute.
- Flavor depth from three components. Rather than relying on a single bold ingredient, this recipe creates complexity through the interplay of three distinct flavors—creamy, sweet, and savory—that make each bite interesting and satisfying.
The Ingredients
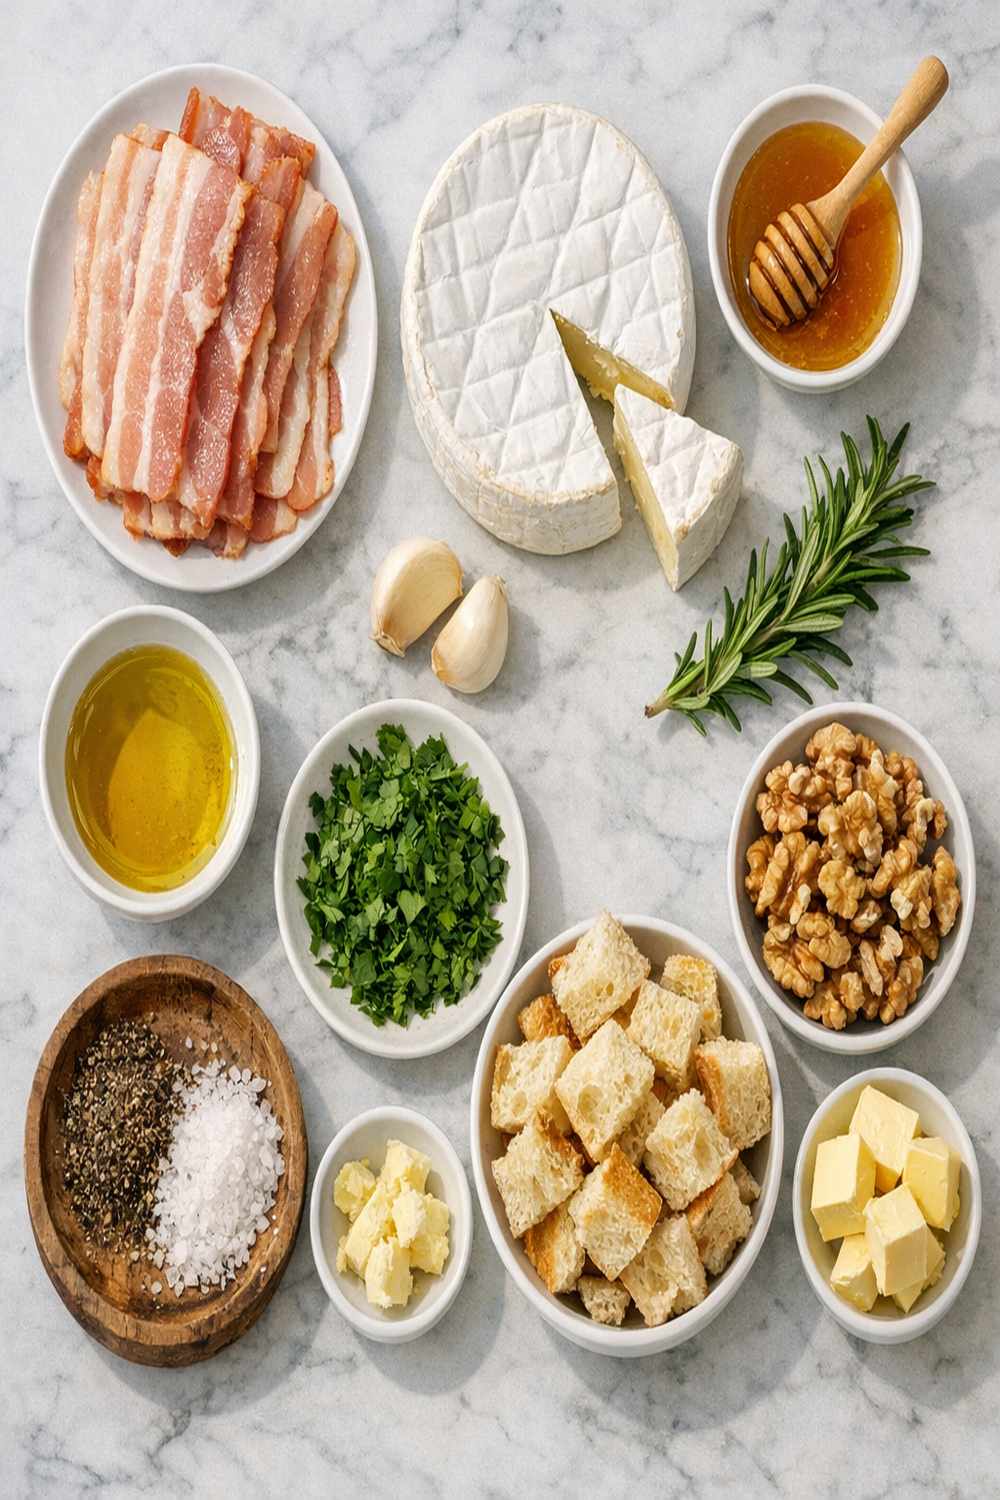
One of my favorite things about this recipe is how it works with ingredients you likely already have, or can source affordably at any Colorado grocery store. I’ve kept the ingredient list intentionally short—just five components plus a few pantry staples—because I believe the best festive foods celebrate quality ingredients rather than overwhelming complexity.
Here’s what you’ll need to create this showstopper:
- 2 tablespoons extra light olive oil (for gentle caramelization without competing flavors)
- 1 tablespoon brown sugar (or erythritol if you prefer low-carb options—sweetens without overwhelming)
- ¼ teaspoon sea salt (for finishing, enhances all the flavors)
- Crusty French bread crostini or quality crackers (for serving—choose what your guests prefer)
- 16 ounces brie cheese in a round wheel (typically one standard wheel from your cheese counter)
- 5 to 6 slices of bacon (thick-cut works beautifully, but standard slices work too)
- 2 medium yellow onions (sliced into thin ¼-inch rounds for even caramelization)
How to Make Warm Brie with Crispy Bacon and Caramelized Onions?
This recipe breaks down into three distinct components that come together beautifully. I’m going to walk you through each step with the kind of detail that comes from making this dish dozens of times. You’ll know exactly when something is done because you’ll see and smell the cues I describe.
Step 1: Render the Bacon Until Perfectly Crispy
Begin by laying your bacon slices flat in a cold skillet—I prefer cast iron because it distributes heat so evenly, but any large skillet works. Turn the heat to medium and let the bacon cook undisturbed for the first 2-3 minutes. You’ll hear it beginning to sizzle, and the fat will start releasing into the pan.
Continue cooking for another 5-7 minutes total, turning occasionally, until the bacon is almost crispy but still slightly flexible—you want it cooked through but not so brittle it shatters. The bacon should look deep golden-brown, not burned. When you lift a piece, it should bend slightly without breaking.
Transfer the bacon to a paper towel-lined plate and let it cool completely—this takes about 5 minutes and is crucial because warm bacon is too soft to chop uniformly. Once cooled, finely chop the bacon into small, bite-sized pieces. You should have about ½ cup of chopped bacon.

This step can be done up to 3 days ahead. Store the cooked bacon in an airtight container in your refrigerator, and it will stay fresh and crispy. You can even reheat it gently in a 300-degree oven for 3-4 minutes if it loses its crispness.
Step 2: Caramelize the Onions Until Golden and Sweet
Now for the step that requires patience but very little active effort: caramelizing the onions. This is where the magic happens, and it’s the signature technique I teach in every holiday cooking class I lead.
Drain most of the bacon fat from your skillet, leaving about 1 tablespoon to coat the pan. Add your 2 tablespoons of olive oil to bring the total fat to about 3 tablespoons. Turn the heat to medium-low—this is crucial. High heat will burn the onions instead of caramelizing them.
Add all your sliced onions to the pan and stir to coat them evenly in the oil. They’ll look like way too much onion at first—that’s normal. They’ll release moisture and reduce significantly as they cook.
Let the onions cook undisturbed for about 5 minutes, then give them a good stir. They should already be beginning to soften and turn slightly golden at the edges. Continue cooking, stirring every 5 minutes, for a total of approximately 20 minutes. You’re looking for the onions to transform into a deep golden color, becoming very soft and naturally sweet-smelling.
About 2 minutes before the caramelization is complete—when the onions are nearly translucent and deeply golden—sprinkle your brown sugar (or erythritol) directly over the onions. Stir well to distribute, and let everything cook together for another 1-2 minutes until the sugar fully dissolves and the onions glisten.
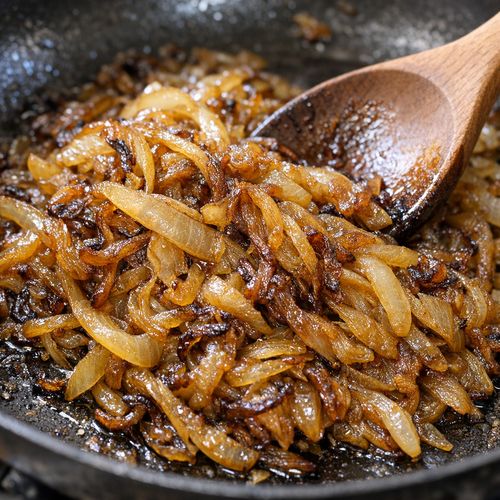
At this point, the onions should smell incredibly sweet and savory—like a perfect balance of natural caramelization. Remove them from the heat and let them cool slightly. This step can be completed up to 2 days ahead. Store the caramelized onions in an airtight container in your refrigerator and gently reheat them in a skillet over low heat before assembling.
Step 3: Assemble the Brie
Now for the easy part. Remove your brie from the refrigerator about 15 minutes before assembly—this helps it come to closer to room temperature, which means it’ll bake more evenly. Place the brie wheel on a baking sheet or small oven-safe skillet.
Spoon the caramelized onions directly onto the top of the brie wheel, creating a generous mound in the center. You want to use all of them—don’t hold back. The onions will slightly slide down the sides of the brie as it melts, which is exactly what you want.
Top the onions with your chopped bacon, distributing it evenly across the surface. Sprinkle with a tiny pinch of sea salt to enhance all the flavors.
Make-ahead tip: You can assemble the brie completely up to 4 hours before baking. Cover it loosely with plastic wrap and keep it in the refrigerator. When you’re ready to bake, you don’t need to bring it to room temperature—just add 2-3 minutes to the baking time.
Step 4: Bake Until Melting and Oozing
Preheat your oven to 350 degrees Fahrenheit. Once preheated, place your assembled brie directly into the oven on the middle rack.
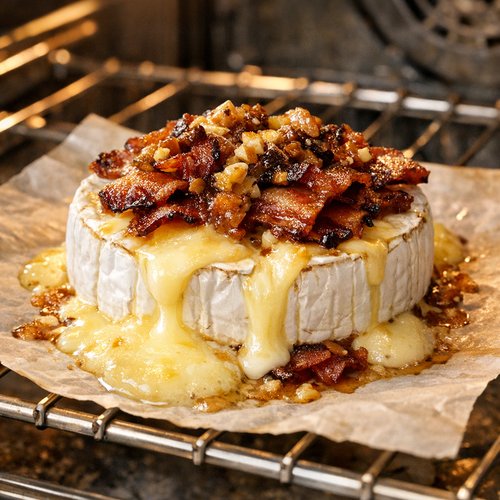
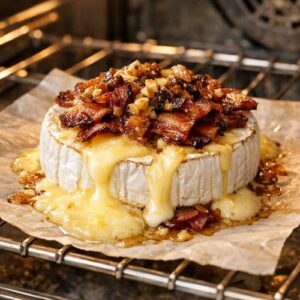
Bake for exactly 10 minutes if your brie started at room temperature, or 12-13 minutes if it came straight from the refrigerator. You’re looking for the brie to become visibly soft and creamy, with some of the cheese beginning to ooze out around the edges, but the wheel should still maintain its shape overall.
Here’s the exact visual cue: When you look at the brie, the top should jiggle slightly if you gently nudge the pan, and you should see small rivulets of melted cheese emerging from under the onions. The edges of the wheel might spread slightly, but it shouldn’t be completely collapsed.
Remove from the oven and let it rest for 2 minutes before serving. This resting period allows the cheese to set just enough that it holds together when people scoop it up, while remaining creamy and spreadable.
Step 5: Serve Immediately for Best Experience
Transfer your baked brie to a serving platter and surround it with your chosen accompaniments—crusty French bread crostini, quality crackers, apple slices, or raw vegetables all work beautifully. Place a small spreading knife or cheese spreader directly on the board next to the brie so guests can easily help themselves.
The brie will continue to soften as it sits, so it’s best enjoyed within about 15-20 minutes of coming out of the oven. That said, I’ve found it remains delicious for up to 30 minutes, and it can even be briefly reheated if needed.
Tips and Tricks From My Kitchen to Yours
- Choose quality brie. Look for brie that feels slightly soft when gently pressed (not rock-hard), with a white rind that doesn’t have any dark spots or cracks. This indicates good freshness and proper ripeness. A wheel that’s too young won’t melt smoothly; one that’s too old might separate.
- Don’t rush the onions. Low and slow is the only way to caramelize onions properly. Turning up the heat saves time but creates burned onions instead of sweet ones. In my experience, the 20 minutes is non-negotiable for that deep, complex sweetness.
- Prep bacon in bulk. If you’re making multiple wheels of brie for a large gathering, cook all your bacon at once and store it. This saves last-minute cooking stress and keeps your kitchen less hectic during the critical hosting hours.
- Use a small skillet as your baking vessel. Rather than transferring the assembled brie to a baking sheet, you can assemble it directly in a small cast iron skillet. This keeps everything contained and looks beautiful when brought straight to the table.
- Layer your toppings strategically. Put the onions on first, then the bacon on top. This order matters because it keeps the bacon from getting too soft from the melting cheese, preserving that crucial crispy texture.
- Customize the sweetness. If you prefer less sweetness, reduce the brown sugar to ½ tablespoon or omit it entirely—the caramelized onions already develop natural sweetness through the cooking process. If you want more pronounced sweetness (which works beautifully with the smoky bacon), add up to 1½ tablespoons.
- Experiment with brie variations. Herbed brie or truffle brie creates interesting flavor variations. Simply follow the same process—the caramelized onions and bacon work beautifully with any brie variation.
Expert’s Nutritional Insight: Why This Appetizer Works Better Than You Think
As a registered dietitian, I’m often asked how I justify serving rich appetizers at festive gatherings. Here’s my professional take: This brie dish actually contains more nutritional balance than most cocktail hour offerings.
The caramelized onions provide quercetin, a powerful antioxidant with documented anti-inflammatory properties in the nutrition literature. The slowly cooked onions also have a lower glycemic load than raw onions, meaning they won’t spike blood sugar the way refined appetizers do. Bacon provides complete protein and important B vitamins, while the brie contributes calcium and vitamin D—nutrients many people don’t get enough of during busy holiday seasons.
By combining three components with different nutritional profiles, you create an appetizer that satisfies on multiple levels. Your guests aren’t just getting empty calories; they’re getting genuine nourishment. This is why people feel satisfied eating one serving of this brie, rather than mindlessly grazing through multiple less-satisfying appetizers.
Can I Store and Reheat Brie with Bacon and Caramelized Onions?
Yes, and I’m actually a big advocate of making components ahead. Here’s my storage approach, developed through years of holiday hosting:
Individual components: Store the cooked bacon in an airtight container for up to 3 days. Keep caramelized onions in a separate airtight container for up to 2 days. This way you can assemble and bake on the day of your gathering for maximum freshness.
Assembled but unbaked brie: Cover loosely with plastic wrap and refrigerate for up to 4 hours before baking. This is my favorite make-ahead approach for entertaining.
Leftover baked brie: This is rare in my experience, but if you have leftovers, cover and refrigerate for up to 2 days. Reheat gently in a 300-degree oven for 4-5 minutes until warmed through and softened again. Do not use the microwave, as it creates uneven heating and can make the cheese tough.
Freezing: I don’t recommend freezing the assembled or baked brie, as the texture of the cheese changes significantly upon thawing. However, you can freeze cooked bacon and caramelized onions separately for up to 1 month, then thaw and use them within 2 days.
Nutrition Information
Per serving (approximately one-eighth of the wheel, with accompaniments):
Calories: 285 | Protein: 14g | Total Fat: 22g | Saturated Fat: 10g | Carbohydrates: 8g | Fiber: 1g | Sugars: 4g | Sodium: 680mg | Calcium: 180mg | Iron: 1.2mg
This nutritional information is based on USDA FoodData Central entries for brie cheese, bacon, and caramelized onions without added sugar (using the minimal brown sugar approach I recommend). The protein content is notably high for an appetizer, which makes this recipe nutritionally superior to most cheese dips. The sodium is moderate when consumed as one serving, though those watching sodium intake can reduce the bacon portion or use low-sodium varieties.
The carbohydrate content comes primarily from the caramelized onions and the small amount of brown sugar, making this an excellent option for lower-carb gatherings—simply omit the brown sugar entirely and you’ll reduce carbs to approximately 5g per serving.
What Should I Serve With Warm Brie and Crispy Bacon?
The beauty of this appetizer is its flexibility with accompaniments. Here’s what I recommend based on different gathering styles:
- French bread crostini. Slice a baguette diagonally into ½-inch slices, brush lightly with olive oil, and toast at 375 degrees for 5-7 minutes until golden. The crispy surface provides perfect contrast to the creamy cheese.
- Assorted crackers. Choose a combination of textures and flavors: water crackers for neutrality, whole grain crackers for earthiness, maybe one fun flavor like rosemary. Avoid overly flavored crackers that compete with the brie.
- Apple slices. Toss thin apple slices with a bit of lemon juice to prevent browning. The natural sweetness and slight tartness pair beautifully with the bacon and caramelized onions.
- Pear slices. Similar to apples, but with a slightly softer texture and more delicate flavor.
- Celery and carrot sticks. For guests preferring vegetables, the refreshing crunch provides great contrast to the rich cheese.
- Candied or spiced nuts. A small handful of pecans or walnuts adds another textural element and complements the warm spices of the gathering season.
I typically offer 2-3 different accompaniments, giving guests choice without overwhelming the table. If you’re pairing this with a meal, consider what main dishes you’re serving. The rich cheese pairs beautifully with lighter main courses. For holiday meals where you’re serving a lighter protein like Lemon Baked Cod Recipe, this brie becomes a perfect substantial appetizer. Conversely, if your main course is heartier, keep the brie as a smaller appetizer option.
Substitutes and Healthy Ingredient Swaps
- Camembert instead of brie. This French cheese is smaller and slightly more pungent than brie. It works beautifully in this recipe and actually comes in a perfect single-serving size. The flavor becomes more complex and earthy. Use the exact same cooking method and timing.
- Turkey bacon for regular bacon. If you’re looking to reduce saturated fat, turkey bacon provides the smoky, salty flavor with less fat. Use the same amount and cooking method, though turkey bacon crisps slightly faster—watch it carefully to avoid overcooking.
- Erythritol or monk fruit sweetener instead of brown sugar. For low-carb or keto gatherings, these sweeteners work perfectly and don’t require any adjustment to the recipe. Use about ¾ tablespoon to match the sweetness of the full tablespoon of brown sugar, as these sweeteners are more potent.
- Shallots instead of onions. If you prefer a more delicate, slightly sweet onion flavor, use 3-4 large shallots sliced thin. They caramelize in about the same time and provide sophisticated flavor.
- Smoked paprika for additional depth. If you want to enhance the smoky notes, add ¼ teaspoon of smoked paprika when you caramelize the onions. This adds complexity without requiring additional ingredients.
- Goat cheese mixed with brie. For tangier flavor, replace 4 ounces of the brie with 4 ounces of soft goat cheese. Blend them together before baking. This creates a more sophisticated, slightly tangy appetizer.
- Prosciutto instead of bacon. For a more elegant presentation, finely chop prosciutto and use the same amount as bacon. Since prosciutto is already cured and ready to eat, you can skip the cooking step and just chop and scatter over the onions.
Make-Ahead Hosting Guide: Your Timeline for Stress-Free Entertaining
One of my core philosophies as a festive gathering specialist is that the best parties happen when the host isn’t stressed. This recipe is incredibly make-ahead friendly, and here’s my detailed timeline:
Up to 3 days before your gathering: Cook your bacon completely and store in an airtight container in the refrigerator. This removes one major stress point from the day-of timeline.
Up to 2 days before: Caramelize your onions and store in an airtight container. You can make a double batch at this point if you’re serving multiple wheels.
Up to 4 hours before guests arrive: Remove your brie from the refrigerator’s dedicated cheese storage (never store cheese in the coldest part of the fridge, as it mutes flavor). Assemble the brie with caramelized onions and bacon on your baking sheet or small skillet. Cover loosely with plastic wrap and refrigerate until baking time.
30 minutes before serving: Preheat your oven to 350 degrees and arrange your crackers and accompanying items on serving boards or platters.
20 minutes before serving: Place your assembled brie in the preheated oven. (Remember, if it’s been in the cold refrigerator, bake for 12-13 minutes instead of the standard 10 minutes.)
10 minutes before serving: Remove the brie from the oven and let it rest for 2 minutes. Arrange it on your serving platter surrounded by accompaniments.
This timeline means you’re spending maybe 30 minutes of actual prep time spread across several days, and only 20 minutes of active work on the day of your gathering. Everything else happens in the oven while you’re greeting guests or finishing other dishes.
Common Mistakes to Avoid
- Baking the brie too long. The most frequent mistake I see is bakers leaving the brie in the oven until it’s completely collapsed and oozing everywhere. You want the brie soft and creamy, not explosive. That 10-minute timer is important—set a phone alert if you need to, especially if you’re juggling multiple oven tasks during hosting.
- Using onions that are too thick. If you slice your onions thicker than ¼-inch, they won’t caramelize evenly. Some pieces will still be crunchy while others burn. Take the 2 extra minutes to slice them uniformly—your final dish will be noticeably better.
- Burning the bacon because you turned your back. Bacon goes from perfectly crispy to burnt incredibly fast, especially once it’s already mostly cooked. Check it every minute once it’s past the halfway point. I learned this lesson the hard way during my first holiday!
- Skipping the cooling step for bacon.. If you try to chop warm bacon, it sticks together and becomes difficult to distribute evenly. Waiting the 5 minutes for cooling isn’t optional—it genuinely improves your final result.
- Serving at the wrong temperature. The brie is best enjoyed warm (not piping hot, which burns your mouth, and not room temperature, which becomes dense). Serve within 15 minutes of removing from the oven, and it stays in that perfect window.
Seasonal Variations for Year-Round Entertaining
While this brie is perfect year-round, I love adapting it to seasonal ingredients. Here are my favorite variations:
Fall gatherings: Add ½ teaspoon of cinnamon or nutmeg to your caramelizing onions about 5 minutes before they’re finished. This creates warmth and nostalgia that pairs beautifully with apple slices and spiced nuts as accompaniments. The seasonality feels immediate and intentional.
Winter holidays: This is the classic version as written. The bacon and cheese feel rich and celebratory, perfect for December gatherings. Add fresh thyme sprigs to the top for a pop of fresh color against the golden onions.
Spring gatherings: Replace half the caramelized onions with fresh, tender spring onions or leeks (gently sautéed rather than caramelized). Add fresh tarragon or dill on top. Serve with fresh spring vegetables and rye crackers. The lightness feels appropriate for the season.
Summer entertaining: Make a lighter version using half the bacon and adding fresh herbs like basil or summer savory to your caramelized onions. Serve with fresh vegetables, corn crackers, and grilled bread. The richness is still there but feels less heavy for warm-weather gatherings.
Brie And Bacon Recipe
Ingredients
Method
- Begin by laying your bacon slices flat in a cold skillet—I prefer cast iron because it distributes heat so evenly, but any large skillet works. Turn the heat to medium and let the bacon cook undisturbed for the first 2-3 minutes. You'll hear it beginning to sizzle, and the fat will start releasing into the pan. Continue cooking for another 5-7 minutes total, turning occasionally, until the bacon is almost crispy but still slightly flexible—you want it cooked through but not so brittle it shatters. The bacon should look deep golden-brown, not burned. When you lift a piece, it should bend slightly without breaking. Transfer the bacon to a paper towel-lined plate and let it cool completely—this takes about 5 minutes and is crucial because warm bacon is too soft to chop uniformly. Once cooled, finely chop the bacon into small, bite-sized pieces. You should have about ½ cup of chopped bacon. This step can be done up to 3 days ahead. Store the cooked bacon in an airtight container in your refrigerator, and it will stay fresh and crispy. You can even reheat it gently in a 300-degree oven for 3-4 minutes if it loses its crispness.

- Now for the step that requires patience but very little active effort: caramelizing the onions. This is where the magic happens, and it's the signature technique I teach in every holiday cooking class I lead. Drain most of the bacon fat from your skillet, leaving about 1 tablespoon to coat the pan. Add your 2 tablespoons of olive oil to bring the total fat to about 3 tablespoons. Turn the heat to medium-low—this is crucial. High heat will burn the onions instead of caramelizing them. Add all your sliced onions to the pan and stir to coat them evenly in the oil. They'll look like way too much onion at first—that's normal. They'll release moisture and reduce significantly as they cook. Let the onions cook undisturbed for about 5 minutes, then give them a good stir. They should already be beginning to soften and turn slightly golden at the edges. Continue cooking, stirring every 5 minutes, for a total of approximately 20 minutes. You're looking for the onions to transform into a deep golden color, becoming very soft and naturally sweet-smelling. About 2 minutes before the caramelization is complete—when the onions are nearly translucent and deeply golden—sprinkle your brown sugar (or erythritol) directly over the onions. Stir well to distribute, and let everything cook together for another 1-2 minutes until the sugar fully dissolves and the onions glisten. At this point, the onions should smell incredibly sweet and savory—like a perfect balance of natural caramelization. Remove them from the heat and let them cool slightly. This step can be completed up to 2 days ahead. Store the caramelized onions in an airtight container in your refrigerator and gently reheat them in a skillet over low heat before assembling.

- Now for the easy part. Remove your brie from the refrigerator about 15 minutes before assembly—this helps it come to closer to room temperature, which means it'll bake more evenly. Place the brie wheel on a baking sheet or small oven-safe skillet. Spoon the caramelized onions directly onto the top of the brie wheel, creating a generous mound in the center. You want to use all of them—don't hold back. The onions will slightly slide down the sides of the brie as it melts, which is exactly what you want. Top the onions with your chopped bacon, distributing it evenly across the surface. Sprinkle with a tiny pinch of sea salt to enhance all the flavors. Make-ahead tip: You can assemble the brie completely up to 4 hours before baking. Cover it loosely with plastic wrap and keep it in the refrigerator. When you're ready to bake, you don't need to bring it to room temperature—just add 2-3 minutes to the baking time.

- Preheat your oven to 350 degrees Fahrenheit. Once preheated, place your assembled brie directly into the oven on the middle rack. Bake for exactly 10 minutes if your brie started at room temperature, or 12-13 minutes if it came straight from the refrigerator. You're looking for the brie to become visibly soft and creamy, with some of the cheese beginning to ooze out around the edges, but the wheel should still maintain its shape overall. Here's the exact visual cue: When you look at the brie, the top should jiggle slightly if you gently nudge the pan, and you should see small rivulets of melted cheese emerging from under the onions. The edges of the wheel might spread slightly, but it shouldn't be completely collapsed. Remove from the oven and let it rest for 2 minutes before serving. This resting period allows the cheese to set just enough that it holds together when people scoop it up, while remaining creamy and spreadable.
- Transfer your baked brie to a serving platter and surround it with your chosen accompaniments—crusty French bread crostini, quality crackers, apple slices, or raw vegetables all work beautifully. Place a small spreading knife or cheese spreader directly on the board next to the brie so guests can easily help themselves. The brie will continue to soften as it sits, so it's best enjoyed within about 15-20 minutes of coming out of the oven. That said, I've found it remains delicious for up to 30 minutes, and it can even be briefly reheated if needed.
Notes
FAQs About Warm Brie with Crispy Bacon and Caramelized Onions
Can I make this recipe if I’m vegetarian?
Absolutely! Simply skip the bacon, and your brie is still absolutely delicious. The caramelized onions provide enough depth and complexity that the dish remains interesting and satisfying. You might add an extra ¼ teaspoon of salt to compensate for the bacon’s salty contribution, and consider a finishing touch of fresh herbs like thyme or rosemary to add another flavor dimension. Some vegetarian friends of mine prefer adding candied nuts or toasted breadcrumbs for textural contrast in place of the bacon.
What size wheel of brie do I need?
A standard round of brie from your cheese counter weighs approximately 8 ounces and serves 4-6 people as an appetizer. For the recipe as written, which calls for 16 ounces, you’ll want a double-sized wheel (sometimes labeled as 2-pound brie). Most quality cheese counters have these available, or you can use two standard 8-ounce wheels side by side on your baking sheet. The cooking time remains the same.
Can I use a brie that’s been in my refrigerator for a while?
Yes, but check the expiration date first. Brie should be consumed by the date listed, and that date matters more than how recently you purchased it. Once the date passes, the cheese can develop harmful bacteria. If your brie is within date but you’re unsure about freshness, give it a smell test—it should smell pleasantly creamy and slightly yeasty, never ammonia-like or off-putting. When in doubt, don’t use it.
Is this appetizer gluten-free?
The brie, bacon, caramelized onions, and seasonings are all naturally gluten-free. However, the accompaniments usually aren’t. Simply serve with gluten-free crackers, fresh vegetables, or gluten-free crostini made from gluten-free bread. Your guests with gluten sensitivity will appreciate you thinking ahead about this accommodation.
Can I bake this in advance and reheat it?
You can, though the texture is freshest when baked right before serving. If you need to bake in advance, bake according to instructions and let it cool completely, then cover and refrigerate for up to 2 days. To reheat, place it in a 300-degree oven for 4-5 minutes until warmed through and creamy again. The reheated version is still delicious and works beautifully for gatherings where timing is tight.
More Recipes You’ll Love
- this simple cake – A festive dessert that pairs beautifully after serving this savory appetizer, with warm spices that echo the caramelized onions.
- Barbecue Potatoes Recipe – A hearty side dish that works well alongside your warm brie for casual entertaining or holiday potlucks.
- Banana Pie Recipe With Pudding – The perfect lighter dessert option to balance the richness of the brie appetizer at your gathering.
I genuinely hope this warm brie with crispy bacon and caramelized onions becomes a staple in your gathering traditions—the way it’s become a staple in mine