Ingredients
Method
Step 1: Render the Bacon Until Perfectly Crispy
- Begin by laying your bacon slices flat in a cold skillet—I prefer cast iron because it distributes heat so evenly, but any large skillet works. Turn the heat to medium and let the bacon cook undisturbed for the first 2-3 minutes. You'll hear it beginning to sizzle, and the fat will start releasing into the pan. Continue cooking for another 5-7 minutes total, turning occasionally, until the bacon is almost crispy but still slightly flexible—you want it cooked through but not so brittle it shatters. The bacon should look deep golden-brown, not burned. When you lift a piece, it should bend slightly without breaking. Transfer the bacon to a paper towel-lined plate and let it cool completely—this takes about 5 minutes and is crucial because warm bacon is too soft to chop uniformly. Once cooled, finely chop the bacon into small, bite-sized pieces. You should have about ½ cup of chopped bacon. This step can be done up to 3 days ahead. Store the cooked bacon in an airtight container in your refrigerator, and it will stay fresh and crispy. You can even reheat it gently in a 300-degree oven for 3-4 minutes if it loses its crispness.

Step 2: Caramelize the Onions Until Golden and Sweet
- Now for the step that requires patience but very little active effort: caramelizing the onions. This is where the magic happens, and it's the signature technique I teach in every holiday cooking class I lead. Drain most of the bacon fat from your skillet, leaving about 1 tablespoon to coat the pan. Add your 2 tablespoons of olive oil to bring the total fat to about 3 tablespoons. Turn the heat to medium-low—this is crucial. High heat will burn the onions instead of caramelizing them. Add all your sliced onions to the pan and stir to coat them evenly in the oil. They'll look like way too much onion at first—that's normal. They'll release moisture and reduce significantly as they cook. Let the onions cook undisturbed for about 5 minutes, then give them a good stir. They should already be beginning to soften and turn slightly golden at the edges. Continue cooking, stirring every 5 minutes, for a total of approximately 20 minutes. You're looking for the onions to transform into a deep golden color, becoming very soft and naturally sweet-smelling. About 2 minutes before the caramelization is complete—when the onions are nearly translucent and deeply golden—sprinkle your brown sugar (or erythritol) directly over the onions. Stir well to distribute, and let everything cook together for another 1-2 minutes until the sugar fully dissolves and the onions glisten. At this point, the onions should smell incredibly sweet and savory—like a perfect balance of natural caramelization. Remove them from the heat and let them cool slightly. This step can be completed up to 2 days ahead. Store the caramelized onions in an airtight container in your refrigerator and gently reheat them in a skillet over low heat before assembling.

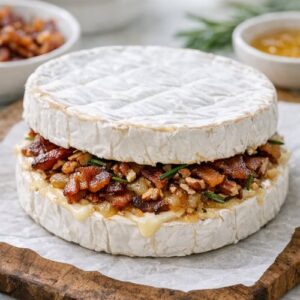
Step 3: Assemble the Brie
- Now for the easy part. Remove your brie from the refrigerator about 15 minutes before assembly—this helps it come to closer to room temperature, which means it'll bake more evenly. Place the brie wheel on a baking sheet or small oven-safe skillet. Spoon the caramelized onions directly onto the top of the brie wheel, creating a generous mound in the center. You want to use all of them—don't hold back. The onions will slightly slide down the sides of the brie as it melts, which is exactly what you want. Top the onions with your chopped bacon, distributing it evenly across the surface. Sprinkle with a tiny pinch of sea salt to enhance all the flavors. Make-ahead tip: You can assemble the brie completely up to 4 hours before baking. Cover it loosely with plastic wrap and keep it in the refrigerator. When you're ready to bake, you don't need to bring it to room temperature—just add 2-3 minutes to the baking time.
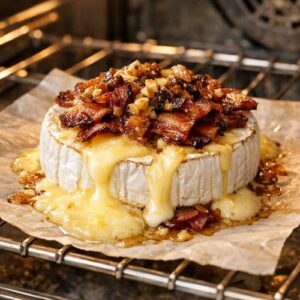
Step 4: Bake Until Melting and Oozing
- Preheat your oven to 350 degrees Fahrenheit. Once preheated, place your assembled brie directly into the oven on the middle rack. Bake for exactly 10 minutes if your brie started at room temperature, or 12-13 minutes if it came straight from the refrigerator. You're looking for the brie to become visibly soft and creamy, with some of the cheese beginning to ooze out around the edges, but the wheel should still maintain its shape overall. Here's the exact visual cue: When you look at the brie, the top should jiggle slightly if you gently nudge the pan, and you should see small rivulets of melted cheese emerging from under the onions. The edges of the wheel might spread slightly, but it shouldn't be completely collapsed. Remove from the oven and let it rest for 2 minutes before serving. This resting period allows the cheese to set just enough that it holds together when people scoop it up, while remaining creamy and spreadable.
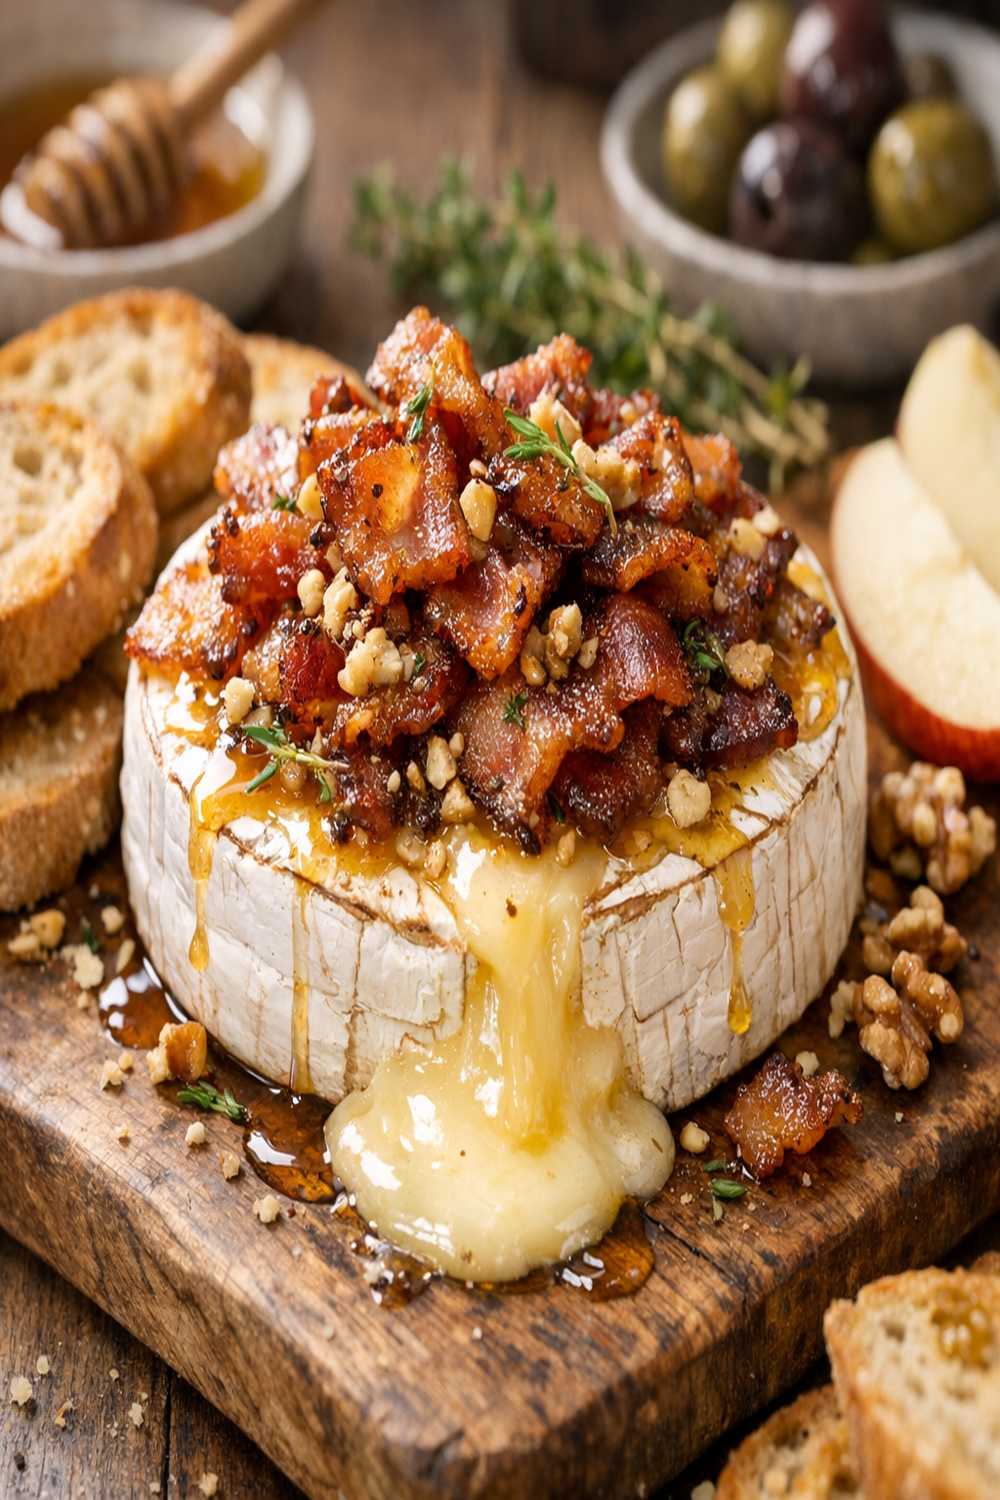
Step 5: Serve Immediately for Best Experience
- Transfer your baked brie to a serving platter and surround it with your chosen accompaniments—crusty French bread crostini, quality crackers, apple slices, or raw vegetables all work beautifully. Place a small spreading knife or cheese spreader directly on the board next to the brie so guests can easily help themselves. The brie will continue to soften as it sits, so it's best enjoyed within about 15-20 minutes of coming out of the oven. That said, I've found it remains delicious for up to 30 minutes, and it can even be briefly reheated if needed.
Notes
- Choose quality brie. Look for brie that feels slightly soft when gently pressed (not rock-hard), with a white rind that doesn't have any dark spots or cracks. This indicates good freshness and proper ripeness. A wheel that's too young won't melt smoothly; one that's too old might separate.
- Don't rush the onions. Low and slow is the only way to caramelize onions properly. Turning up the heat saves time but creates burned onions instead of sweet ones. In my experience, the 20 minutes is non-negotiable for that deep, complex sweetness.
- Prep bacon in bulk. If you're making multiple wheels of brie for a large gathering, cook all your bacon at once and store it. This saves last-minute cooking stress and keeps your kitchen less hectic during the critical hosting hours.
- Use a small skillet as your baking vessel. Rather than transferring the assembled brie to a baking sheet, you can assemble it directly in a small cast iron skillet. This keeps everything contained and looks beautiful when brought straight to the table.
- Layer your toppings strategically. Put the onions on first, then the bacon on top. This order matters because it keeps the bacon from getting too soft from the melting cheese, preserving that crucial crispy texture.
- Customize the sweetness. If you prefer less sweetness, reduce the brown sugar to ½ tablespoon or omit it entirely—the caramelized onions already develop natural sweetness through the cooking process. If you want more pronounced sweetness (which works beautifully with the smoky bacon), add up to 1½ tablespoons.