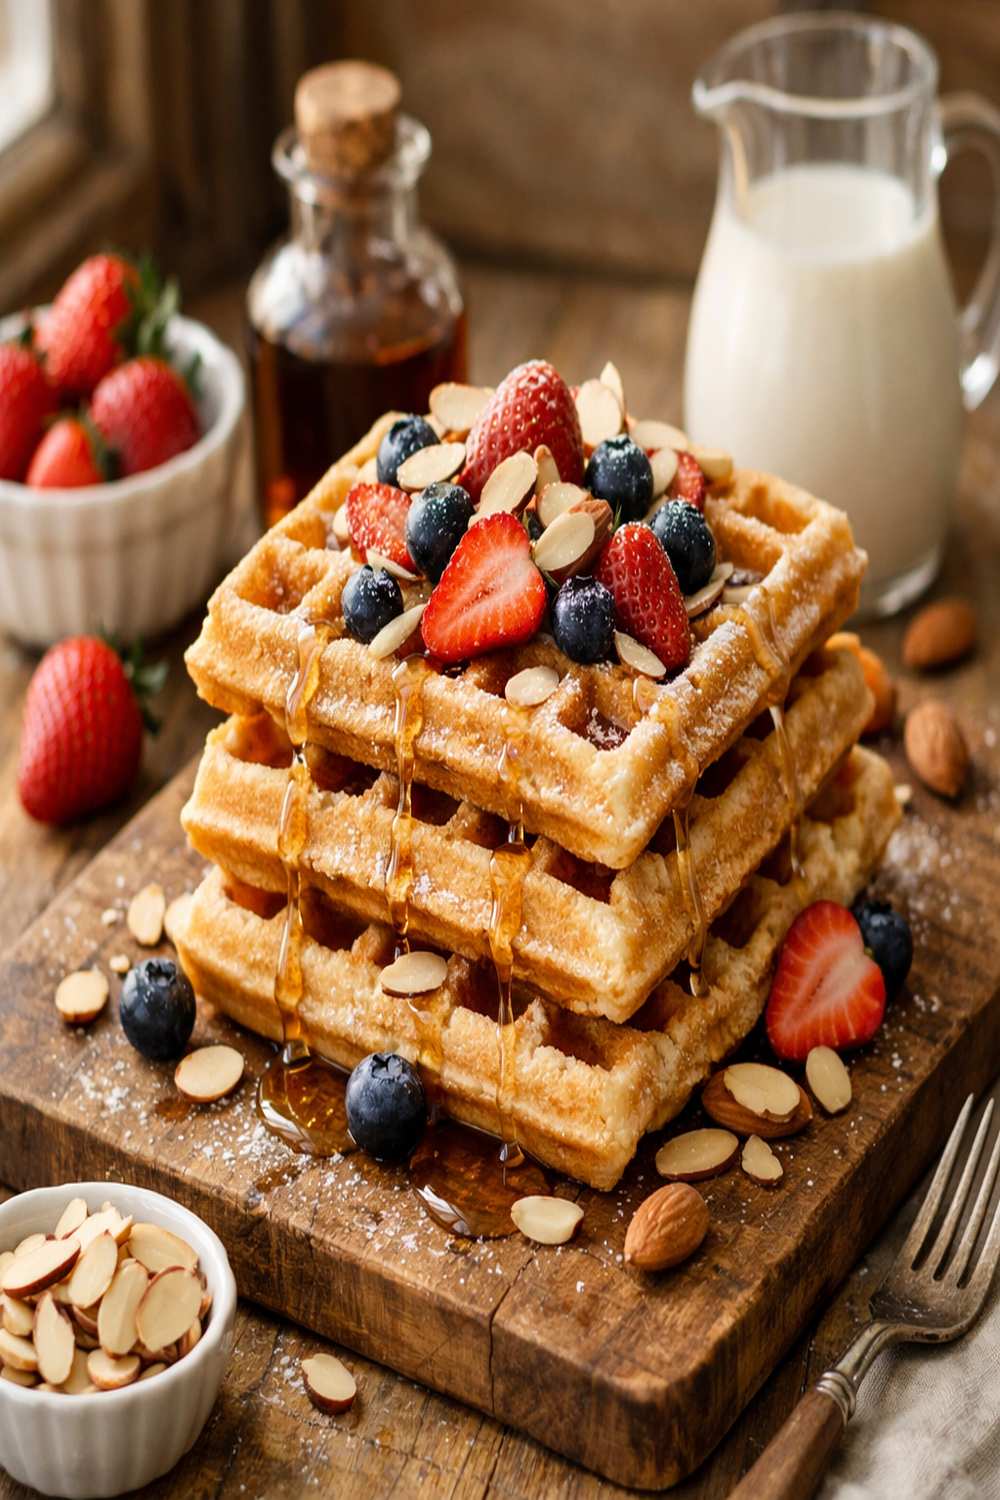
Almond Milk Waffle Recipe

This post contains affiliate links. As an Amazon Associate I earn from qualifying purchases.
There’s something magical about gathering around a waffle iron on a holiday morning. The anticipation, the aroma of vanilla and toasted batter, the way everyone gravitates toward the kitchen without being asked—it’s pure joy. I’ve served these almond milk waffles at countless family breakfasts and friendsgivings over the years, and they’ve become one of my most requested recipes. They’re naturally dairy-free, beautifully inclusive for guests with various dietary needs, and the homemade strawberry sauce brings that touch of elegance without the stress. If you’re looking for other morning treats that share that same festive spirit, I also love pairing these waffles with banana pancakes for toddler when the littlest guests are at the table.
Why Almond Milk Waffles Became My Holiday Breakfast Staple
I remember the first time I made these waffles—it was a snowy December morning, and my sister had just mentioned she was cutting out dairy for a few weeks. Instead of complicated substitutions or feeling like I was making “special diet food,” I grabbed my almond milk from the pantry and realized something beautiful: this recipe didn’t need dairy to be incredible. It just needed intention and good technique.
That morning, as my family bit into those crispy-on-the-outside, fluffy-on-the-inside waffles, my mom said something I’ll never forget: “These taste like celebration.” That’s when I understood the real power of inclusive cooking. When everyone at the table can eat the same thing without compromise, that’s when the magic happens.
What Is an Almond Milk Waffle?
An almond milk waffle is a plant-based variation on the classic breakfast favorite, using unsweetened or lightly sweetened almond milk instead of traditional dairy. The result? A waffle that’s remarkably tender, delicately crispy at the edges, and naturally lighter than conventional versions. In my nutrition practice, I’ve found that almond milk creates a different crumb structure than dairy milk—it’s less dense, which means your waffles have that desirable airiness without any heaviness.
The origin of using plant-based milks in baking really took off in the early 2000s, but the technique has roots in traditional vegan baking methods. What makes this recipe special is that it doesn’t taste like you’re missing anything. The vanilla extract and quality ingredients do the heavy lifting, creating waffles that even dairy-devoted guests will devour. I’ve served these at holiday tables for over a decade, and the conversation is never about what’s missing—it’s about seconds.
Why You’ll Love This Almond Milk Waffle Recipe
- Truly inclusive for all dietary needs – Dairy-free, naturally vegan-friendly (with an egg substitute), and allergen-conscious without feeling restrictive. Everyone at your gathering eats the same beautiful breakfast.
- Budget-friendly and pantry-staple friendly – Most of these ingredients are already in your kitchen. Almond milk is significantly less expensive than specialty plant-based products, and you likely have all-purpose flour, sugar, and eggs on hand.
- Crispy exterior with fluffy interior – The canola oil creates that golden, crispy edge while the almond milk keeps the inside tender and light. It’s textural perfection.
- Make-ahead friendly for stress-free hosting – You can prepare the batter the night before and cook waffles to order in the morning, or bake them ahead and reheat before serving.
- The homemade strawberry sauce elevates everything – No corn syrup, no artificial ingredients—just real fruit, a touch of sugar, and bright lemon juice that makes people feel genuinely cared for.
- Naturally lighter than traditional waffles – Almond milk contains about 30-40 calories per cup compared to whole dairy milk at 150 calories, making this a nutritionally smarter choice without sacrificing satisfaction.
The Ingredients
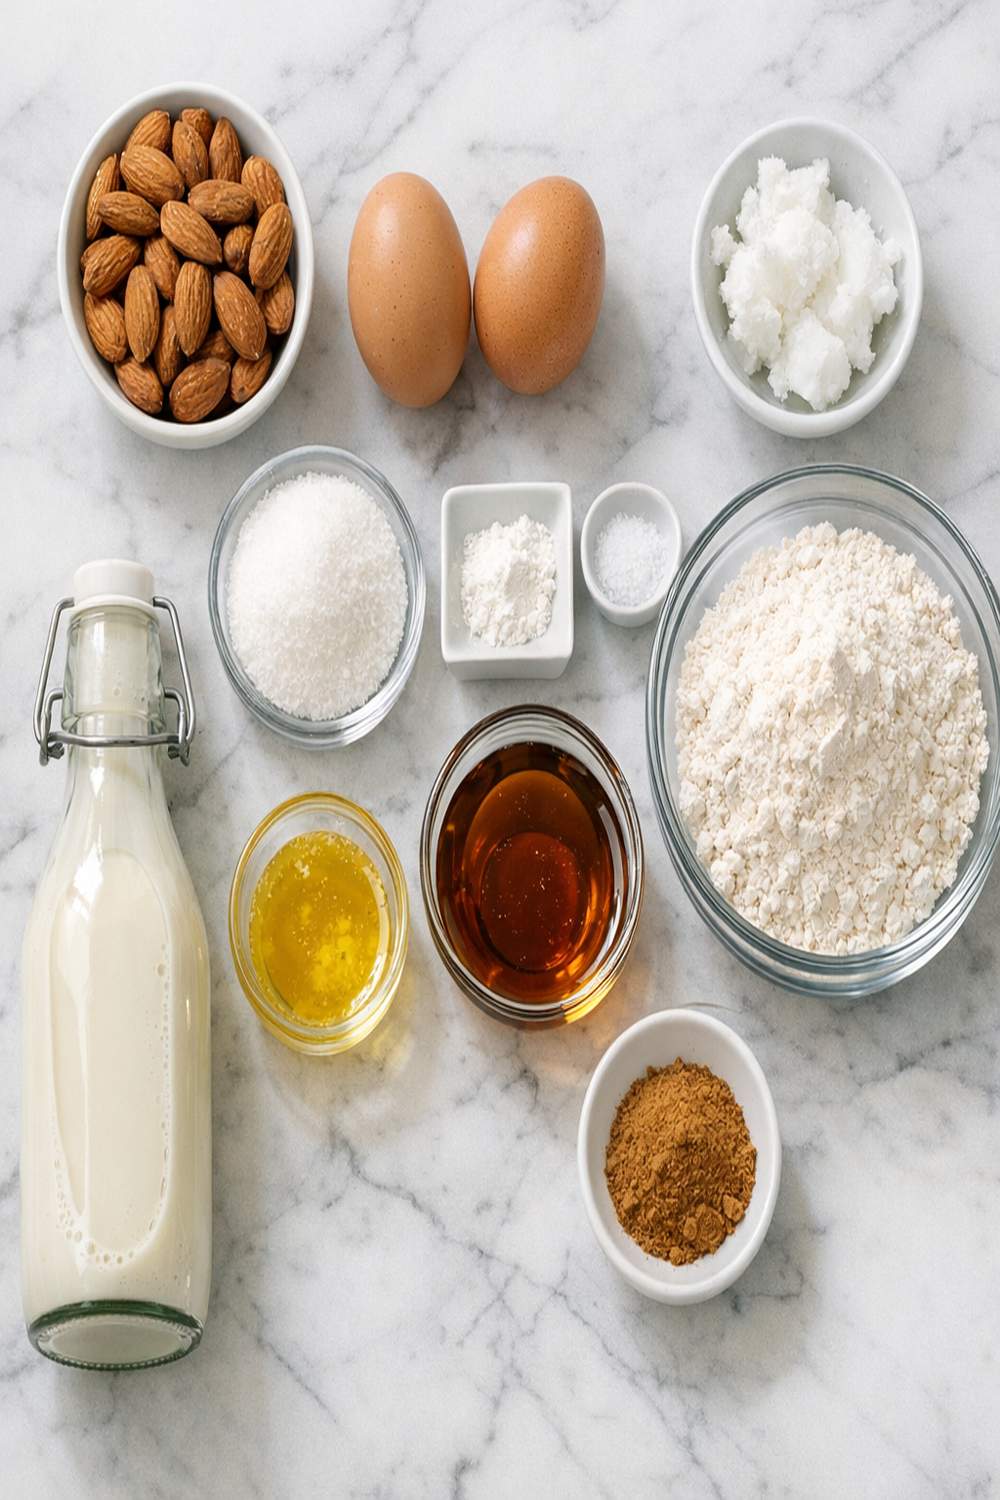
I’ve organized these ingredients into two simple sections: your base waffle batter and the vibrant strawberry topping. Each ingredient serves a specific purpose, and I’ll explain the why behind each choice. This recipe makes approximately 8 to 10 individual waffles, depending on your waffle iron size.
For the Waffles
- 2 large eggs (room temperature for best incorporation)
- 2 tablespoons granulated sugar (adds slight sweetness without overwhelming)
- 1 tablespoon baking powder (fresh, not expired—it’s your leavening power)
- 6 tablespoons canola oil (creates that crispy exterior and tender crumb)
- 1 teaspoon pure vanilla extract (not imitation—it makes a real difference)
- 1¾ cups all-purpose flour (spooned and leveled, not packed—this prevents dense waffles)
- ½ teaspoon ground cinnamon (optional but recommended for festive warmth)
- ¼ teaspoon coarse sea salt (enhances all flavors and balances sweetness)
- 1½ cups unsweetened almond milk (or lightly sweetened if you prefer)
For the Strawberry Sauce
- ¼ cup granulated sugar (balances the tart berry flavor)
- 1 pound frozen strawberries (thawed in the refrigerator, still slightly cold)
- 2 tablespoons cold water (helps cornstarch dissolve smoothly)
- 2 tablespoons cornstarch (creates silky, thickened consistency)
- 2 tablespoons fresh lemon juice (brightens and prevents overly sweet sauce)
How to Make Almond Milk Waffles?
I’m going to walk you through this process step by step, and I promise it’s simpler than it sounds. The key is understanding the order of operations and not overthinking the batter. Let’s create something beautiful together.
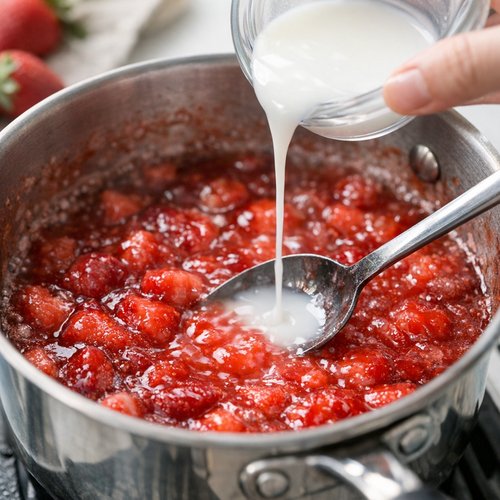
Step 1: Prepare Your Strawberry Sauce First
Start with the sauce because it needs time to cool slightly and thicken beautifully. In a medium saucepan over medium heat, combine your thawed strawberries, sugar, and fresh lemon juice. Stir gently and let the mixture heat for about 3 to 4 minutes. You’ll notice the strawberries beginning to soften and release their natural juices, creating a gorgeous ruby liquid. The kitchen will smell absolutely incredible—that’s your sign you’re on the right track.
While the strawberries are warming, whisk together the cornstarch and cold water in a small bowl until you have a smooth slurry with no lumps. This is important because lumpy cornstarch creates texture problems. Once your strawberry mixture is actively releasing juice and the berries are beginning to break down, pour in your cornstarch mixture while stirring constantly. The sauce will go from thin to beautifully thickened within 1 to 2 minutes. You want it to coat the back of a spoon when it’s ready. Remove from heat and set aside—it will continue thickening as it cools.
Step 2: Preheat Your Waffle Iron
While your sauce cools, plug in your waffle iron and let it fully preheat. This step is non-negotiable for crispy waffles. Different waffle irons have different indicators—some beep, some show a light that turns off, some have a specific temperature gauge. Consult your machine’s manual and give it a full 3 to 5 minutes to reach temperature. A properly preheated iron is the difference between limp waffles and the crispy-edged ones you’re dreaming about.
Pro tip: Once it indicates it’s ready, test it with a tiny drop of batter. If it sizzles immediately, you’re golden. If it sits there silently, give it another minute or two.

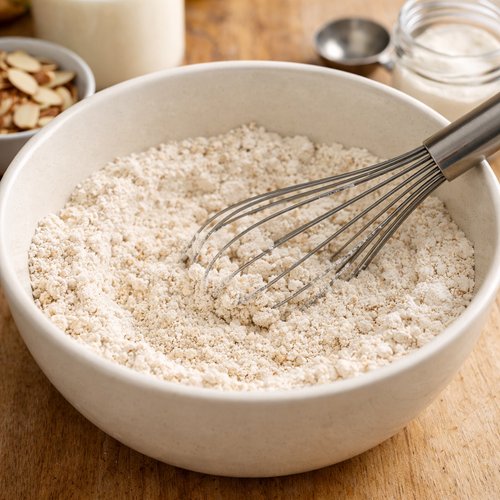
Step 3: Combine Your Dry Ingredients
In a large mixing bowl, whisk together your flour, baking powder, sugar, coarse salt, and cinnamon (if using). Whisk for about 15 to 20 seconds to break up any lumps in the baking powder and distribute everything evenly. This prevents pockets of baking powder in your finished waffles, which would create bitter-tasting spots. I use a simple wire whisk for this because it’s the most effective tool—it aerates slightly while combining.
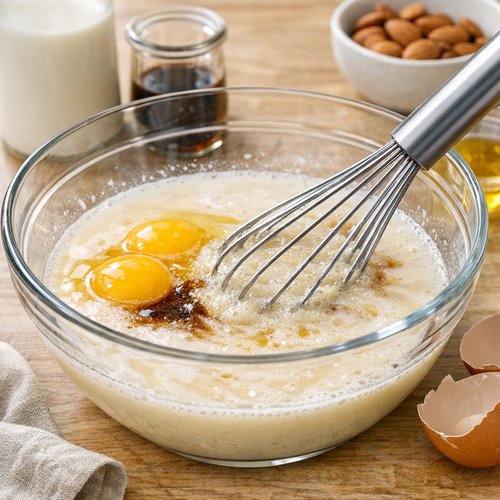
Step 4: Create Your Wet Mixture
In a separate bowl, combine your almond milk, canola oil, eggs, and vanilla extract. Whisk these together until thoroughly combined and the mixture is smooth. This takes about 30 seconds of vigorous whisking. The emulsion of oil and milk is important here—you want them blended, not separated.
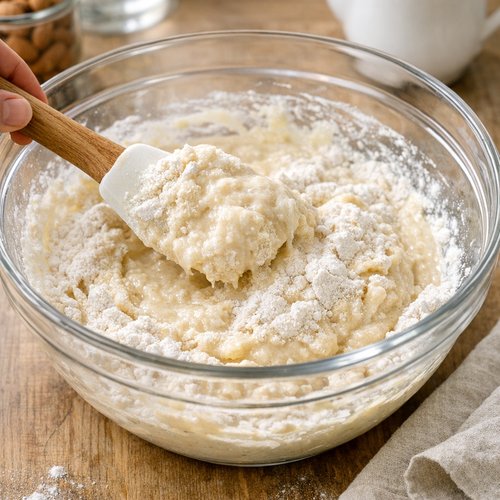
Step 5: Combine Wet and Dry (Gently!)
Pour your wet ingredients into your dry ingredients and whisk gently until just combined. This is the moment where less is more. You want to stir until you don’t see dry flour anymore, but stop immediately when that happens. Some small lumps are absolutely fine and actually desirable—they create pockets of tenderness in your finished waffles. Overmixing develops the gluten too much, making waffles tough and dense. I typically whisk for about 20 to 30 seconds total. The batter should be slightly thicker than pancake batter but pourable.
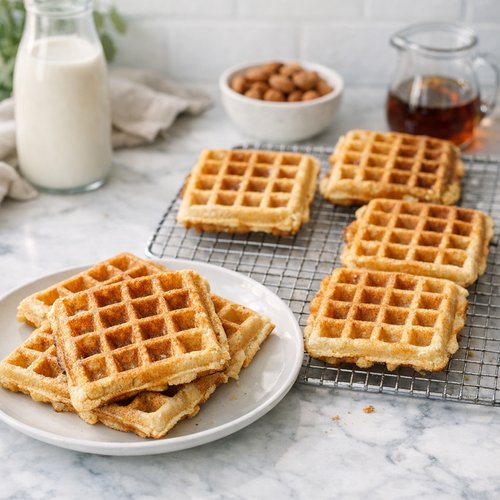
Step 6: Cook Your Waffles to Perfection
This is where the magic happens. Lightly brush or spray your preheated waffle iron with cooking spray (even if it’s nonstick, this helps immensely). Pour approximately ½ cup of batter into the center of your iron, depending on your machine’s size. Some irons are smaller and need ⅓ cup; some are larger and take ¾ cup. You’ll learn your machine’s preference after the first waffle.
Close the lid gently and resist the urge to peek. Do not open the waffle iron while cooking—this lets steam escape and breaks the cooking process. Most waffles are done in 4 to 6 minutes, when your machine beeps or the steam stops escaping. When you hear the signal, look through the sides if possible. Your waffle should be golden brown and not steaming much anymore.
Here’s my professional tip: If the waffle doesn’t look quite crispy enough when it first signals done, give it another 30 to 60 seconds. The extra time creates that coveted crispy exterior without overcooking the inside. Remove the waffle carefully with a fork (not metal tongs, which can tear it), and transfer to a plate or cooling rack.
Repeat with remaining batter. You should have 8 to 10 waffles depending on portion size. If you’re cooking ahead for a gathering, transfer cooked waffles to a cooling rack rather than stacking them, which traps steam and makes them soggy.
Step 7: Serve with Warmth and Joy
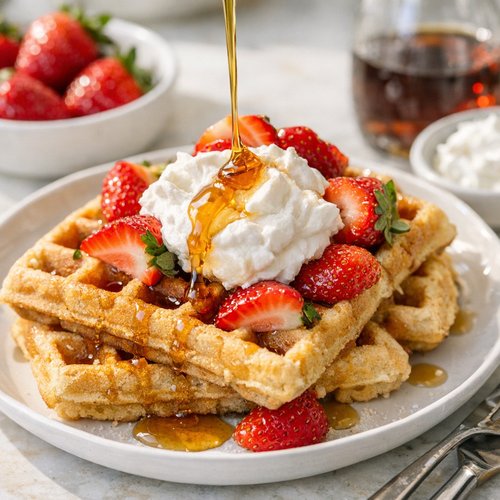
Arrange your waffles on plates and top generously with your homemade strawberry sauce. A drizzle of pure maple syrup, a dollop of coconut whipped cream, or fresh whipped cream (if your guests eat dairy) all work beautifully. Fresh strawberries scattered on top add a beautiful finishing touch. Serve immediately while waffles are still warm—this is when they’re at their absolute best.
Make-Ahead Guide: Hosting Without Stress
One of my favorite things about this recipe is how accommodating it is to advance preparation. As someone who’s hosted dozens of holiday breakfasts, I’ve learned that the difference between a relaxed morning and a chaotic one often comes down to what you can prepare ahead.
The night before: Mix your dry ingredients in a bowl, cover with a kitchen towel, and leave on the counter. Mix your wet ingredients in a separate bowl, cover, and refrigerate. The batter will keep for up to 24 hours. Just stir gently before using—you may need to add an extra splash of almond milk if it’s thickened slightly.
Earlier in the day: Prepare your strawberry sauce completely. It actually tastes better after a few hours as the flavors meld. Store in an airtight container in the refrigerator for up to 3 days. Reheat gently over low heat just before serving, adding a splash of water if it’s too thick.
The morning of: If you want warm waffles for everyone simultaneously, here’s my strategy: cook all waffles about 15 minutes before serving, then arrange them on a baking sheet in a single layer. Place in a 200°F oven for up to 15 minutes to keep warm without drying out. This is perfect for gathering everyone at the table at the same time.
After cooking: Leftover waffles can be stored in an airtight container in the refrigerator for up to 4 days or frozen for up to 2 months. Reheat in a toaster or toaster oven until warm and crispy again.
Tips and Tricks
- Use fresh baking powder – Old baking powder loses potency. If your baking powder is more than a year old, buy a fresh box. This is the most common reason waffles turn out dense.
- Room temperature eggs matter – Cold eggs don’t incorporate as smoothly into the batter. Remove eggs from the refrigerator 15 minutes before cooking, or place them in warm water for 5 minutes.
- Don’t skip the oil – The 6 tablespoons of canola oil creates that crispy exterior. Substituting with less oil results in dense, pale waffles. Trust the recipe.
- Invest in a quality waffle iron – A machine that maintains consistent temperature throughout cooking creates dramatically better results. This doesn’t need to be expensive—even a $30-40 iron performs better than a very old one.
- Sift your flour if possible – Sifted flour incorporates more air and creates lighter waffles. If you don’t have a sifter, whisk your flour vigorously before measuring.
- Make the strawberry sauce in the morning – While it keeps for days, freshly made sauce has brighter flavor and better texture. Plus, your kitchen will smell absolutely divine.
- Top waffles immediately – Warm waffles absorb toppings better and create more cohesive bites. Cold waffles with cold toppings feel less luxurious.
Common Mistakes to Avoid
Mistake 1: Overmixing the batter. I see this constantly with home cooks who want to eliminate every lump. That creates tough, dense waffles with a rubbery texture. Mix just until combined—small lumps are your friend.
Mistake 2: Opening the waffle iron too early. I know the anticipation is real, but steam needs to stay inside to cook the interior properly. Resist that urge to peek until you see your machine’s signal.
Mistake 3: Using sweetened almond milk. This adds unexpected sugar and can make waffles taste cloying. Unsweetened almond milk gives you control over sweetness level and results in more refined flavor.
Mistake 4: Skipping the strawberry sauce thickening step. Cornstarch is crucial here. Without it, you have pretty fruit soup rather than a cohesive topping. Don’t skip the slurry step.
Seasonal Variations
One of the joys of this recipe is how beautifully it adapts to seasonal ingredients and flavors. This is where your festive entertaining becomes even more special.
Spring: Replace the strawberry sauce with fresh raspberries or blueberries prepared the same way. Add a touch of lemon zest to the batter. Spring celebrations feel lighter and brighter with these variations.
Summer: Make a quick peach compote using the same technique as the strawberry sauce. Summer gatherings benefit from that warm-spice comfort, so keep the cinnamon in the waffle batter and maybe add ¼ teaspoon of nutmeg.
Fall: Add ½ teaspoon of ground cinnamon, ¼ teaspoon of nutmeg, and a pinch of cloves to your batter. Replace the strawberry sauce with spiced apple compote. This version feels like autumn on a plate.
Winter: This is where the original recipe shines. Keep the cinnamon, add fresh ginger (¼ teaspoon, finely minced), and serve with cranberry sauce or a pomegranate-berry compote. Winter entertaining feels warm and intentional with these additions.
Expert’s Nutritional Insight
As a registered dietitian, I want to share what I’ve learned about almond milk’s role in baking that goes beyond simple substitution. Almond milk contains less protein than dairy milk (about 1 gram per cup compared to 8 grams in dairy), which actually benefits waffle texture. Higher protein can create tougher baked goods, while almond milk’s lower protein allows for that tender interior we’re seeking.
Additionally, almond milk has virtually no naturally occurring calcium, but most brands are fortified to match or exceed dairy milk’s calcium content. Check your label to ensure you’re choosing a fortified version. The fat content in almond milk is also significantly lower than dairy—about 2.5 grams per cup compared to 7-8 grams in whole milk. This means these waffles are lighter while still achieving great texture thanks to the canola oil in the recipe.
The strawberry sauce is nutrient-dense in ways many commercial syrups aren’t. Strawberries are excellent sources of vitamin C and fiber, and when you make your own sauce, you’re avoiding corn syrup and artificial additives entirely. A quarter-cup of homemade strawberry sauce contains approximately 30-40 calories and almost 6 grams of natural sugar, compared to traditional maple syrup at 52 calories and 13 grams of sugar per serving.
Can I Store Almond Milk Waffles?
Yes! These waffles store beautifully, which is one reason they’re perfect for entertaining. Refrigerator storage: Place cooled waffles in an airtight container for up to 4 days. Reheat in a toaster or toaster oven at 350°F for 5-7 minutes to restore crispiness.
Freezer storage: Cool waffles completely, then arrange in a single layer on a baking sheet and freeze for 2 hours until solid. Transfer to a freezer bag or container for up to 2 months. Reheat directly from frozen in a toaster or toaster oven—no thawing needed. They’ll be ready to eat in about 8-10 minutes.
Strawberry sauce storage: Keep in an airtight container in the refrigerator for up to 3 days. It doesn’t freeze as well as the waffles because the texture becomes grainy when thawed, but refrigerated sauce is perfect for meal prep throughout the week.
Nutrition Information
According to USDA nutritional data, one waffle (using ½ cup batter) with approximately 2-3 tablespoons of strawberry sauce contains approximately 245 calories, 8 grams of fat, 37 grams of carbohydrates (including 2 grams of fiber from the strawberries), and 4 grams of protein. The waffles alone, without sauce, contain approximately 185 calories per waffle.
These numbers make almond milk waffles a reasonable breakfast choice even when you’re mindful of calories. The combination of complex carbohydrates from whole grains and the natural sugars and fiber from strawberries provides sustained energy. Pair with a protein source like Greek yogurt or eggs for a more balanced meal that keeps you satisfied longer.
If you’re watching sodium, note that baking powder adds approximately 240 mg of sodium per waffle. Those with sodium restrictions can reduce baking powder slightly to ¾ tablespoon, though this will result in slightly less rise.
What Can I Serve With Almond Milk Waffles?
These waffles are beautifully versatile breakfast centerpieces. The homemade strawberry sauce is the star, but there are so many complementary accompaniments that make your gathering feel more intentional. I often serve these alongside simple protein options and fresh fruit to create a complete breakfast spread.
- Greek yogurt and granola – For those who want something more substantial, a dollop of creamy Greek yogurt and a sprinkle of granola adds protein and satisfying crunch.
- Fresh whipped cream – A generous dollop of freshly whipped cream (or coconut whipped cream for dairy-free guests) feels luxurious and celebratory.
- Pure maple syrup – I still love traditional maple syrup alongside the strawberry sauce, letting guests choose or combine toppings.
- Fresh fruit medley – Arrange sliced strawberries, blueberries, raspberries, and kiwi on the plate alongside waffles for color and nutrition.
- Almond butter or peanut butter – A smear of nut butter adds richness and protein that keeps guests satisfied through morning activities.
- Honey or agave nectar – A light drizzle over warm waffles feels elegant and offers natural sweetness.
- Cinnamon sugar topping – A simple mix of sugar and cinnamon sprinkled on top while waffles are warm adds warmth and a festive touch.
For festive gatherings, I love creating a waffle bar where guests customize their plates. Set out your waffles, strawberry sauce, 2-3 additional toppings, and let people assemble their perfect breakfast. This approach is budget-friendly (you control portions), inclusive (guests with different preferences find something they love), and feels special without requiring you to cook to order.
Speaking of complementary recipes, if you’re planning a bigger breakfast spread, consider pairing these waffles with banana pie with pudding for a dessert-forward brunch, or keep things breakfast-focused with banana pancakes for the younger guests who might want variety.
Substitutes and Ingredient Swaps
- Oat milk instead of almond milk – Oat milk creates slightly denser, more tender waffles with a richer flavor. Use the same amount. The texture will be marginally different but equally delicious.
- Coconut oil instead of canola oil – This creates slightly crispy waffles with a subtle coconut undertone. Use refined coconut oil if you don’t want coconut flavor. Measure the same amount.
- Whole wheat flour for part of the all-purpose flour – Substitute up to ½ cup of the all-purpose flour with whole wheat flour for nuttier flavor and added fiber. Waffles may be slightly denser.
- Honey or maple syrup instead of sugar – You can replace the 2 tablespoons of sugar with 1½ tablespoons of honey or maple syrup. This adds complexity but may make batter slightly more liquid.
- Almond extract instead of vanilla – Use ½ teaspoon of almond extract for nuttier flavor. Almond extract is more concentrated, so use less.
- Fresh strawberries instead of frozen for sauce – You can use 1 pound of fresh strawberries, hulled and halved. Cook for an additional 2-3 minutes to fully release juices.
- Raspberry or blackberry sauce – Prepare exactly like the strawberry sauce. Raspberries may need slightly more cornstarch as they’re more delicate.
- Flax eggs for vegan waffles – Mix 2 tablespoons of ground flaxseed with 6 tablespoons of water and let sit for 15 minutes before adding to batter. This creates slightly denser waffles.
Almond Milk Waffle Recipe
Ingredients
Method
- Start with the sauce because it needs time to cool slightly and thicken beautifully. In a medium saucepan over medium heat, combine your thawed strawberries, sugar, and fresh lemon juice. Stir gently and let the mixture heat for about 3 to 4 minutes. You'll notice the strawberries beginning to soften and release their natural juices, creating a gorgeous ruby liquid. The kitchen will smell absolutely incredible—that's your sign you're on the right track. While the strawberries are warming, whisk together the cornstarch and cold water in a small bowl until you have a smooth slurry with no lumps. This is important because lumpy cornstarch creates texture problems. Once your strawberry mixture is actively releasing juice and the berries are beginning to break down, pour in your cornstarch mixture while stirring constantly. The sauce will go from thin to beautifully thickened within 1 to 2 minutes. You want it to coat the back of a spoon when it's ready. Remove from heat and set aside—it will continue thickening as it cools.
- While your sauce cools, plug in your waffle iron and let it fully preheat. This step is non-negotiable for crispy waffles. Different waffle irons have different indicators—some beep, some show a light that turns off, some have a specific temperature gauge. Consult your machine's manual and give it a full 3 to 5 minutes to reach temperature. A properly preheated iron is the difference between limp waffles and the crispy-edged ones you're dreaming about. Pro tip: Once it indicates it's ready, test it with a tiny drop of batter. If it sizzles immediately, you're golden. If it sits there silently, give it another minute or two.
- In a large mixing bowl, whisk together your flour, baking powder, sugar, coarse salt, and cinnamon (if using). Whisk for about 15 to 20 seconds to break up any lumps in the baking powder and distribute everything evenly. This prevents pockets of baking powder in your finished waffles, which would create bitter-tasting spots. I use a simple wire whisk for this because it's the most effective tool—it aerates slightly while combining.
- In a separate bowl, combine your almond milk, canola oil, eggs, and vanilla extract. Whisk these together until thoroughly combined and the mixture is smooth. This takes about 30 seconds of vigorous whisking. The emulsion of oil and milk is important here—you want them blended, not separated.
- Pour your wet ingredients into your dry ingredients and whisk gently until just combined. This is the moment where less is more. You want to stir until you don't see dry flour anymore, but stop immediately when that happens. Some small lumps are absolutely fine and actually desirable—they create pockets of tenderness in your finished waffles. Overmixing develops the gluten too much, making waffles tough and dense. I typically whisk for about 20 to 30 seconds total. The batter should be slightly thicker than pancake batter but pourable.
- This is where the magic happens. Lightly brush or spray your preheated waffle iron with cooking spray (even if it's nonstick, this helps immensely). Pour approximately ½ cup of batter into the center of your iron, depending on your machine's size. Some irons are smaller and need ⅓ cup; some are larger and take ¾ cup. You'll learn your machine's preference after the first waffle. Close the lid gently and resist the urge to peek. Do not open the waffle iron while cooking—this lets steam escape and breaks the cooking process. Most waffles are done in 4 to 6 minutes, when your machine beeps or the steam stops escaping. When you hear the signal, look through the sides if possible. Your waffle should be golden brown and not steaming much anymore. Here's my professional tip: If the waffle doesn't look quite crispy enough when it first signals done, give it another 30 to 60 seconds. The extra time creates that coveted crispy exterior without overcooking the inside. Remove the waffle carefully with a fork (not metal tongs, which can tear it), and transfer to a plate or cooling rack. Repeat with remaining batter. You should have 8 to 10 waffles depending on portion size. If you're cooking ahead for a gathering, transfer cooked waffles to a cooling rack rather than stacking them, which traps steam and makes them soggy.
- Arrange your waffles on plates and top generously with your homemade strawberry sauce. A drizzle of pure maple syrup, a dollop of coconut whipped cream, or fresh whipped cream (if your guests eat dairy) all work beautifully. Fresh strawberries scattered on top add a beautiful finishing touch. Serve immediately while waffles are still warm—this is when they're at their absolute best.
Notes
FAQs
Can I make the batter ahead of time?
Absolutely! This is one of my favorite features of the recipe. You can mix the dry ingredients the evening before and store in an airtight container. Mix the wet ingredients separately and refrigerate. The next morning, combine them just before cooking. The batter keeps for up to 24 hours in the refrigerator. You may need to add an extra splash of almond milk before cooking if the batter has thickened slightly.
Why did my waffles turn out dense and pale?
This usually indicates one of three issues: expired baking powder (which loses potency after about a year), mixing the batter too much (which develops gluten), or a waffle iron that wasn’t fully preheated. Fresh baking powder, gentle mixing, and allowing your waffle iron to fully heat will solve this problem. Also ensure you’re using the full 6 tablespoons of oil—less oil creates pale, dense waffles.
Is this recipe truly vegan?
The waffle portion contains two eggs, so it’s not vegan in its current form. However, you can easily make it vegan by substituting the eggs with flax eggs: mix 2 tablespoons of ground flaxseed with 6 tablespoons of water and let sit for 15 minutes until thickened. The resulting waffles will be slightly denser but delicious. The strawberry sauce is already vegan.
Can I use sweetened almond milk instead of unsweetened?
You can, but I don’t recommend it. Sweetened almond milk adds approximately 1-2 teaspoons of added sugar per cup, which means your waffles will be sweeter than intended and may have a cloying flavor. The recipe is designed with unsweetened milk to let the strawberry sauce and natural ingredients shine. If you only have sweetened milk available, reduce the sugar in the batter to 1 tablespoon.
My waffle iron seems to cook unevenly. How do I fix this?
Uneven cooking often means your iron isn’t fully preheated or temperature is inconsistent. Give your machine 5 full minutes to preheat, not just the 3-5 minutes it signals. Some waffle irons have hot spots—if you notice one corner always browns faster, try pouring batter slightly off-center to compensate. If the problem persists, your iron may be aging out. Quality waffle irons are inexpensive investments for dramatically better results.
How do I know when the strawberry sauce is done?
The sauce is finished when it coats the back of a spoon and you can drag your finger through it without the sauce immediately flowing back together. This indicates proper thickening from the cornstarch. It should look glossy, gorgeous, and deep ruby-red. If you want it thicker, simmer an additional 1-2 minutes. Remember that sauce thickens more as it cools, so it may seem slightly thinner than you want when hot.
More Recipes You’ll Love
- Banana Pie Recipe With Pudding – Perfect for dessert-forward brunches or festive afternoon gatherings with creamy vanilla pudding and fresh bananas.
- Apple Galette Puff Pastry Recipe – An elegant, rustic-looking dessert that’s impressive but surprisingly approachable for home bakers hosting gatherings.
- this simple cake – This festive cake pairs beautifully with your morning waffles as an afternoon coffee companion or light dessert option.
I truly hope you’ll make these almond milk waffles for your next gathering—whether it’s an intimate family breakfast or a larger holiday celebration. There’s something deeply special about serving food that’s inclusive, delicious, and made with genuine care. These waffles, topped with that jewel-bright strawberry sauce, are my love letter to festive gathering.
The magic isn’t in complicated techniques or expensive ingredients. It’s in the intention: choosing a recipe that works for everyone, taking time to prepare it thoughtfully, and setting a table where people feel genuinely welcome. That’s what turns a breakfast into a memory, a meal into a moment that matters.
I can’t wait to share many more delicious and festive recipes with you. Happy cooking!