Ingredients
Method
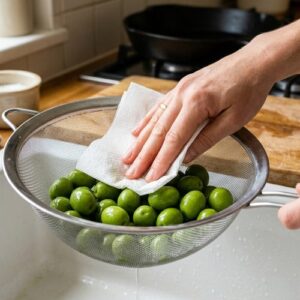
Step 1: Prepare Your Olives With Care
- Start by draining your Castelvetrano olives thoroughly in a fine-mesh colander, pressing them gently with paper towels to remove excess brine and moisture. This step is essential for the final texture of your tapenade. Excess moisture creates a watery consistency that waters down your other flavors. Once drained, transfer the olives to your cutting board. I prefer slicing them rather than chopping because the thin slices create a more elegant presentation and the recipe stays visually interesting when served. Using a sharp chef's knife, slice each olive lengthwise into thin pieces—this takes about 10-12 minutes for the full batch, but it's worth the time investment. If you're genuinely pressed for time, you can pulse the olives in a food processor, but pulse gently just three to four times to avoid creating a paste.
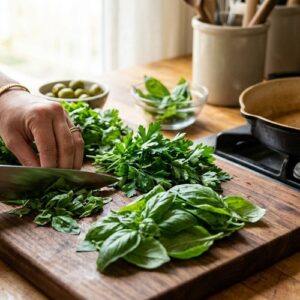
Step 2: Prepare Your Fresh Herbs and Aromatics
- While your olives are draining, prep your fresh herbs. Wash and thoroughly dry your basil, parsley, and cilantro using a salad spinner or clean kitchen towel. Dry herbs are essential—wet herbs introduce moisture that will shorten your tapenade's shelf life. Stack the leaves, roll them loosely, and slice them into thin ribbons. This technique, called chiffonade, creates a more refined presentation than chopped herbs. Mince your garlic finely on a cutting board or, if you prefer, use a microplane grater to create a paste-like consistency that distributes more evenly throughout the mixture. Zest your lemons while the fruit is still whole, then set the zest aside.
Step 3: Combine Your Base Mixture
- Transfer your sliced olives to a large mixing bowl—I use a 6-quart stainless steel bowl because it gives me plenty of room to work. Add your minced garlic, fresh herbs, lemon zest, dried oregano, and Dijon mustard. Don't add your oil yet; you want to combine your solid ingredients first so you can taste and adjust seasonings before the oil makes tasting more difficult. Gently fold everything together using a wooden spoon or silicone spatula, being careful not to bruise the delicate olive slices. This gentle approach keeps the tapenade visually appealing rather than becoming a mushy paste.
Step 4: Create Your Oil Infusion
- Now pour your extra virgin olive oil over the mixture in three additions rather than all at once. After each addition, gently fold the oil into the other ingredients, making sure everything is evenly coated. The oil serves two purposes: it's a flavor carrier and a natural preservative that extends your refrigerator storage time to five to seven days. Once all the oil is incorporated, add your Aleppo chili flakes and your first teaspoon of red wine vinegar. The vinegar adds brightness and acts as an additional preservative.
Step 5: Taste and Fine-Tune Your Flavors
- This is where your instincts become important. Taste a small spoonful of your tapenade on a neutral cracker or plain bread. You should taste the briny olive flavor clearly, with the garlic noticeable but not overpowering, bright herbs coming through, and a subtle heat from the chili flakes. Adjust each element individually: add more garlic only if you want more savory depth, increase chili flakes if you want more heat, add more vinegar if you want more brightness, and sprinkle salt carefully if the overall flavor feels flat. Remember that the flavors will continue to develop over the next 24 hours, so err on the side of subtle now—you can always add more tomorrow, but you can't remove it.

Step 6: Transfer to Storage Containers
- Once you're satisfied with your flavor profile, transfer your tapenade to clean glass containers with tight-fitting lids. Glass containers are superior to plastic for this application because they don't stain and they allow you to see the beautiful color of your tapenade at a glance. I divide my batch into three medium containers rather than one large container—this approach minimizes air exposure every time you open a container, which extends freshness. Make sure there's about a half-inch of oil on top of the tapenade in each container; this oil layer acts as a seal against oxidation and keeps your tapenade fresher longer.