Method
Step 1: Prepare Your Tomatoes and Mise en Place
- Before you touch your stovetop, have everything ready and waiting. Rinse your cherry tomatoes and pat them completely dry—any water clinging to their surface will create steam instead of char. Mince your garlic very finely (this matters more than you'd think; chunks will brown unevenly while fine pieces will cook to creamy golden perfection). Tear or chop your basil and set it aside on a small cutting board. Measure your olive oil and have it standing by. I learned this lesson the hard way during my first professional kitchen experience: mise en place isn't French fanciness, it's injury prevention and stress elimination. When everything is prepared and positioned, you can focus entirely on what's happening in your pan instead of panicking about what you haven't done yet.
Step 2: Heat Your Oil to the Right Temperature
- Place a medium skillet (10-12 inches is ideal) over medium-high heat. Pour in your olive oil and let it warm for about 60-90 seconds. You'll know it's ready when it shimmers and moves freely across the pan. The oil should smell fragrant but never smoky—if you see smoke, your heat is too high and you'll risk bitter, burnt flavoring instead of the sweet caramelized notes you're building toward. This temperature matters more than you'd expect. Too cold and your tomatoes will release water instead of caramelize. Too hot and you'll char the exterior before the interior softens. Medium-high is the Goldilocks zone where the magic happens.

Step 3: Create the First Blister
- Add all your dried cherry tomatoes to the hot oil in a single layer. This is critical: don't stir them. Let them sit completely undisturbed for exactly 2 minutes. During this time, the direct heat is creating a gorgeous caramelized crust on the bottom of each tomato. You might hear a gentle crackling sound—that's the sound of browning, and it's beautiful. I know the urge to stir is strong. We're conditioned to think that moving food around prevents sticking. But with this technique, the stillness is the entire point. Trust the heat, trust the oil, trust the process.
Step 4: Add Your Garlic and Begin the Second Blister
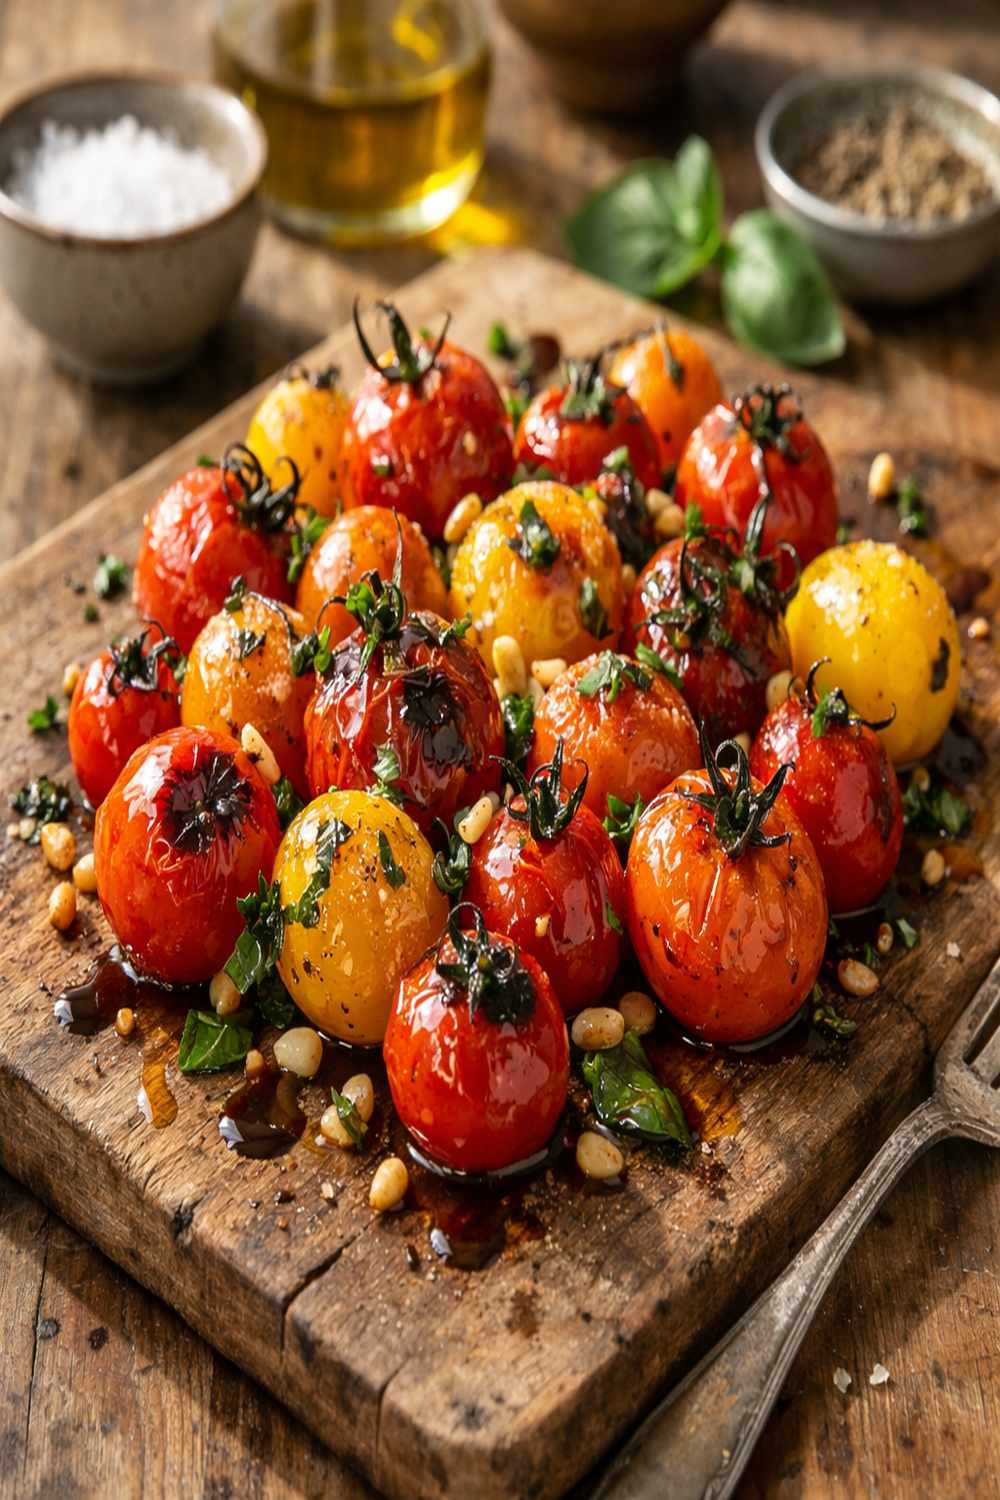
- After those 2 minutes, scatter your minced garlic across the tomatoes. Add a generous pinch of sea salt and freshly ground black pepper. Now you can gently stir, using a wooden spoon or silicone spatula to fold the garlic into the oil and distribute it among the tomatoes. You're looking for even coating—the oil should be visibly clinging to everything in the pan. Let this mixture cook for another 2-3 minutes, stirring occasionally (every 30-45 seconds is perfect). Watch as the tomatoes continue to blister and split. Some will burst completely, releasing their seeds and juice into the oil, creating a light sauce. Others will hold their shape with deep char marks. This variation is exactly what you want—it creates textural contrast that makes the dish more interesting.

Step 5: Finish and Serve Immediately
- The moment you notice the tomatoes are deeply blistered and beginning to collapse (usually around 4-5 minutes total cooking time), remove the pan from heat. Taste one tomato—it should be soft, sweet, with just a hint of savory depth from the garlic. If it tastes thin or watery, you can return the pan to heat for another 30 seconds to reduce the liquid further. Pour the entire contents—tomatoes, garlic, all the precious oil—into a serving bowl. Scatter your fresh basil across the top and give it one gentle fold to combine. Serve immediately while everything is still warm and the basil aroma is at its peak. The warmth helps the basil release its essential oils, creating aroma and flavor that will make people ask for your recipe before they even taste it.