Ingredients
Method
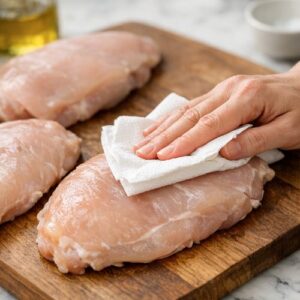
Step 1: Prepare Your Chicken to Even Thickness
- Start by patting your chicken breasts completely dry with paper towels. Moisture is the enemy of that perfect crust, so don't skip this step. Using a meat mallet or the flat bottom of a heavy skillet, gently pound each breast until they're approximately ¾-inch thick throughout. This matters tremendously—uneven thickness means some sections overcook while others undercook. Professional kitchens obsess over this detail, and now you will too. If your breasts are particularly large (over 8 ounces each), you can carefully butterfly them horizontally or simply pound them thinner. The goal is uniform thickness for uniform cooking.
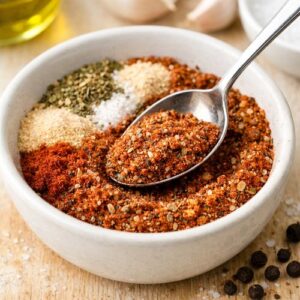
Step 2: Create Your Spice Blend
- In a small bowl, combine the smoked paprika, Italian seasoning, cayenne, onion powder, garlic powder, salt, and black pepper. Stir thoroughly with a fork, breaking up any clumps. This blend is identical across all dietary versions—there are no substitutions here. This is the moment where you're building the foundation of flavor. I recommend making this blend the day before for gatherings. Store it in a small mason jar with a tight-fitting lid. It keeps perfectly for months and saves you precious prep time when guests are arriving.
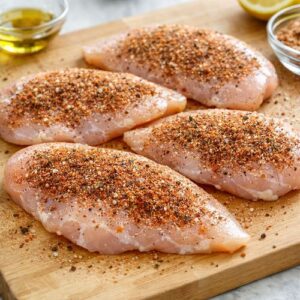
Step 3: Season Your Chicken Generously and Evenly
- Place your pounded chicken breasts on a clean cutting board. Divide your spice blend in half. Sprinkle half the blend across one side of all four chicken breasts, using your fingers to gently press the spices into the meat. This isn't a light dusting—this is a proper coating. Flip each breast and repeat with the remaining spice blend on the other side. Here's a professional tip I learned from working with athletes in Colorado: the spices should stick to the protein, creating a crust that will caramelize on the grill. If spices are sliding off, your chicken might still be slightly damp. Pat it down once more with paper towels. All dietary versions: No modifications here. Everyone gets the same spice treatment.
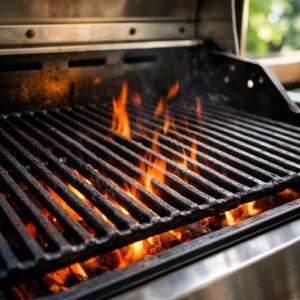
Step 4: Preheat Your Grill to High Heat
- Heat your grill to approximately 400-425°F (about 10-15 minutes on high). You want the grill hot enough that when you hold your hand above the grates, you can only count to 2-3 seconds before the heat forces your hand away. This temperature creates the signature blackened crust we're after. Brush your grill grates with avocado oil using a grill brush or rolled-up paper towels held with tongs. This prevents sticking and promotes that beautiful caramelization. All dietary versions: No changes. Everyone grills at the same temperature.
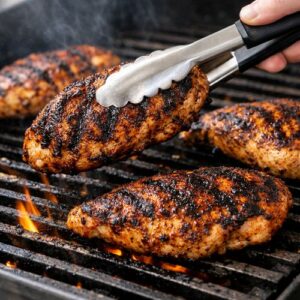
Step 5: Grill the Chicken, First Side
- Place your seasoned chicken breasts directly on the hot grates. Do not move them for 4-5 minutes. I know it's tempting to fuss, but letting them sit creates that gorgeous blackened char. You'll see the edges begin to caramelize—that's exactly what you want. Around the 4-minute mark, you can peek underneath. The chicken should release from the grates easily and have deep brown grill marks. If it's sticking, give it another minute. Every grill is slightly different, so use visual cues rather than strict timing. All dietary versions: Same cooking time and method.

Step 6: Flip and Grill the Second Side
- Using tongs (never a fork—you don't want to pierce the meat and lose juices), carefully flip each breast. Grill the second side for another 4-5 minutes. You're looking for the same deep browning and charred appearance on this side. Start checking internal temperature around the 4-minute mark using an instant-read meat thermometer. Insert the thermometer horizontally into the thickest part of the breast. You want to see 165°F (74°C) for food safety. If you're at 160°F, you need another minute or two. All dietary versions: Same cooking time. Temperature is non-negotiable for food safety across all diets.
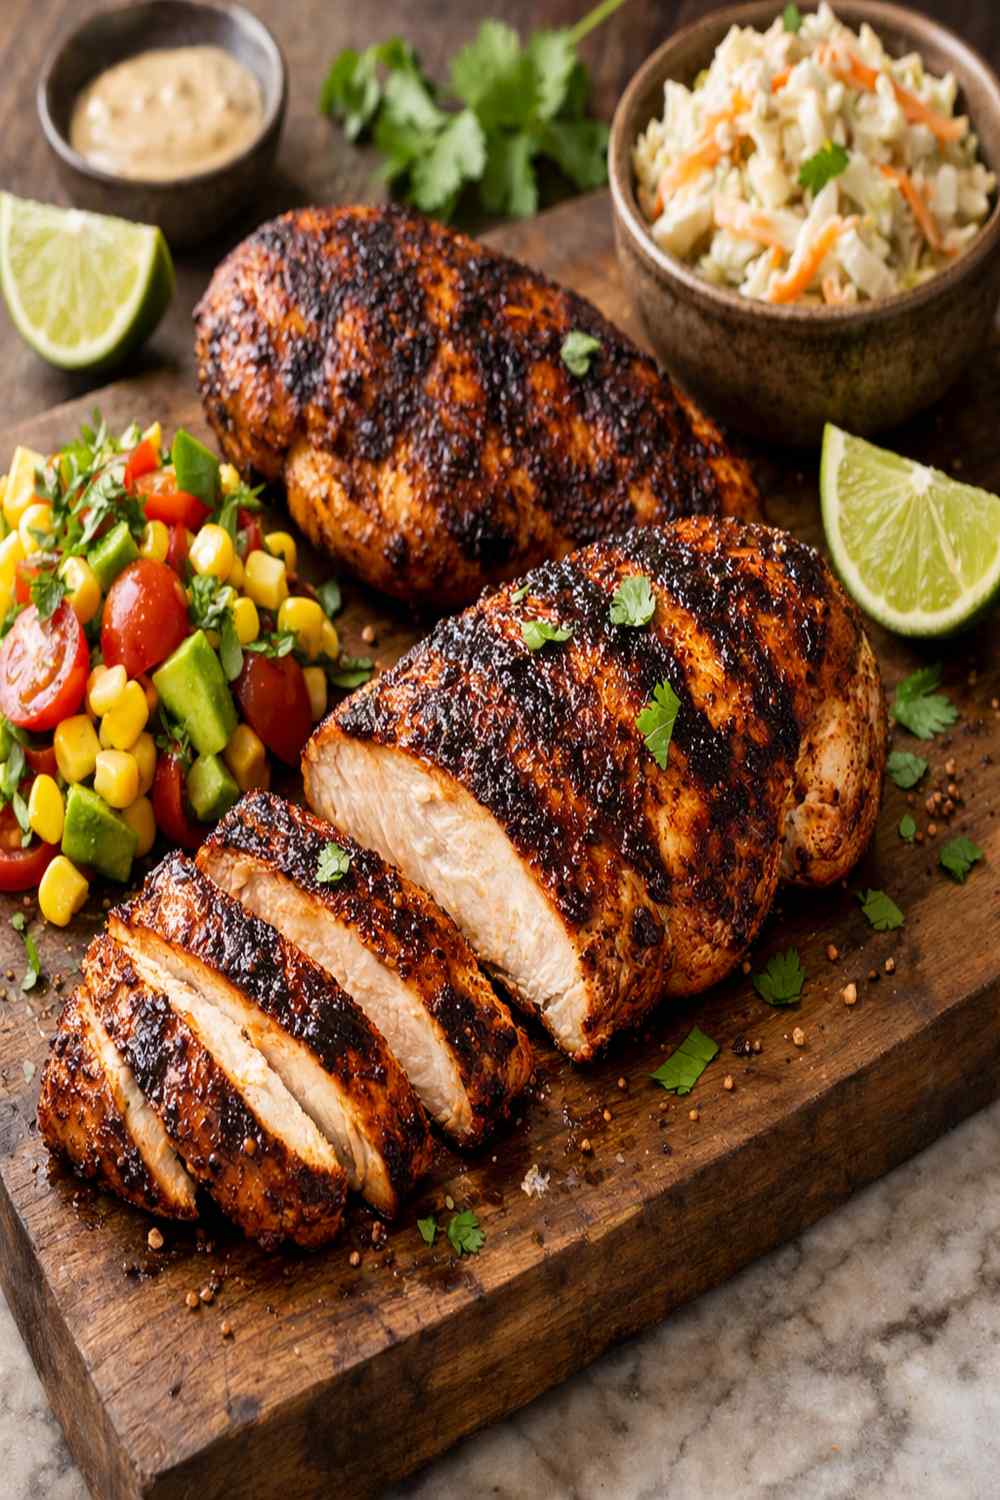
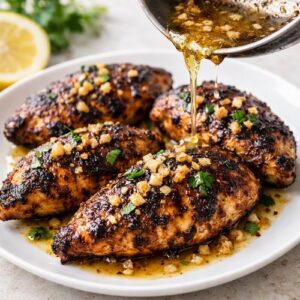
Step 7: Finish With Your Chosen Fat and Garlic
- This is where your dietary versions diverge slightly. Remove the chicken from the grill and place on a clean plate. Working quickly while the chicken is still hot, brush or drizzle your chosen finishing fat mixed with fresh minced garlic across each breast. Keto & Gluten-Free versions: Warm 1 tablespoon unsalted butter in a small skillet over low heat. Add 1 teaspoon minced fresh garlic and cook for 30 seconds until fragrant. Brush immediately over the hot chicken. Vegan version: Mix 1 tablespoon tahini with 1 teaspoon lemon juice, ½ teaspoon minced garlic, and 1-2 tablespoons unsweetened plant milk until you reach a drizzleable consistency. The mixture won't be as rich as butter, but it's silky and delicious. Drizzle generously over chicken. Dairy-Free version: Warm 1 tablespoon refined coconut oil or avocado oil in a small skillet. Add 1 teaspoon minced fresh garlic and cook for 30 seconds. Brush over the hot chicken immediately. The heat of the chicken will help the fat coat evenly. This finishing step isn't just about richness—it adds moisture and ensures the spices don't dry out as the chicken cools slightly.
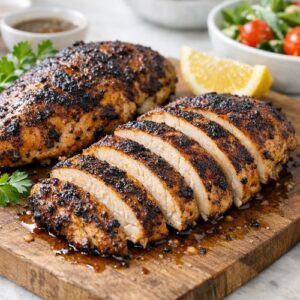
Step 8: Rest and Serve
- Let the chicken rest for 3-5 minutes before serving. This allows the juices to redistribute throughout the meat, keeping every bite moist. Meanwhile, you can plate your sides or arrange your serving platter. If you're serving multiple dietary versions, consider labeling them lightly so guests know which chicken was finished with which fat. A small paper flag or serving spoon for each version prevents confusion and respects everyone's dietary choices. All dietary versions: Same resting time applies.
Notes
- Mistake #1: Wet chicken. Even a light amount of surface moisture prevents proper seasoning adhesion and crust formation. Pat your chicken completely dry before seasoning. I cannot overstate this.
- Mistake #2: Uneven thickness leading to uneven cooking. That one breast that's twice as thick as the others will either be overcooked on the outside or undercooked at the center. Use your meat mallet—don't skip this step.
- Mistake #3: Overcrowding the grill or moving the chicken too early. Each breast needs space around it to develop that blackened crust. Resist the urge to flip or move them before 4 minutes have passed. Patience creates the crust; rushing ruins it.
- Mistake #4: Forgetting about carryover cooking. Your chicken continues cooking for a minute or two after you remove it from heat. If you pull it at 165°F exactly, it'll be perfect. If you wait for it to reach 170°F on the grill, it'll be slightly overdone by the time you serve it. Use your thermometer strategically.