Ingredients
Method
Step 1: Preheat and Prepare Your Baking Dish
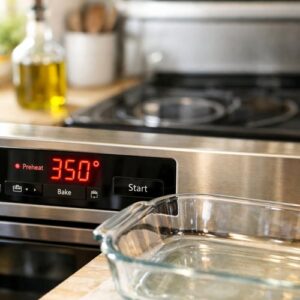
- Set your oven to 350 degrees Fahrenheit (175 Celsius) right now. This gives it time to reach true temperature while you work on the stovetop components. Lightly coat a 13-by-9-inch baking dish with cooking spray or a thin layer of olive oil. This step prevents sticking and makes cleanup genuinely easier—no scrubbing crusty corners. If you're preparing this dish ahead, you can line the baking dish now and let it sit uncovered at room temperature until you're ready to fill it.
Step 2: Cook the Pasta to Precise Doneness
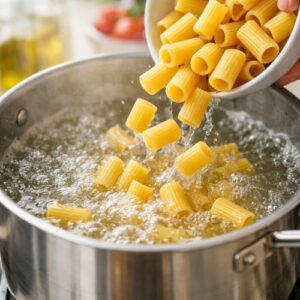
- Bring a large pot of salted water to a rolling boil—the water should taste like the sea, roughly one tablespoon of kosher salt per gallon. Add your rigatoni and cook according to the package directions, but start checking for doneness two minutes before the suggested time. You're aiming for al dente, which means the pasta has some resistance when you bite it but isn't hard or chalky. This is critical because the pasta continues cooking slightly in the oven. Drain thoroughly in a colander but do not rinse—the starch on the surface helps the sauce cling.
Step 3: Build Your Flavor Foundation With Aromatics
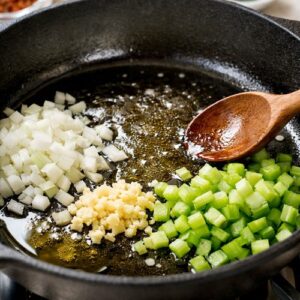
- While your pasta is cooking, heat your tablespoon of olive oil in a large skillet or Dutch oven over medium-high heat. Once it shimmers (about one minute), add your diced onion and cook, stirring occasionally, until the pieces turn translucent and the edges begin to caramelize slightly—about five to seven minutes. This isn't rushing; you're developing sweetness and depth through the Maillard reaction. Add your minced garlic and stir constantly for about sixty seconds until the raw edge disappears and you smell that distinctively warm, toasted garlic aroma. Don't let it brown—burnt garlic tastes harsh and bitter. If your heat is too high, reduce it slightly and add a splash of water to cool things down.
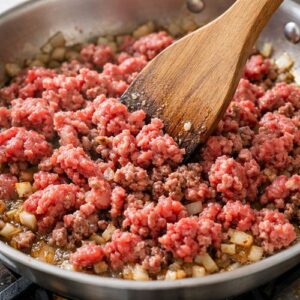
Step 4: Brown the Ground Beef Properly
- Crumble your ground beef directly into the pan with the onions and garlic. Use a wooden spoon or the edge of a spatula to break it into small pieces as it cooks, rather than leaving large chunks. This isn't about being aggressive; it's about surface area and even browning. Cook, stirring occasionally, for about seven to nine minutes until no pink remains anywhere in the meat and most of the pieces have a light brown exterior. If your beef releases a lot of liquid, you can drain some of it (leaving about a tablespoon of the flavorful drippings) or simply let it cook off completely over another minute or two. This is where you can taste and adjust seasoning—a pinch of salt and fresh black pepper make a genuine difference in how the whole dish comes together.
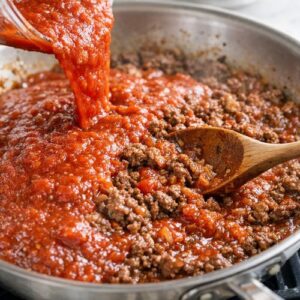
Step 5: Combine With Sauce and Season
- Pour your forty ounces of marinara sauce directly into the pan with your browned beef. Stir everything together thoroughly, scraping any flavorful brown bits from the bottom of the pan (this is called deglazing, and those bits are pure concentrated flavor). Let the mixture simmer gently for about three to four minutes, just until it reaches a gentle bubble and you can smell that the flavors are warming through. This isn't a long simmer; you're just integrating the sauce and ensuring even heat distribution. Taste now and adjust your salt and pepper as needed. Remember, you haven't added cheese yet, which will add a subtle salty note, so season slightly under where you might normally stop.
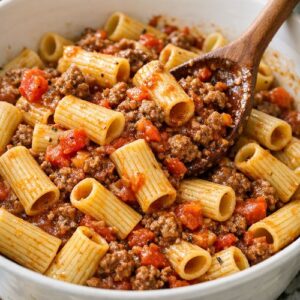
Step 6: Combine Pasta and Sauce
- In a large bowl (or right in your baking dish if you're comfortable working with the size), combine your cooked, drained rigatoni with the beef and sauce mixture. Use a large spoon or spatula to fold everything together gently until every piece of pasta is coated with sauce. You're looking for even distribution without aggressive stirring that might break the pasta. If the mixture seems dry, add a splash of reserved pasta water (that starchy water you should have saved from cooking the pasta)—just a few tablespoons usually does it.
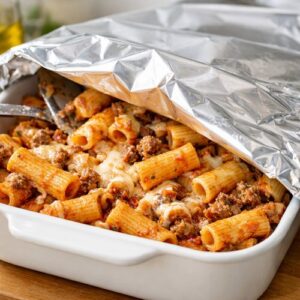
Step 7: Transfer to Your Prepared Baking Dish
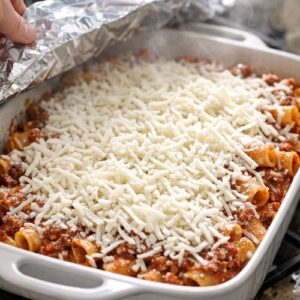
- Pour and scrape your pasta mixture into your prepared baking dish, spreading it in an even layer. Cover the dish loosely with aluminum foil—loosely matters here because you want some steam to escape so the top doesn't get soggy. If you press the foil tightly against the surface, you'll trap too much moisture and end up with a gluey top layer instead of a cohesive baked dish.
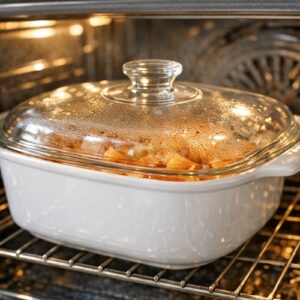
Step 8: The First Bake (Heating Through)
- Place your covered baking dish in your preheated 350-degree oven and bake for exactly twenty minutes. You're not trying to brown anything yet; you're ensuring the entire dish comes to a consistent temperature throughout. This matters especially if you've assembled everything ahead—it gives those cold components time to warm evenly. While this bakes, if you haven't done so already, shred your mozzarella cheese if using a block (which I genuinely recommend). Fresh-shredded cheese melts more smoothly and develops better color than pre-shredded varieties.
Step 9: Add Cheese and Final Bake
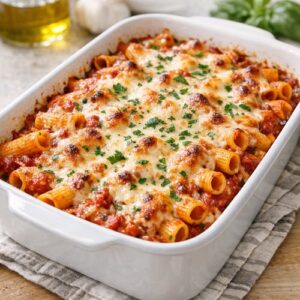
- Carefully remove your baking dish from the oven and lift off the foil. Be cautious of the steam that escapes. Sprinkle your two cups of shredded mozzarella evenly across the top of the pasta—you want relatively consistent coverage so you get that beautiful golden top throughout rather than spotty browning. If you're using the optional red pepper flakes, sprinkle them now for a subtle heat that builds through the cheese. Return the uncovered dish to the oven and bake for ten to twelve minutes, until the cheese is completely melted and the edges show light golden-brown color. You're not looking for dark brown unless you genuinely prefer crispier cheese edges—a light golden color means the cheese has reached optimal melted texture without beginning to separate.
Step 10: Rest and Finish
- Remove from the oven and let rest for five minutes before serving. This resting period allows the heat to distribute evenly and helps the baked dish set slightly so you get cleaner portions when serving. Just before bringing to the table, garnish with your fresh basil scattered across the top—the residual heat will warm the basil just enough to release its oils without destroying its bright color.