As the weather warms up and the sun shines a little brighter, nothing makes me happier than whipping up a good old-fashioned dessert. It’s about finding those treats that transport you back to sunny picnics and family gatherings.
One classic that truly rules the dessert table is Banana Cream Pie. Add a twist—let’s trade the traditional crust for a Nilla Wafer one—and boy, do we have a hit! The combination of decadent banana custard, crispy cookie crust, and fluffy whipped cream is a comforting hug in dessert form, ready to steal the show at any barbecue or picnic.

Banana Cream Pie is one of those iconic desserts that feels like nostalgia on a plate. Creamy banana custard, surrounded by sweet, crispy Nilla Wafers instead of the usual pastry crust, and topped with fluffy whipped cream—it’s a dessert that’s always a crowd-pleaser.
Whether it’s a summer gathering or a special occasion, this pie comes together beautifully, and everyone leaves with a smile—and possibly crumbs on their cheeks.
You Might Like These Recipes!
What is Banana Cream Pie Nilla Wafers Recipe?
This Banana Cream Pie Nilla Wafers recipe is a delightful take on the classic banana cream pie. By using Nilla Wafers for the crust, the recipe enhances the flavor profile while keeping the preparation simple. The filling boasts a rich and creamy banana custard made from egg yolks, cornstarch, whole milk, and sugar, layered with fresh banana slices and a generous helping of whipped cream on top. It’s a wonderful combination that yields an indulgent yet refreshing dessert.
Why This Recipe Works?
This recipe succeeds because it brings together the nostalgia of the classic banana cream pie while making it approachable for home cooks. The creamy custard perfectly balances the crunch of the Nilla Wafer crust, and the addition of whipped cream adds an airy, light finish. It doesn’t get more satisfying than this delicious dessert, which can be prepped ahead, allowing the flavors to meld beautifully while you relax.
How Does It Taste Like?
The flavor of this pie is delightful and vibrant. The sweetness of the ripe bananas mingles with the creamy custard, and the Nilla Wafer crust adds a golden, buttery crunch that contrasts beautifully with the smooth filling. Topping it off with lightly sweetened whipped cream adds just the right note of indulgence, making every bite a treat to remember.
What Sets This Recipe Apart from Other Banana Cream Pie Nilla Wafers Recipe Variations?
What makes this recipe unique is the homemade custard cooked to perfection rather than using instant pudding. The Nilla Wafer crust brings nostalgia and a delightful twist, making it a standout at any dessert table. This recipe leans on quality ingredients, ensuring each component shines without overshadowing the others, resulting in a balanced, flavorful dessert.
The Ingredients

For the Nilla Wafer Crust:
– 2 cups crushed Nilla Wafers (about 60 cookies)
– ⅓ cup melted unsalted butter
– 2 tablespoons brown sugar (adds a touch of extra flavor)
For the Filling:
– 4 large egg yolks
– ¼ cup cornstarch
– 2½ cups whole milk
– ⅔ cup granulated sugar
– ¼ teaspoon salt
– 2 tablespoons butter, cut into small pieces
– 2 teaspoons pure vanilla extract
– 3 large ripe bananas, sliced
– 1 tablespoon lemon juice (to keep the bananas from browning)
For the Whipped Cream Topping:
– 1½ cups heavy whipping cream
– 3 tablespoons powdered sugar
Ingredients From : tastesbetterfromscratch.com
How to Make Banana Cream Pie Nilla Wafers Recipe?
Creating this delicious pie is easy, with a few simple steps that ultimately reward you with an incredible dessert. Let’s dive into the detailed process to make this delightful treat!
Instructions
Step 1: Prepare the Crust

Preheat your oven to 350°F (175°C). Grab a food processor and pulse the Nilla Wafers until you have fine crumbs. If you don’t have a food processor, you can place the wafers in a resealable bag and crush them gently with a rolling pin. Next, transfer the crumbs to a mixing bowl and stir in the melted butter and brown sugar until everything is well combined. Use the back of a measuring cup to press this mixture firmly into the bottom and up the sides of a 9-inch pie plate. Bake in your preheated oven for 10 minutes. Once done, let the crust cool completely before you add the custard filling.
Step 2: Make the Custard Filling

In a medium bowl, whisk together the egg yolks and cornstarch until smooth and well blended. Set this mixture aside for later. In a large, heavy-bottomed saucepan, combine the sugar, salt, and whole milk. Whisk everything together and bring it to a simmer over medium heat, stirring continuously to prevent sticking.
Now, it’s time to slowly incorporate the egg mixture. Take a ladleful of the hot milk and gradually stir it into the egg yolk mixture, whisking constantly. This technique tempers the eggs, preventing them from scrambling. Once combined, pour the tempered egg mixture back into the saucepan. Continue to cook, stirring constantly, until the mixture thickens enough to coat the back of a spoon. Remove from heat and stir in the butter and vanilla extract until melted and incorporated.
For an added layer of smoothness, strain the custard through a fine-mesh sieve into a storage container. Cover the surface of the custard with plastic wrap to prevent a skin from forming, and let it cool for about 30 minutes.
Step 3: Assemble the Pie

Slice your bananas and sprinkle the lemon juice over them to help keep them fresh and bright. Once the crust is cooled, arrange the banana slices on the bottom. Then, pour the cooled custard over the bananas, spreading it evenly. To prevent a skin from forming on the custard, place a piece of plastic wrap directly over the pudding’s surface. Refrigerate for at least 4-6 hours, allowing the flavors to meld and the pie to set.
Step 4: Make the Whipped Cream Topping

When you’re ready to serve, whip the heavy cream and powdered sugar together in a mixing bowl until soft peaks form. Gently spread the whipped cream over the top of the chilled pie, bringing it to a smooth, silky finish.
Step 5: Chill and Serve
Allow the pie to chill in the refrigerator for another hour after adding the whipped cream for the best texture. Slice, serve, and watch as everyone falls in love with each creamy bite.
Notes
– Use ripe bananas: Ensure the bananas are perfectly ripe for maximum sweetness and flavor.
– Chill thoroughly: For the best results, allow the pie to chill overnight; the flavors deepen and develop beautifully.
– Don’t skip the lemon juice: This small addition will make sure your banana slices stay fresh and vibrant for longer.
– Make-ahead option: This pie can easily be made a day in advance—perfect for stress-free entertaining.
– Taste as you go: Adjust the sweetness of the custard to your taste preference; everyone’s palate is different!
How Do You Store This Banana Cream Pie Nilla Wafers Recipe?
To store the Banana Cream Pie, cover it tightly with plastic wrap or store it in an airtight container. Keep it refrigerated, and it should be good for up to 3-4 days. If you plan to make it ahead of time, consider keeping the whipped cream separate until serving to maintain its freshness and texture.
Sides for Banana Cream Pie Nilla Wafers Recipe
– Fresh Fruit Salad: A refreshing mix of seasonal fruits complements the richness of the pie beautifully.
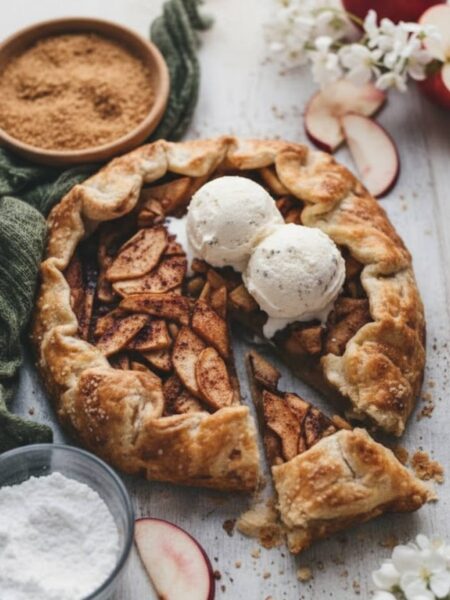
– Vanilla Ice Cream: A scoop of creamy vanilla ice cream takes the dessert experience to the next level.
– Chocolate Sauce: Drizzling some chocolate sauce over the pie adds a delicious layer of flavor and a touch of elegance.
– Coffee or Iced Tea: The slight bitterness of coffee or the refreshing taste of iced tea pairs perfectly with the sweet richness of the pie.
– Cheese Platter: A light cheese platter with cream cheese and fresh herbs can be a good counterbalance to the sweetness.
What Alternatives Can You Use for the Ingredients If They Are Not Present in Your Kitchen?
– Nilla Wafers: Graham crackers can be used as a substitute for the crust for a different flavor and texture.
– Whole Milk: If you don’t have whole milk on hand, almond milk or another dairy alternative can work, though it may affect the creaminess of the custard.
– Egg Yolks: In a pinch, you can use egg substitutes or flaxseed meal mixed with water for a vegan version, keeping in mind that the texture may vary.
– Butter: If you’re dairy-free, try using coconut oil or a plant-based butter substitute for the crust and custard.
– Heavy Cream: For a lighter option, use coconut cream or whipped topping instead of heavy whipping cream for the topping.
Conclusion
This Banana Cream Pie with Nilla Wafers is a showstopper! With its buttery crust, luscious custard, fresh bananas, and the lightest whipped cream topping, every bite is truly a delight. Whether you’re gathering with friends, celebrating a birthday, or craving a sweet treat on a quiet evening, this pie will bring joy to your table.
So, roll up your sleeves and give this recipe a try—you won’t regret it!
You Might Also Like These Latest Recipes!

Banana Cream Pie Nilla Wafers Recipe – Friendsgiving Food Ideas
Description
Banana Cream Pie is one of those iconic desserts that feels like nostalgia on a plate. Creamy banana custard, surrounded by sweet, crispy Nilla Wafers instead of the usual pastry crust, and topped with fluffy whipped cream—it’s a dessert that’s always a crowd-pleaser.
Ingredient
For the Nilla Wafer Crust:
For the Filling:
Instructions
Step 1: Prepare the Crust
-
Preheat your oven to 350°F (175°C). Grab a food processor and pulse the Nilla Wafers until you have fine crumbs. If you don’t have a food processor, you can place the wafers in a resealable bag and crush them gently with a rolling pin. Next, transfer the crumbs to a mixing bowl and stir in the melted butter and brown sugar until everything is well combined. Use the back of a measuring cup to press this mixture firmly into the bottom and up the sides of a 9-inch pie plate. Bake in your preheated oven for 10 minutes. Once done, let the crust cool completely before you add the custard filling.
Step 2: Make the Custard Filling
-
In a medium bowl, whisk together the egg yolks and cornstarch until smooth and well blended. Set this mixture aside for later. In a large, heavy-bottomed saucepan, combine the sugar, salt, and whole milk. Whisk everything together and bring it to a simmer over medium heat, stirring continuously to prevent sticking.
-
Now, it’s time to slowly incorporate the egg mixture. Take a ladleful of the hot milk and gradually stir it into the egg yolk mixture, whisking constantly. This technique tempers the eggs, preventing them from scrambling. Once combined, pour the tempered egg mixture back into the saucepan. Continue to cook, stirring constantly, until the mixture thickens enough to coat the back of a spoon. Remove from heat and stir in the butter and vanilla extract until melted and incorporated.
-
For an added layer of smoothness, strain the custard through a fine-mesh sieve into a storage container. Cover the surface of the custard with plastic wrap to prevent a skin from forming, and let it cool for about 30 minutes.
Step 3: Assemble the Pie
-
Slice your bananas and sprinkle the lemon juice over them to help keep them fresh and bright. Once the crust is cooled, arrange the banana slices on the bottom. Then, pour the cooled custard over the bananas, spreading it evenly. To prevent a skin from forming on the custard, place a piece of plastic wrap directly over the pudding's surface. Refrigerate for at least 4-6 hours, allowing the flavors to meld and the pie to set.
Step 4: Make the Whipped Cream Topping
-
When you’re ready to serve, whip the heavy cream and powdered sugar together in a mixing bowl until soft peaks form. Gently spread the whipped cream over the top of the chilled pie, bringing it to a smooth, silky finish.
Step 5: Chill and Serve
-
Allow the pie to chill in the refrigerator for another hour after adding the whipped cream for the best texture. Slice, serve, and watch as everyone falls in love with each creamy bite.
Nutrition Facts
Servings 8
- Amount Per Serving
- % Daily Value *
- Total Fat 17g27%
- Saturated Fat 9g45%
- Trans Fat 0.3g
- Cholesterol 100mg34%
- Sodium 219mg10%
- Potassium 247mg8%
- Total Carbohydrate 40g14%
- Dietary Fiber 1g4%
- Sugars 26g
- Protein 5g10%
* Percent Daily Values are based on a 2,000 calorie diet. Your daily value may be higher or lower depending on your calorie needs.
Note
- Use ripe bananas: Ensure the bananas are perfectly ripe for maximum sweetness and flavor.
- Chill thoroughly: For the best results, allow the pie to chill overnight; the flavors deepen and develop beautifully.
- Don’t skip the lemon juice: This small addition will make sure your banana slices stay fresh and vibrant for longer.
- Make-ahead option: This pie can easily be made a day in advance—perfect for stress-free entertaining.
- Taste as you go: Adjust the sweetness of the custard to your taste preference; everyone's palate is different!